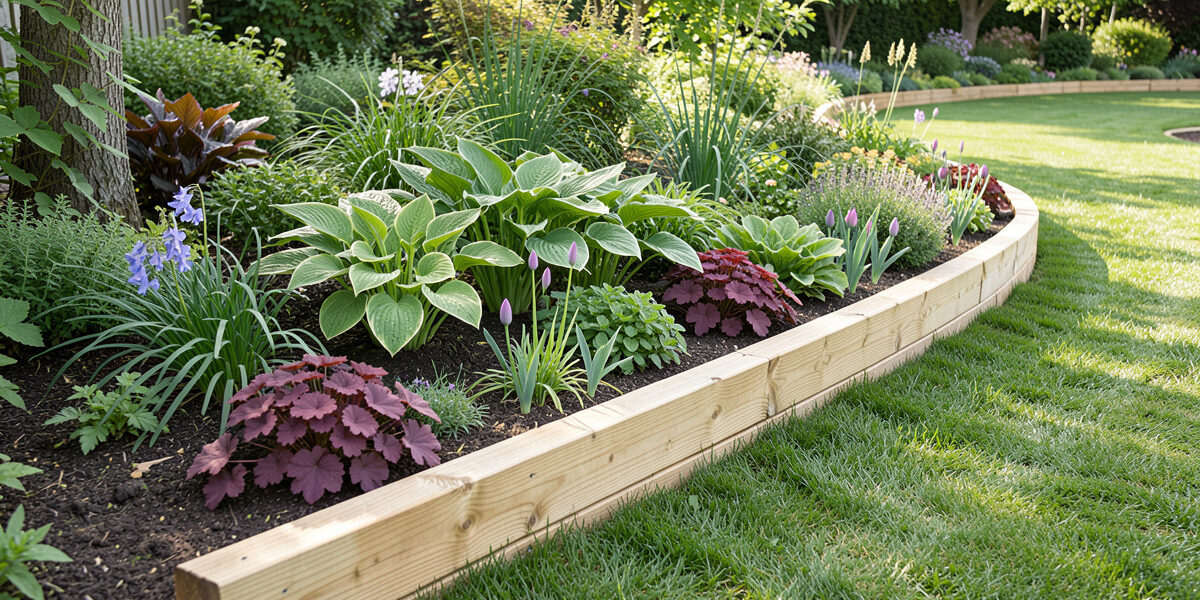
Raised border edging is the detail that separates a garden that looks intentional from one that looks like plants happened to it. On my Nordic balcony and the small patio space I garden, edging defines where the growing area stops and the walking surface starts, contains soil and mulch where they belong, and creates the clean lines that make a small space read as designed rather than accidental. For the wider picture, see my complete raised beds and planters guide.
As an Amazon Associate I earn from qualifying purchases.
What Raised Border Edging Actually Does
The functions are practical before they are aesthetic. Edging creates a physical barrier that stops grass rhizomes from creeping into planting beds and stops mulch from washing onto paths during heavy rain. It defines pathways so foot traffic stays where it should. On a small balcony or patio where every centimetre is contested between growing space and living space, a clear edge is what makes the garden feel organised rather than crowded. The visual structure — the elevation change, the shadow line, the crisp definition between materials — is the bonus that makes it look professional.
Material Comparison
The material you choose determines lifespan, cost, and maintenance for the next decade or more. Here is how the main options compare:
| Material | Lifespan | Cost per metre | Maintenance | Best for |
|---|---|---|---|---|
| Galvanised/COR-TEN steel | 20+ years | $10-20 | None | Clean modern lines, curves |
| Aluminium | 15-20 years | $12-22 | None | Rust-proof, lightweight DIY |
| Cedar/redwood timber | 15-20 years | $8-15 | Annual oiling | Natural look, food-safe |
| Treated pine timber | 10-15 years | $4-8 | Sealing cut ends | Budget, DIY-friendly |
| Composite (wood-plastic) | 20-25 years | $10-18 | None | Zero-maintenance natural look |
| Brick (clay or concrete) | 30-50+ years | $15-30 | Occasional re-leveling | Traditional, permanent |
| Natural stone | 50+ years | $25-50 | None | Rustic, timeless |
| Recycled plastic | 5-10 years | $3-8 | None | Budget, temporary |
On my balcony, I run powder-coated steel edging along the growing border — it gives the cleanest line, it bends to follow the curved edge of the raised bed without cutting, and it will outlast me. Iowa State Extension’s raised-bed construction guidance covers the timber and composite options in more depth if you are weighing those materials.
Height and Design
Edging height determines both function and visual impact. At ground level (1-2 inches), you get a subtle mowing strip that defines lawn edges without visual presence — metal or plastic is typical. At low raised height (3-6 inches), the edging contains mulch and creates a genuine grass barrier — this is the most common height for vegetable garden borders. At medium raised height (6-12 inches), you can actually plant in the edging itself, and the border has significant visual presence — timber or stone is typical. At tall raised height (12+ inches), the edging becomes a planter wall or terrace, requiring genuine engineering with corner posts and structural fasteners.
The line shape matters as much as the height. Straight lines create a formal, organised appearance and are easier to install — best with metal, brick, or timber. Gentle curves create an organic, flowing look and are where metal edging shines, since it bends to follow the line without cutting. Geometric shapes (circles, hexagons) require precise cutting and have strong visual impact but are demanding to execute well.
Installation by Material
Metal Edging (Steel or Aluminium)
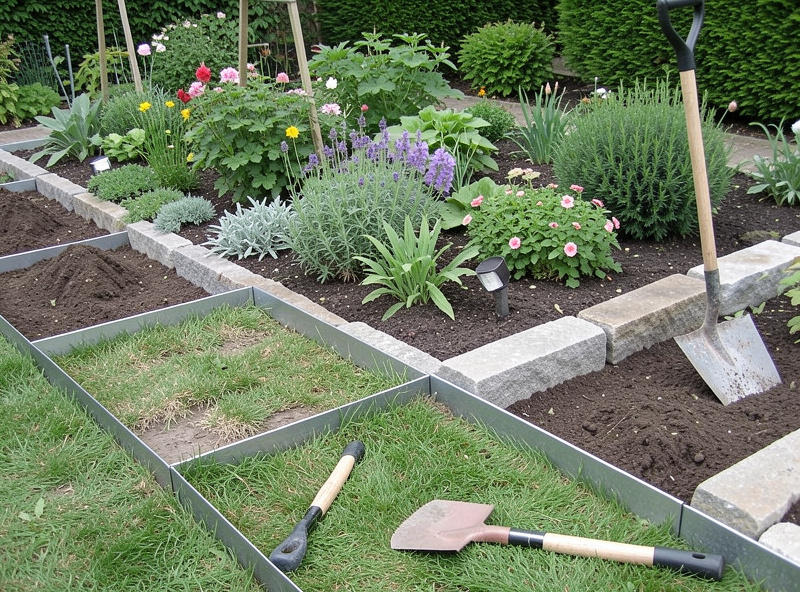
The fastest edging to install and the one I recommend for most urban gardens. Cut a narrow trench 4-6 inches deep with a flat spade or edging tool along your marked line. Position the edging in the trench, connecting sections with a 2-4 inch overlap. Drive the included stakes through the edging every 24-36 inches, bending gradually for curves. Ensure the top edge sits at your desired height, then backfill and compact soil firmly on both sides. A typical 4×2 metre bed takes 1-2 hours from start to finish.
Timber Edging
Mark the edge line with spray paint or a hose, then dig a trench to half the timber height plus 2 inches. Add a 2-inch gravel or sand base for drainage and levelling. Position the timber, check level and alignment, then secure by driving rebar or timber spikes through pre-drilled holes every 3-4 feet. Join corners with butt joints or mitred corners fastened with exterior screws. Backfill firmly and seal all cut ends with penetrating oil to prevent moisture wicking — this one step adds years to a timber border in a wet climate.
Stone and Brick
For dry-stack stone edging, excavate a trench 4-6 inches deep and 2 inches wider than the stone. Add 2-3 inches of compacted gravel as a base. Lay the largest, flattest stones first, levelling each one, then stack subsequent courses with a slight backward lean (batter) for stability. Keep joints tight to prevent soil migration, backfilling behind the wall as you build. For brick edging, excavate to the appropriate depth, lay a 1-2 inch sand base, place bricks tight together in the soldier course (on-end) pattern, tap level with a rubber mallet, and backfill firmly. Mortared stone or brick over 18 inches tall requires a concrete footing below the frost line and is a professional installation.
The Nordic Frost-Heave Problem
In a climate where the ground freezes solid and thaws repeatedly, edging that is not buried deep enough will heave out of the ground over a single winter. Frost heave is the upward force of freezing soil expanding against the buried portion of the edging, and it is the single most common failure mode for improperly installed borders in Nordic gardens. The fix is depth: bury the edging at least 10-15 cm below grade, and in freeze-thaw climates add an extra 5 cm of buried depth for stability. The buried portion anchors against frost heave and also blocks grass rhizomes from tunneling under the edging into your beds.
I learned this the expensive way with my first steel edging install, where I buried only 3 inches below grade. By the following April, two sections had heaved up nearly 2 inches and the crisp line I had installed was a wavy mess. I reinstalled at 6 inches below grade and have had zero movement since through three winters. The lesson: dig deeper than you think you need to, especially in clay soils that heave aggressively.
Design Applications
Vegetable Garden Borders
For food gardens, the material choice has a food-safety dimension. Cedar and composite edging are food-safe without any concerns. Treated pine is acceptable when lined with landscape fabric to keep soil off the treated surface. Steel and aluminium are inert and food-safe. Avoid reclaimed railway sleepers of unknown provenance — older stock may have been treated with creosote, which leaches into soil. Oregon State Extension’s treated-lumber safety assessment covers the leaching research in detail.
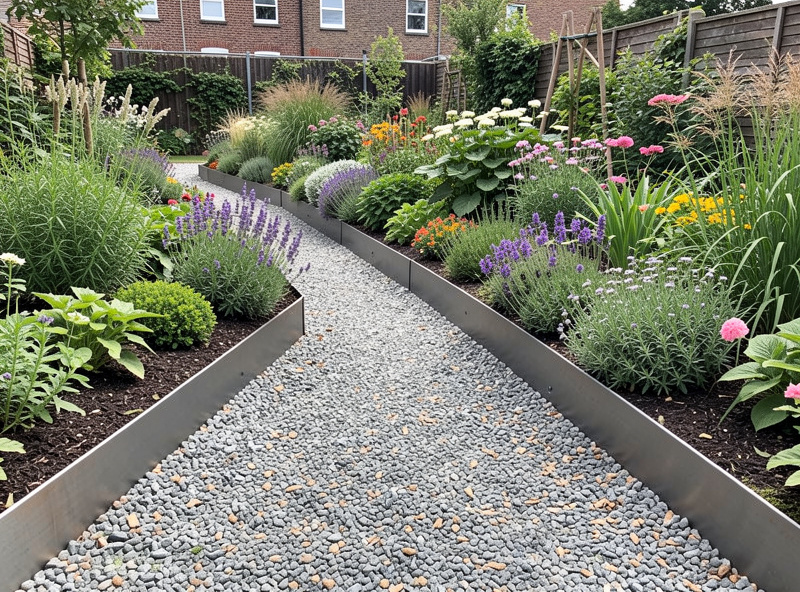
Pathway Edging
For gravel or mulch paths, 4-6 inch raised edging is essential to contain the surface material. Steel edging is ideal because it has no gaps for gravel to escape through. For stone paths, 1-2 inch edging provides definition without containment — the stones themselves are the surface. Matching brick edging along a brick path creates visual continuity that reads as intentional design.
Lawn Separation
The classic mowing edge: steel or brick edging that your mower wheels can ride along, eliminating the need for a string trimmer along the bed border. Install the top of the edging at exactly mowing height so the mower blade clears it cleanly. This is the single most time-saving edging installation for any garden with a lawn — it turns a weekly trimming chore into nothing.
What Three Nordic Winters Taught Me About Edging
After running steel, timber, and composite edging through three Swedish winters side by side on the same balcony border, the performance differences are clear. The powder-coated steel edging has not moved, rusted, or degraded at all — it looks exactly as it did the day I installed it. The cedar timber edging has weathered from warm honey to silver-grey, which I expected and wanted, and the joints have stayed tight because I pre-drilled every screw hole. The recycled plastic edging I tried as an experiment on a secondary border has faded noticeably and one section cracked at a stake point where frost heave concentrated stress — it will need replacing within another season or two.
The lesson I would pass on: spend the extra money on steel for any border you want to be permanent. The cost-per-year calculation overwhelmingly favours it once you factor in the labour of reinstalling failed edging. On a small balcony where the border is visible from every angle and every centimetre of edge contributes to the overall impression of the space, a crisp steel line that never degrades is worth twice what it costs. The plastic edging works for a temporary border or a trial garden, but treating it as permanent infrastructure is false economy. The steel edging, by contrast, is a one-time installation that I expect to outlast my tenure in this apartment — and if I move, it comes out in sections and re-installs at the next place in a single afternoon.
Cost Considerations
For a typical 4×2 metre raised bed with 12 linear metres of border edging, the total cost ranges from roughly $50 for recycled plastic to $250 for natural stone. The sweet spot for most urban gardeners is galvanised steel at $120-200 total — it delivers the clean look of premium materials at a moderate price point, with a 20+ year lifespan that makes the cost-per-year lower than any other option except permanent masonry. Timber is the natural-look alternative at $50-120 total, but factor in the annual maintenance time (oiling, checking joints, sealing cut ends) when comparing true value over the bed’s lifetime.
Maintenance
Annual maintenance is minimal for most materials. Each spring, inspect for winter damage, reset any shifted materials, and clean stone or brick surfaces. Throughout the growing season, remove encroaching grass from edges and refresh mulch to maintain border visibility — a defined edge that has disappeared under mulch and grass creep defeats the entire purpose of the installation. For timber edging, reapply penetrating oil to exterior surfaces each spring if you are maintaining colour rather than letting it weather naturally. Steel and aluminium need no maintenance beyond occasional cleaning. Stone and brick may need re-leveling every few years as the base settles.
Connecting to Complete Garden Design
Raised border edging integrates with broader landscape strategies. Learn raised bed construction in my sleeper planter box DIY guide. Compare all edging and sleeper materials in my comprehensive materials comparison. For equipment supporting landscape projects, see my equipment recommendations.
Related Articles
- Raised Beds and Planters: Complete Guide
- Best Sleepers for Raised Beds — Wood vs Concrete
- Wooden Sleeper Planters — Design Ideas
- How to Build a Sleeper Planter Box — DIY
- Urban Gardening on a Budget
What is the best material for raised border edging?
Galvanised steel edging lasts 20+ years, creates the cleanest lines, and bends for curves without cutting. Aluminium is lighter and rust-proof. For budget options, recycled plastic edging costs less and lasts 5-10 years without maintenance. Cedar and composite offer natural looks with 15-20 year lifespans.
How deep should raised border edging be installed?
Edging should be buried 10-15 cm below ground level with 5-10 cm visible above the soil line. The buried portion anchors against frost heave. In freeze-thaw Nordic climates, add an extra 5 cm of buried depth — shallow installation heaves out within a single winter.
Can I install raised border edging myself?
Yes. Metal and plastic edging systems install with a rubber mallet and a level in 1-2 hours for a typical garden bed. Brick or stone edging needs a gravel base and is a weekend project. The key is setting depth consistently along a string line.
Does raised border edging prevent grass from invading beds?
Yes, when installed at least 10 cm deep. The underground barrier blocks grass rhizomes from spreading into beds. Steel edging is most effective because it has no gaps. For aggressive grasses, install at 15-20 cm depth for maximum protection.
How much does raised border edging cost per metre?
Plastic edging costs $3-8 per metre. Galvanised steel runs $10-20 per metre. Brick or stone edging costs $25-50 per metre including materials and base preparation. For a typical 4×2 metre raised bed (12 linear metres of edging), budget $50-250 depending on material choice.