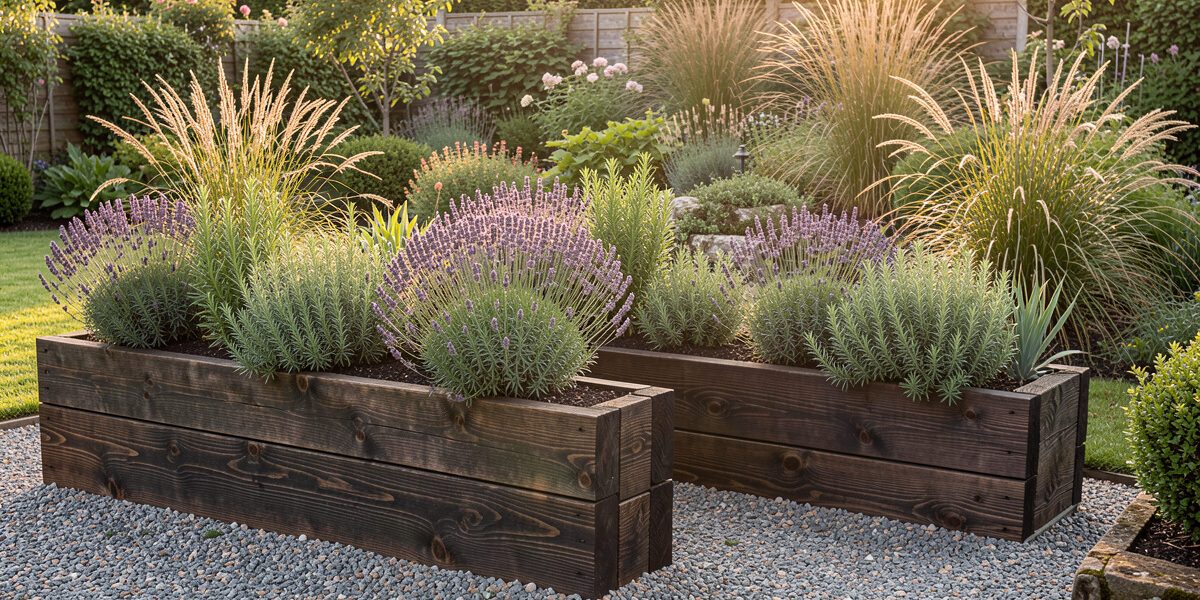
Wooden sleeper planters bring a natural, warm aesthetic to raised bed gardening that plastic and metal cannot replicate. I have built three sleeper planters for my Nordic balcony and patio over the years, learning what design choices hold up through wet winters and what trends look great in photos but collapse after two seasons. For the full raised-bed picture, see my complete raised beds and planters guide.
As an Amazon Associate I earn from qualifying purchases.
What Makes a Good Wooden Sleeper Planter Design
A sleeper planter is defined by its use of thick horizontal timber beams — typically 15-30 cm tall — stacked to create a raised bed wall. The best designs combine structural integrity with visual appeal. On my balcony, the planter that draws the most compliments is the one I built from reclaimed oak sleepers with dovetail corner joints — it looks like furniture rather than garden infrastructure. The thickness of the timber itself is part of the aesthetic: a 6-inch sleeper has a visual weight and solidity that thin board lumber cannot match, and that mass is also what gives the bed its structural longevity through freeze-thaw cycling.
Timber Selection: What Holds Up in Wet Climates
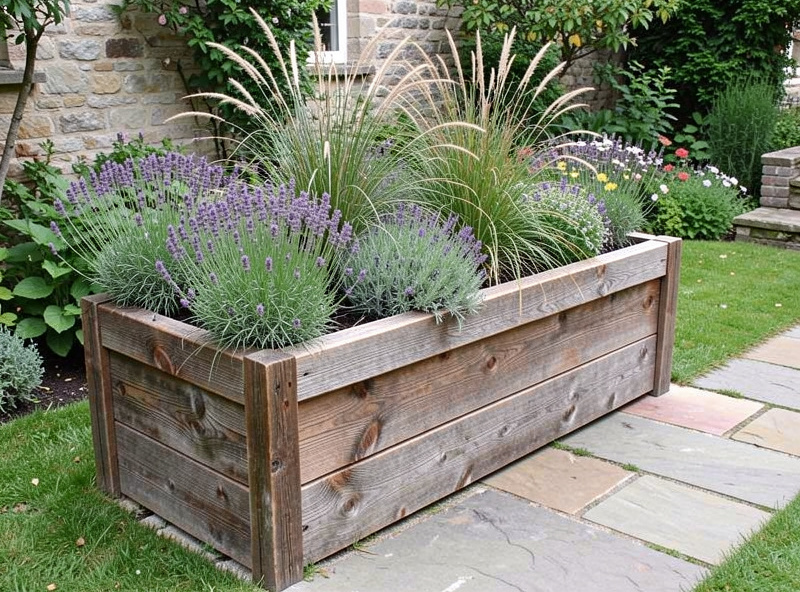
Cedar and redwood are the premium choices — naturally rot-resistant for 15-25 years and stunning as they weather to silver-grey. These are the same decay-resistant species that Iowa State Extension recommends for outdoor garden structures. Untreated oak and black locust are the dense hardwood alternatives that match cedar’s lifespan without any chemical treatments. The trade-off is that oak is heavy and genuinely hard to cut — my first oak sleeper build took twice as long as cedar because every screw hole needed pre-drilling. Pressure-treated pine is the budget option at roughly half the cost, but in a wet Nordic climate, I strongly recommend lining the bed with landscape fabric. Without it, pine sleepers soften at the corners within 3-4 years where constant soil moisture saturates the end-grain.
Classic Design Patterns for Sleeper Planters
Stacked horizontal sleepers: The most common design. Sleepers laid flat and stacked two or three high, joined at the corners with metal brackets or half-lap joints. Clean, modern, and the easiest to build. Use corner brackets rated for exterior use — ordinary indoor brackets rust through in a single wet season.
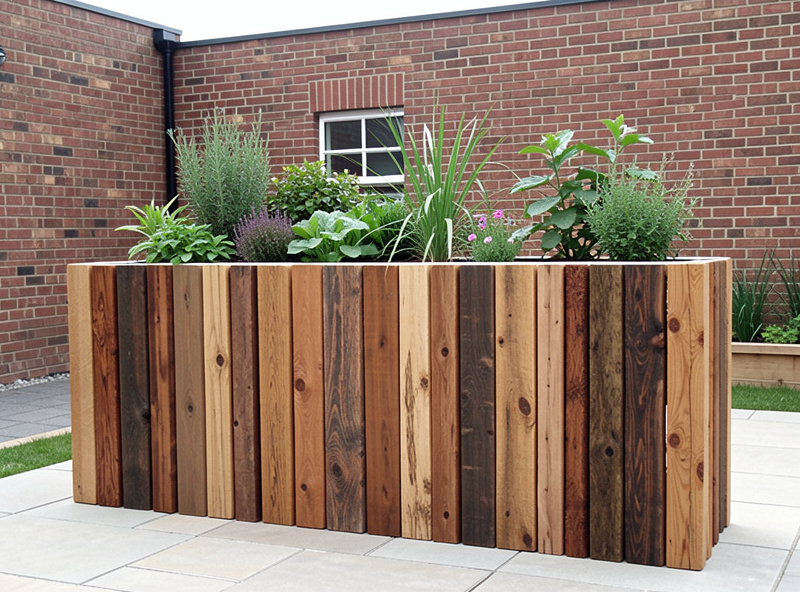
Vertical sleeper walls: Sleepers stood on end side-by-side create a taller bed with a different visual rhythm. This design uses more sleepers per linear metre but gives you a 40-60 cm deep bed without the layered look. The vertical joints need careful alignment and additional bracing on the back side.
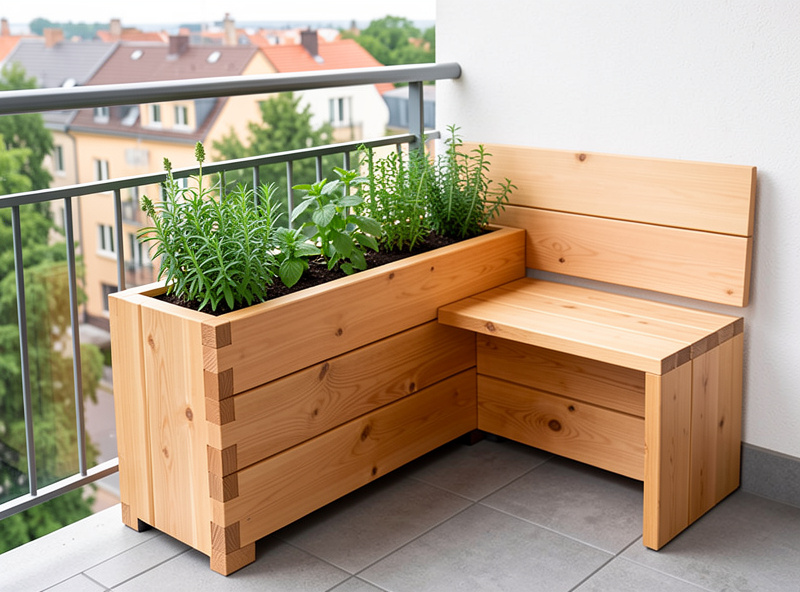
Integrated bench seating: Adding a wide capping sleeper on top of the planter walls creates built-in seating. This is the design I use on my balcony — the 25 cm wide top rail serves as a ledge for tools, a seat for weeding, and a place to set a coffee mug while I check on the lettuce. The capping board needs to be a full-width sleeper, not two narrow boards butted together — the joint between narrow boards traps water and rots first.
Corner detail options: The corners define how a sleeper planter looks. Half-lap joints create seamless flush corners. Exposed metal brackets give an industrial workshop feel. Staggered or “log cabin” corners with extended sleeper ends are the rustic cottage look. Each has different structural integrity — staggered corners shed water better than flush joints in a wet climate, because the overlapping ends keep the joint gap from aligning with the soil line where moisture concentrates.
Nordic Design Considerations
The design choices that matter most in a Swedish climate are the ones that manage freeze-thaw cycling. Water is the enemy of every wooden outdoor structure, and in a climate where the temperature crosses zero dozens of times each winter, the expansion-contraction cycle works moisture into every joint gap and end-grain surface. Three design decisions mitigate this. First, use half-lap or staggered corners rather than simple butt joints — the interlocking geometry resists the micro-movements that freeze-thaw induces in every connection. Second, slope the top edge of each sleeper slightly outward (a millimetre or two is enough) so water runs off the outer face rather than sitting on the flat top surface and soaking in. Third, elevate the bottom sleeper off the ground on a gravel or paver base rather than setting it directly on soil — ground contact is where rot always starts, and an air gap underneath lets the timber dry between rain events.
The aesthetic of weathering also matters more up here. In a mild climate, cedar weathers to silver-grey gradually over years. In a Nordic climate with hard winters and intense summer UV, the weathering happens faster and less evenly — the south-facing wall silvers quickly while the north-facing wall stays darker and damper. Some growers find this patchy weathering attractive; others prefer to apply a penetrating oil annually to even out the colour. I leave mine natural — the uneven weathering reads as honest material aging, which suits the Nordic design sensibility better than a uniformly stained surface that requires constant maintenance to maintain.
Finishing and Weatherproofing
The most critical step in Nordic climates is sealing cut ends. When you cut a sleeper to length, you expose raw wood that preservatives never reached. A food-safe penetrating oil on every cut face and end grain prevents moisture from wicking into the timber — this one step adds 3-5 years to a planter in a wet climate. For the interior walls, landscape fabric or plastic sheeting stapled to the inside face keeps soil off the wood entirely.
Avoid varnish and film-forming sealers on the exterior — they crack under freeze-thaw cycling and then trap moisture behind the film, accelerating rot instead of preventing it. Penetrating oils that soak in and let the wood breathe perform better through Nordic winters. I re-oil my cedar sleepers every other spring; the process takes about twenty minutes per bed and keeps the wood looking intentional rather than neglected.
What to Plant in a Sleeper Planter
The depth of your sleeper planter determines what will thrive in it. At two sleepers stacked (30-40 cm), you have enough soil volume for the full range of Nordic balcony crops: leaf lettuce, spinach, kale, pak choi, herbs, bush peas, strawberries, and determinate cherry tomatoes. At three sleepers (45-60 cm), you add deep-rooted crops — carrots, parsnips, potatoes, and full-sized tomatoes with room for their root systems to spread. The soil depth guidelines in Wisconsin Extension’s container vegetable guidance track closely with what I have found productive in my sleeper beds.
One advantage unique to thick-timber beds: the wooden walls insulate the soil better than thin metal or plastic. In a short Nordic season, that insulation buffers the root zone against late-spring cold snaps and early-autumn frosts, extending the growing window at both ends by a week or two. The soil in my cedar sleeper bed stays workable a full week longer in autumn than the soil in my galvanised steel bed sitting three metres away in the same light — the wood’s thermal mass holds the day’s warmth into the night.
Seasonal Care
Sleeper planters need minimal seasonal maintenance compared to other container types. Each spring, inspect the corner joints for loosening from freeze-thaw cycling and re-tighten fasteners. Check the landscape fabric lining for tears or separation at the top rim and patch as needed. Refresh the top 5 cm of soil with fresh compost to replace nutrients leached by the previous season’s watering. Apply penetrating oil to the exterior if you choose to maintain the colour rather than letting it weather naturally.
In autumn, clear spent summer plants and transition to cold-hardy crops — kale, spinach, and mizuna will keep producing through October frosts in the insulated soil. By late November, I clear the beds entirely, top with a layer of compost as a winter mulch, and leave the soil to settle through the freeze. The sleeper walls themselves need no winter protection — they are designed for year-round outdoor exposure, and a season of snow and ice on properly sealed timber causes no damage.
Cost and Value
A DIY cedar sleeper planter at 4×8 feet and 30 cm tall costs roughly $200-300 in timber, hardware, and sealer. Treated pine drops that to $100-150. The same dimensions in a pre-assembled kit runs $250-350. The DIY approach saves 20-40% and lets you customise the design — the integrated bench seating and dovetail corners that make my balcony planter distinctive are not available in any kit. Over a 15-year lifespan, the cost-per-year of a cedar sleeper bed is competitive with any other raised-bed material, and the aesthetic quality is unmatched. For the full construction method behind these designs, see my DIY sleeper planter box guide.
Combining Sleeper Planters With Other Growing Methods
A sleeper planter rarely exists in isolation on a productive balcony — it works best as part of an integrated growing system. On my own setup, the sleeper bed handles the deep-rooted and cut-and-come-again crops (kale, chard, lettuce, bush peas), while railing planters take the herbs and trailing strawberries, and fabric grow bags at floor level handle the bulky potatoes that need depth without the permanence of a timber bed. The sleeper planter is the anchor of the system — the most productive, most permanent, most visually substantial piece — but it is not the whole garden.
The thermal mass of thick timber walls also creates microclimates you can exploit. The south-facing wall of a sleeper bed warms earlier in spring than the surrounding air, and planting heat-loving crops (tomatoes, peppers) directly against that wall gives them a head start that can mean the difference between a ripe harvest and green tomatoes at first frost. Conversely, the north-facing wall stays cooler, which is where I plant lettuce and spinach to delay bolting in the long Nordic summer daylight. The bed is not a uniform environment — it is a collection of microclimates, and planting to each one maximises productivity from a small footprint.
Connecting Your Design to the Full Garden System
A wooden sleeper planter is a statement piece, but it works best as part of a complete raised bed strategy. For the construction method behind these designs, see my DIY sleeper planter box guide. For material comparisons, read my wood vs concrete sleepers comparison. And for how wooden designs stack up against other materials, the recycled plastic beds review covers the no-rot alternatives.
Frequently Asked Questions
What wood is best for sleeper planters?
Cedar, redwood, and untreated oak are the best woods for sleeper planters because they resist rot naturally for 15+ years without chemical treatment. Reclaimed railway sleepers have character but verify they are not old creosote-treated stock which leaches toxins into soil.
How do you stop wooden sleeper planters from rotting?
Line the inside with landscape fabric or plastic sheeting so soil never touches the wood. Seal cut ends with penetrating oil. Keep the base elevated on gravel or pavers for drainage. In wet climates, these three steps easily double a pine sleeper planter life.
Can you paint or stain wooden sleeper planters?
Yes. Exterior-grade wood stain or food-safe penetrating oil works best. Avoid standard paint on the interior walls that contact soil. Reapply every 1-2 years. A clear penetrating oil on cedar sleepers needs re-coating each spring after the freeze-thaw cycle.
How tall should a wooden sleeper planter be?
Two sleepers stacked (30-40 cm) work for most vegetables. Three sleepers (45-60 cm) suit root crops and save your back. For wheelchair-accessible designs, a single sleeper (15-20 cm) on legs brings the planting surface to 60-70 cm of working height.
Are old railway sleepers safe for vegetable gardens?
Pre-2004 railway sleepers were often treated with creosote, which is toxic and should not contact food soil. Modern reclaimed sleepers sold as garden products are typically untreated or copper-treated, which is safer. Always ask the supplier about the treatment history before buying.