Building a sleeper planter box from scratch gives you a custom raised bed tailored to your exact space, your preferred materials, and your gardening needs — at a fraction of what a pre-assembled kit of the same dimensions costs. I have built three sleeper planters on my Swedish balcony over the years, and each one taught me something the instructions never mentioned. This guide covers the full process, from selecting timber through the soil fill, with the Nordic-climate details that matter. For the wider picture, see my complete raised beds and planters guide.
As an Amazon Associate I earn from qualifying purchases.
Understanding Garden Sleepers
Garden sleepers are the horizontal retaining timbers that form the walls of a raised bed. Originally actual railroad ties, modern garden sleepers include several wood and alternative material options, each with different lifespans, costs, and food-safety profiles.
Cedar and redwood are the premium natural options — naturally rot- and insect-resistant with no chemical treatment needed, a 15-25 year lifespan, and excellent food safety. They weather to an attractive silver-grey and cost more than treated alternatives. Treated pine is the most affordable option, pressure-treated with modern copper-based compounds (safer than the old arsenic-based CCA that was pulled from residential use), with a 10-15 year lifespan when properly sealed. Oregon State Extension’s safety assessment covers the leaching research in detail — the short version is that lining the bed with landscape fabric sidesteps most concerns. Oak and other dense hardwoods offer 20+ year durability with no chemicals but are expensive, heavy, and harder to cut.
Beyond wood, recycled plastic composite sleepers offer a 25+ year maintenance-free lifespan, and precast concrete provides a permanent (50+ year) solution. I cover all of these materials in depth in my sleepers comparison guide.
Planning Your Sleeper Planter
Dimensions and Height
Before purchasing materials, define your project dimensions. Length typically runs 4-12 feet to match standard sleeper lengths. Width should be 2-4 feet to allow reaching the centre from both sides without stepping into the bed. Height depends on what you plan to grow: 6-8 inches suits herbs, lettuce, and shallow-rooted flowers; 12 inches handles general vegetables and most ornamentals; 18-24 inches accommodates root vegetables, reduces bending, and helps exclude climbing pests.
Site Preparation
Prepare the installation area before buying timber. Mark the bed perimeter with stakes and string, remove sod and vegetation within the perimeter, and level the ground — slight slopes are tolerable, but major levelling improves both appearance and structural integrity. Add landscape fabric if weed suppression is desired, and ensure access from all sides with 18-24 inches of pathway clearance between multiple beds.
Materials and Tools
Materials (4×8 foot bed, 12-inch height)
For the sleepers, you need three 8-foot lengths (front and back walls) and four 4-foot lengths (side walls), all in 6×6-inch or 6×2-inch profile depending on your design preference. For fasteners, budget 12-16 timber screws at 6-inch length for joining corners, plus 8 corner brackets (optional but strongly recommended for longevity), and exterior wood glue for the joints. For drainage and pest exclusion, have hardware cloth (optional, for burrowing pests), gravel for a drainage layer if the bed is open-bottomed, and landscape fabric for lining. For finishing, you will need a food-safe wood sealer if using treated pine, and optionally an exterior stain for cedar.
Tools
The essential tools are a tape measure, carpenter’s square, circular saw or handsaw, drill with screwdriver bits, spirit level, work gloves, and safety glasses. Helpful additions include a mitre saw for precise angle cuts, clamps for holding pieces while fastening, a rubber mallet for seating sleepers, and a post-hole digger if you are securing corner posts into the ground.
Step-by-Step Construction
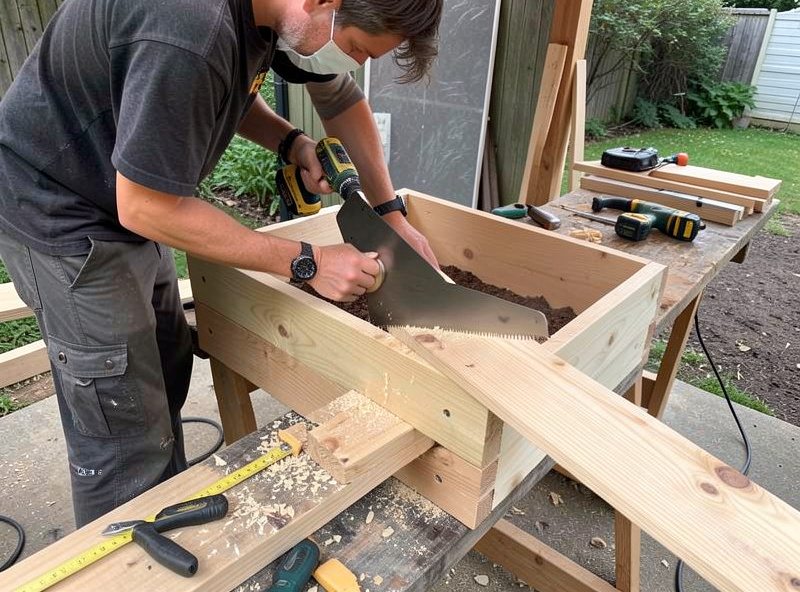
Step 1: Cutting the Sleepers
Measure and mark your cutting points using a carpenter’s square to ensure square cuts. Cut with a circular saw (or mitre saw if available for cleaner cuts). Sand the cut edges to remove splinters, then pre-drill pilot holes for screws to prevent splitting — this is especially important near the ends of the timber where splitting is most likely. If using treated lumber, apply cut-end sealer to the exposed untreated core. Most lumber retailers will cut sleepers to length when you purchase them, which saves time and often produces straighter cuts than DIY if you don’t own a quality saw.
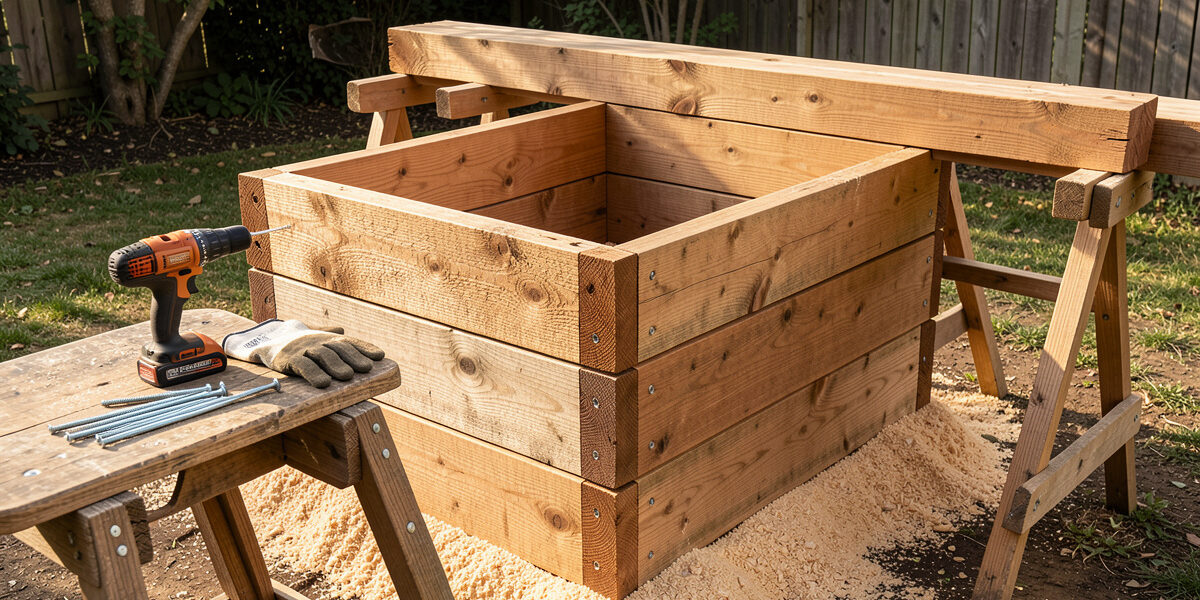
Step 2: Layout and Positioning
Position the sleepers on your prepared site. Place the front and back 8-foot sleepers parallel, 4 feet apart. Position the side sleepers to complete the rectangle. Check corners with a carpenter’s square ensuring 90 degrees, verify level both lengthwise and widthwise, and adjust the ground or shim as needed for stability.
Step 3: Corner Joining
Connect the corners securely using one of three methods. The basic approach is direct screwing: drill pilot holes through the side sleeper into the front/back sleeper, apply exterior wood glue to the joint, and drive 6-inch exterior wood screws (at least 2 per corner), countersinking slightly below the surface. The stronger approach uses corner brackets: position L-brackets at each corner, mark and drill pilot holes, and attach with exterior screws — combined with direct screwing for maximum strength. The advanced approach uses half-lap joints, which require cutting notches in the sleepers to create interlocking corners of superior strength, but demand more carpentry skill.
Step 4: Leveling and Squaring
Before final tightening, check all four corners with a carpenter’s square. Measure the diagonals — they should match exactly for a true square. If they don’t, adjust the corners until they do. Use a 4-foot level on each side, shim low corners with gravel or small wood pieces, then tighten all fasteners once everything is square and level. This is the step that separates a bed that looks professional from one that looks amateur — take the time to get it right.
Step 5: Lining and Pest Exclusion
Line the inside walls with landscape fabric or a fitted planter liner — this keeps damp soil off the timber, dramatically extending the bed’s lifespan, and creates a barrier between any wood treatments and your vegetable roots. Secure the fabric at the top rim with staples or the same clips holding the sleepers. If burrowing pests are a concern in your area, cut hardware cloth to the bed’s dimensions and staple it across the bottom frame before adding soil, extending it 3-6 inches up the sides.
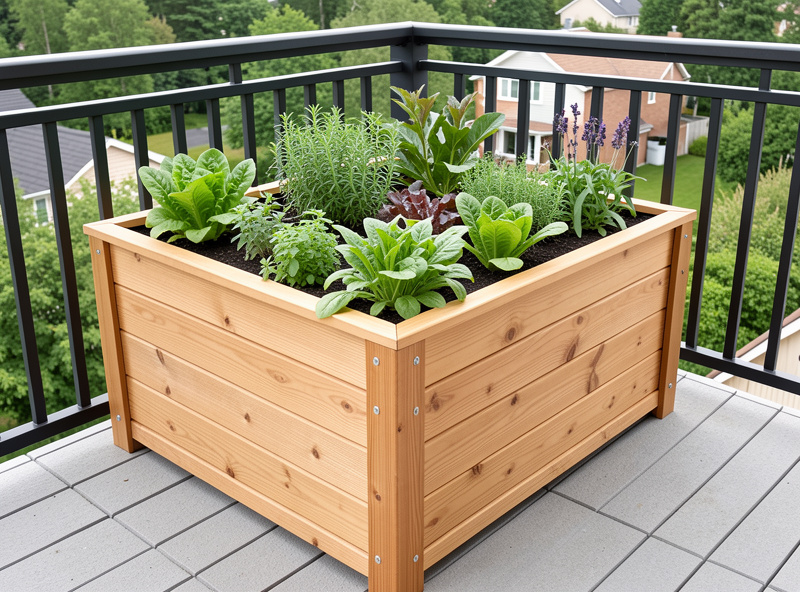
Step 6: Soil Filling
Fill your new planter with a quality raised-bed mix. If the bed is open-bottomed, add a 2-inch gravel layer for drainage first, then lay landscape fabric over the gravel to prevent soil migration. Fill with a mix of roughly 60% quality container soil, 30% compost or worm castings, and 10% perlite or vermiculite for drainage — the same blend I use in all my containers, detailed in my best soil for raised beds guide. Fill to within 1-2 inches of the top, water thoroughly to allow settling, then top off after the soil has settled.
Stacking for Increased Height
For deeper beds (18-24 inches), stack sleepers in multiple tiers. The sturdiest method uses 4×4 corner posts extending the full height of the bed — attach each tier’s sleepers to the posts with timber screws, creating a unified structural frame. Alternatively, use staggered joints where the second tier overlaps the first tier’s joints, screwed together from inside. Metal stacking brackets from raised-bed suppliers provide a clean appearance and reliable joinery. Regardless of method, the key in a Nordic climate is ensuring the stacked structure can handle freeze-thaw cycling without separating at the tier joints — corner posts solve this permanently.
The Nordic Construction Details That Matter
Three details make the difference between a sleeper planter that lasts two seasons and one that lasts ten in a Swedish climate. First, line the inside walls with landscape fabric — without it, wet soil against the timber through months of autumn rain and freeze-thaw cycling rots the wood from the inside out, starting at the soil line where moisture concentrates. The fabric costs pennies and adds years of life.
Second, seal every cut end thoroughly. The preservative in treated pine penetrates only the outer layer — when you cut a sleeper to length, the exposed core is unprotected and will absorb moisture and rot faster than any other part of the bed. Apply cut-end sealer to every fresh cut before assembly. On cedar, sealing cut ends is less critical but still extends lifespan at the vulnerable end-grain.
Third, check and re-tighten all fasteners each spring. Freeze-thaw cycling works micro-movements into every joint, and a screw that was tight in October may have loosened by April. I spend about ten minutes each spring going around my sleeper beds with a screwdriver, tightening every fastener before refilling with soil. It is the cheapest maintenance I do and it prevents the corner separation that eventually destroys these beds.
Cost Comparison: DIY vs Kits
For a 4×8 foot bed at 12-inch height, DIY cedar construction runs roughly $215-295 in sleepers, hardware, and sealer. The same dimensions in treated pine drops to $115-175. A premium pre-assembled kit of equivalent size costs $200-300. The DIY savings are 10-40% depending on material choice — and for anyone who already owns a saw and drill, the only additional cost is your time. For the full kit comparison, see my flat pack raised garden beds guide.
Common Mistakes I Have Made So You Don’t Have To
The first sleeper planter I built had two problems that took a season to surface. I skipped the landscape fabric lining because the cedar looked clean and I assumed natural rot resistance would handle it. By the end of the second autumn, the wood at the soil line on the inside wall was soft and dark with moisture — the cedar was rotting from soil contact that the fabric would have prevented. I rebuilt the bed with a fabric liner the following spring, and three years later that same cedar is still solid. The lesson: line every bed, regardless of material.
The second mistake was not pre-drilling pilot holes near the ends of the sleepers. I drove screws directly into the end-grain, and two of the four corner sleepers split along the grain within the first month as the wood dried and shrank. The split opened a gap that collected water and accelerated rot at that corner. Pre-drilling takes two minutes per corner and completely prevents this failure mode. For annual maintenance, inspect each spring for loose fasteners and re-tighten — freeze-thaw cycling loosens even well-driven screws over a Nordic winter.
Connecting to Complete DIY Gardening
Sleeper planter construction is one DIY approach. For easier alternatives, my flat pack raised beds guide covers pre-fabricated kits that assemble without sawing. Compare all material choices in my comprehensive sleepers comparison. For equipment supporting garden construction, see my equipment recommendations. And for design inspiration using sleepers, my wooden sleeper planters guide covers styling and configuration ideas.
Related Articles
- Raised Beds and Planters: Complete Guide
- Wooden Sleeper Planters — Design Ideas and Tips
- Best Sleepers for Raised Beds — Wood vs Concrete
- Best Raised Planter Boxes on Legs for Small Spaces
- Urban Gardening on a Budget
What wood is best for a sleeper planter box?
Cedar and untreated hardwoods like oak or black locust are best, lasting 15+ years without chemical treatment. Pressure-treated pine is the budget option at half the cost but needs lining with landscape fabric to keep soil off the treated surface, per extension guidance on treated-wood safety.
How deep should a sleeper planter box be?
A minimum of 30-40 cm (two sleepers stacked) suits most vegetables. Stack three sleepers for 45-60 cm depth for carrots, potatoes, and deep-rooted crops. Deeper beds also reduce bending and help exclude climbing pests.
Do I need to line the inside of a sleeper planter?
Yes. Line the inside walls with landscape fabric to keep damp soil off the timber. This doubles the bed’s lifespan in wet, freeze-thaw climates and creates a barrier between any wood treatments and your vegetable roots.
What tools do I need to build a sleeper planter box?
A circular saw or handsaw, drill with exterior-grade screws and a Phillips bit, measuring tape, level, carpenter’s square, and corner brackets. A rubber mallet helps seat sleepers. Pre-drill all screw holes near board ends to prevent splitting.
How much does it cost to build a sleeper planter box?
For a 120×80 cm, single-sleeper-height box, budget $80-150 for cedar or untreated hardwood. Pressure-treated pine brings it to $40-80. Hardware (screws, brackets, liner) adds $20-30. This is roughly 30-40% less than a pre-assembled kit of equivalent size.