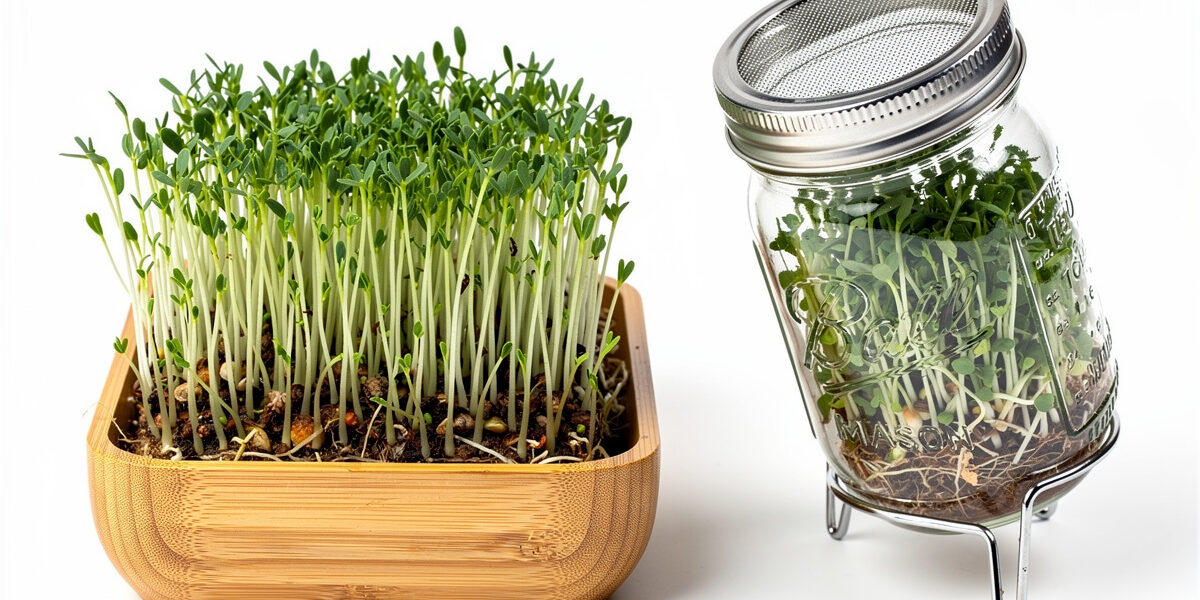
Sprouting tray vs jar: Jars are cheaper, compact, and best for beginners growing small seeds. Trays allow for vertical growth (straight stems), better airflow, and larger yields, making them better for grasses (wheatgrass) and shoots (sunflower/pea). Here is the detailed breakdown to help you choose the right equipment for your sprouting journey.
For a complete overview of all sprouting methods and seeds, see our complete sprouting guide.
Every sprouter eventually faces this dilemma. You start with a mason jar. You love it. But then you see those stacked plastic trays on Instagram, producing lush forests of vertical greens. Are they worth the upgrade?
In this comparison, we will look at cost, yield, ease of cleaning, maintenance, and environmental footprint to help you decide which method suits your kitchen and your sprouting goals.
I have run both setups side by side for over a year, and the answer depends entirely on what you sprout most. The jar is the better tool for small seeds (alfalfa, broccoli, radish, clover) because the roll technique coats the glass with seeds and gives each one airflow. The tray is the better tool for bulk harvests of the same seed (mung beans for a week of stir-fries, chickpeas for hummus prep) because the flat surface area means hundreds of seeds grow at once without clumping.
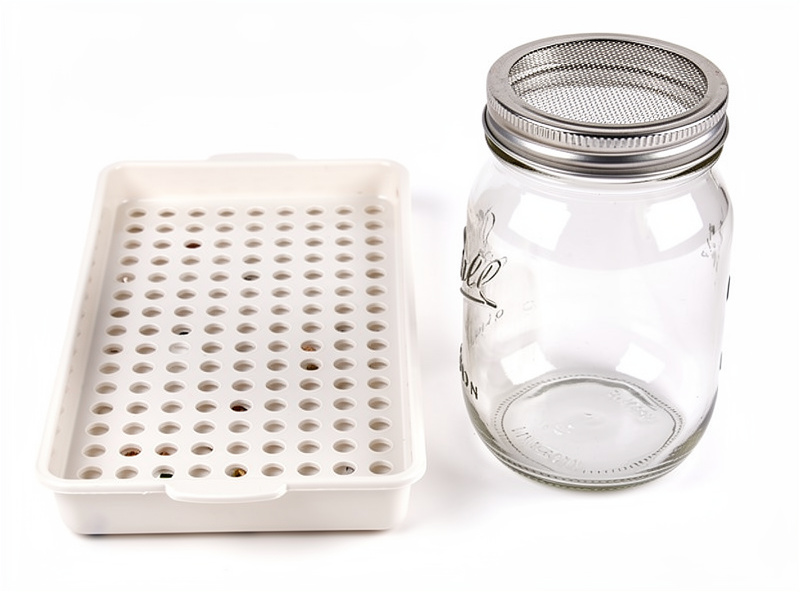
Start with the jar — a quart wide-mouth mason jar and a fine mesh lid cost under $15 and will sprout every seed in this cluster. Add a tray only when you find yourself running three jars of the same seed and wishing you could consolidate into one batch.
The Mason Jar: The Entry Level Champion
As an Amazon Associate I earn from qualifying purchases.Cost: $0-15 if you already own a jar; under $15 for a wide-mouth quart jar plus a stainless steel mesh sprouting lid.
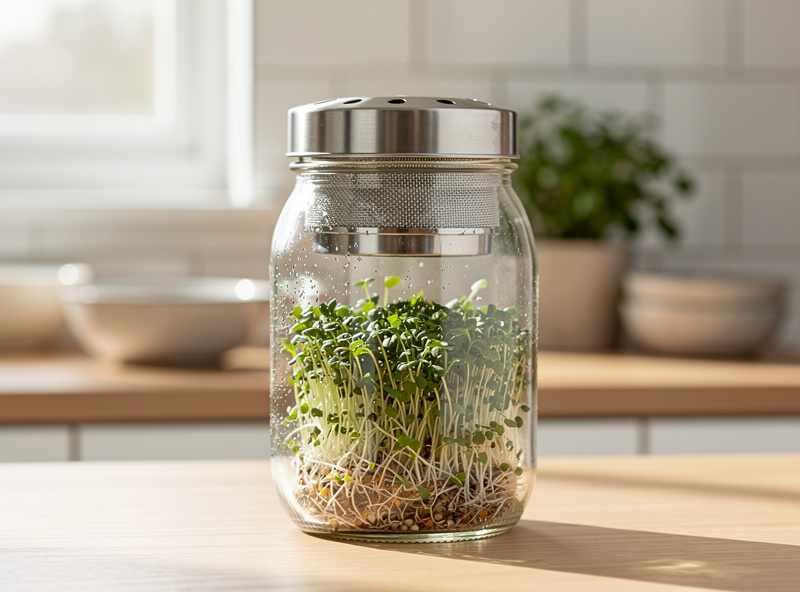
The jar method is rotary gardening. The seeds tumble around every time you rinse them, which means they grow in a tangled ball rather than straight vertical stems. For most home uses — alfalfa on a sandwich, mung beans in a stir-fry, broccoli sprouts on avocado toast — that tangled mass is exactly what you want. The jar takes about 4 inches of counter space, runs through the dishwasher between batches, and lets you watch the whole process happen through the glass.
Best For:
- Salad mixes (alfalfa, clover, radish)
- Soup pulses (lentils, mung beans, chickpeas)
- Small batches for one or two people
- Apartment kitchens with limited counter space
The Limit: Jars struggle with large seeds that break when tumbled and mucilaginous seeds (chia, flax) that slime together into a brick. They also top out at about 2 cups of finished sprouts per quart jar before airflow becomes a problem.
Jar Method Advantages
- Zero learning curve: Fill, soak, rinse, drain, repeat.
- Minimal investment: Use jars you already own.
- Easy to sanitize: Dishwasher safe.
- Portable: Take your sprouts camping or traveling.
- Transparent: Watch the sprouting process happen.
The Sprouting Tray: The Volume King
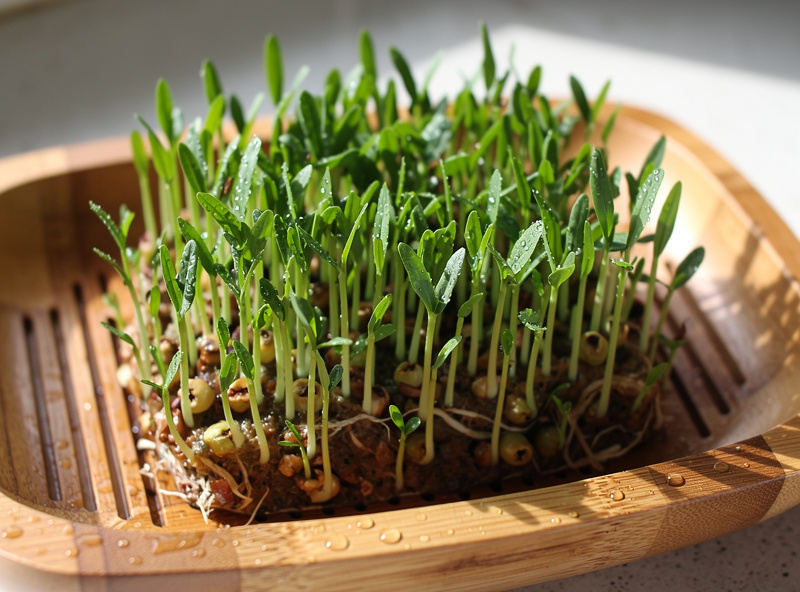
A sprouting tray is a flat, drained container (often stackable) where water cascades from the top through drainage holes into a catch basin at the bottom, eliminating the tumbling action of jars. The seed sits still, roots go down through the mesh, and stems grow straight up. That vertical stability is what makes trays the right tool for wheatgrass, pea shoots, and sunflower shoots — crops that want to stand up rather than tangle.
Cost: $20-50 for a 2- or 3-tier stackable plastic tray; $50-100 for stainless steel or terracotta.
The Vertical Advantage: Because the seeds are not tumbled, the roots go down through the mesh and the stems grow straight up. This allows for:
- Better airflow: Each sprout has its own space. Lower mold risk.
- Easy harvesting: Grab a handful of straight stems or cut them with scissors.
- Even light: Every leaf gets equal exposure, so the greening is uniform.
- Larger batches: The same seed quantity produces more usable sprouts per square inch than a jar.
Types of Sprouting Trays
- Plastic Stackers: The most common. Good for general sprouting. Hard to clean the mesh holes thoroughly. Affordable and widely available.
- Terracotta or Clay: Expensive and heavy, but they naturally regulate humidity by absorbing water. Great for chia and flax. Beautiful on the counter.
- Stainless Steel: The hygienic gold standard. Expensive but lasts forever. No plastic leaching concerns. Professional kitchen quality.
- Hemp Mat Trays: Use disposable hemp mats instead of soil. Clean and compostable. Popular for microgreen production.
Speed and Time-to-Harvest
Jars and trays take roughly the same time to produce a finished batch — three to five days for most small seeds, two days for lentils, six to seven days for mucilaginous seeds on a paper towel. The tray does not speed up germination; what it does is let you run a much bigger batch in that same window, which is the real throughput win. If your bottleneck is “I can only fit one jar on the counter”, the tray multiplies your yield per cycle by three or four. If your bottleneck is “I keep forgetting to rinse them”, neither vessel will save you — that part is operator discipline.
Detailed Feature Comparison
Comparing jar and tray systems across the metrics that actually matter for a home kitchen — cost, counter footprint, yield, cleanability, and the texture of the finished sprout — reveals two genuinely different tools rather than one being strictly better than the other. Jars win on cost (zero if you already own one), portability, and cleanability. Trays win on yield per batch, vertical-stem texture, and the ability to run multiple varieties in a stacked system. Drainage efficiency favors trays (gravity-fed through the layers) over jars (which need a manual 45-degree prop in a bowl). For an apartment counter, jars are usually the right first answer; for a family or a serious sprout eater, trays earn their counter space.
| Feature | Mason Jar | Sprouting Tray |
|---|---|---|
| Initial Cost | $0-15 | $20-50 |
| Space Required | 4 inches | 10-12 inches |
| Yield per batch | 1-2 cups | 4-8 cups |
| Cleaning Difficulty | Easy | Moderate |
| Sprout Texture | Tangled ball | Straight stems |
| Best Seeds | Small (alfalfa, broccoli) | Large (sunflower, pea) |
| Mold Risk | Moderate | Low |
Cost Analysis and Value
If you eat sprouts once a week, stick to a jar. The tray investment does not make sense for occasional use — the jar is already paid for, takes four inches of counter, and cleans in the dishwasher.
If you eat sprouts daily, a 3-tier tray system pays for itself in a few months. It allows you to run a rotation system: a top tray almost ready (day 4), a middle tray growing (day 2), and a bottom tray just soaked (day 0). That gives you a perpetual harvest with fresh sprouts available every day without gaps in production. On my counter through the Swedish winter, when fresh local greens are basically unavailable, that rotation is what keeps the kitchen stocked without resorting to bagged imported salads.
There is a middle path worth knowing about: a single tray (not stacked) catches most of the benefit at a third of the cost. I ran one for a year before adding the second tier, and it was enough for two people eating sprouts four or five times a week.
Cleaning and Maintenance
Cleaning Jars
Mason jars are simple to maintain:
- Run through dishwasher on hot cycle after each batch
- Soak mesh lids in vinegar solution monthly to remove mineral buildup
- Replace mesh lids annually or when holes stretch
- Inspect for cracks that could harbor bacteria
Cleaning Trays
Trays require more attention:
- Rinse immediately after harvest to prevent dried-on roots
- Use a soft brush to clean mesh screens without damaging them
- Soak in diluted hydrogen peroxide (1 tablespoon per quart) weekly
- Allow to fully dry between batches to prevent mold
- Replace plastic trays every 2-3 years as they degrade
Environmental Impact: Glass vs Plastic
For the eco-conscious gardener, the Jar wins hands down.
- Glass Jar: 100% recyclable, lasts forever, zero plastic leaching, can be repurposed indefinitely.
- Plastic Tray: Even BPA-free plastic degrades over time. UV light from windows can make them brittle after a few years. Eventual landfill waste.
However, you can find high-end stainless steel or ceramic trays if you want to avoid plastic entirely. The higher upfront cost is offset by decades of use.
DIY Tray Systems
You do not need to buy a brand-name kit to test whether trays suit your sprouting style. Here is a simple homemade version that costs nothing if you order takeout occasionally:
- Take two plastic takeout containers of the same size.
- Poke 20-30 small holes in the bottom of one using a hot needle or small drill bit.
- Stack the perforated container inside the solid one.
- Put seeds in the top container.
- Cover with a loose lid or a damp paper towel.
- Water by pouring through the top; excess drains into the bottom container, which you empty after each rinse.
This DIY version works surprisingly well for a trial run. If you find you actually use the tray every week, upgrade to a proper stainless or terracotta version that will last decades and avoid the plastic-degradation issue. If you find the tray sits empty after the first month, you have lost nothing — and you have answered the question for your own kitchen.
Verdict: Which Should You Choose?
Choose a JAR if:
- You are growing lentils, mung beans, or broccoli sprouts
- You have very limited counter space
- You want the easiest cleanup (dishwasher safe)
- You are just starting your sprouting journey
- You prefer minimal investment
- You prioritize environmental sustainability
Choose a TRAY if:
- You want to grow Wheatgrass or Pea Shoots
- You hate the tangled ball texture of jar sprouts
- You want to grow chia or flax without the slime
- You need to feed a whole family
- You want professional-looking garnishes
- You are ready to level up your sprouting game
A Quick Word on Sprout Safety
Whichever vessel you pick, the same hygiene rules apply — the warm, wet conditions inside a jar or a tray both suit Salmonella and E. coli as much as they suit the seed. Source seed sold specifically for sprouting, rinse in clean cold running water at every step, drain thoroughly, refrigerate the finished sprouts, and discard any batch that smells off. Trays are slightly easier to keep hygienic than jars because they drain by gravity and air-dry faster, but a clean jar with a stainless mesh lid is perfectly safe too. People who are pregnant, elderly, very young, or immunocompromised should cook sprouts rather than eat them raw. The FDA Sprout Safety Alliance publishes the full industry-side guidance.
Is a sprouting jar or tray better for beginners?
Jars are better for beginners—they’re inexpensive, readily available, and simple to use. You likely already have mason jars at home. Trays become useful once you want to grow larger quantities or multiple varieties simultaneously.
What are the advantages of sprouting trays?
Trays allow larger batches, better air circulation for some seeds, and easier drainage. Stackable trays let you grow multiple varieties at once. They’re ideal for mung beans and other seeds that benefit from weight and darkness.
When should I switch from jars to trays?
Consider trays when you want to grow more than 2 cups of sprouts at once, grow mung bean sprouts restaurant-style (thick and crunchy), or graduate to microgreens that need horizontal growing space.
Can I use any jar for sprouting?
Wide-mouth mason jars work best—the opening makes rinsing and draining easier. Quart size (32 oz) is ideal for most batches. You’ll need a mesh lid or cheesecloth cover to allow drainage while keeping seeds contained.
Which method produces more sprouts?
Trays typically produce larger harvests per batch—up to 4x more than a single jar. A 10-inch tray yields about 2 cups of finished sprouts versus 1/2 cup from a quart jar.
Do sprouting trays require more maintenance?
Trays require slightly more attention—checking water levels in lower trays and ensuring even drainage. Jars are more forgiving for occasional missed rinses. Both methods need daily attention.
Which is easier to clean?
Jars win for simplicity—dishwasher-safe glass and mesh lids clean easily. Trays have more nooks, especially bamboo versions. Clean bamboo trays with vinegar solution; stainless steel trays are dishwasher safe.