Sprouting seeds at home is the fastest way to grow fresh, nutrient-dense food indoors. Most seeds sprout in 2-5 days using only water, a jar, and a warm countertop. Sprouted seeds contain up to 100 times more antioxidants than mature plants and provide complete proteins, vitamins C and K, and live enzymes. This guide covers every method, seed, and technique you need to start sprouting today. Sprouting is also project #1 in our simple family gardening projects guide for kids.
If you have ever wanted to grow food but lack outdoor space, sunlight, or patience, sprouting is your answer. Unlike traditional gardening that takes weeks or months, sprouting delivers harvest-ready food in days. A single tablespoon of broccoli seeds produces a full cup of sprouts containing more sulforaphane than eating pounds of mature broccoli. Lentils sprout in just 48 hours and provide 9 grams of protein per cup. This is urban gardening at its most efficient.
This comprehensive hub covers everything about sprouting: the best seeds for beginners, step-by-step methods for every seed type, equipment you need (and don’t need), safety protocols, and how sprouting compares to growing microgreens. Each section links to detailed guides for deeper dives into specific topics.
What Is Sprouting and Why Does It Matter?
Sprouting is the process of germinating seeds in water and harvesting them at 2-5 days old, eating the entire seed including root, stem, and tiny leaves. During germination, seeds undergo dramatic biochemical changes: phytic acid decreases by up to 60%, vitamin C increases by 500-600%, and complex proteins break into easily digestible amino acids. The result is food that is more nutritious, more digestible, and more bioavailable than the original seed.
The sprouting process activates dormant enzymes within the seed. These enzymes break down starch reserves into simple sugars, convert proteins into amino acids, and synthesize new vitamins. A dry lentil contains virtually no vitamin C. After 3 days of sprouting, that same lentil contains measurable amounts. This transformation happens because the seed is preparing to become a plant, mobilizing every nutrient it needs for growth.
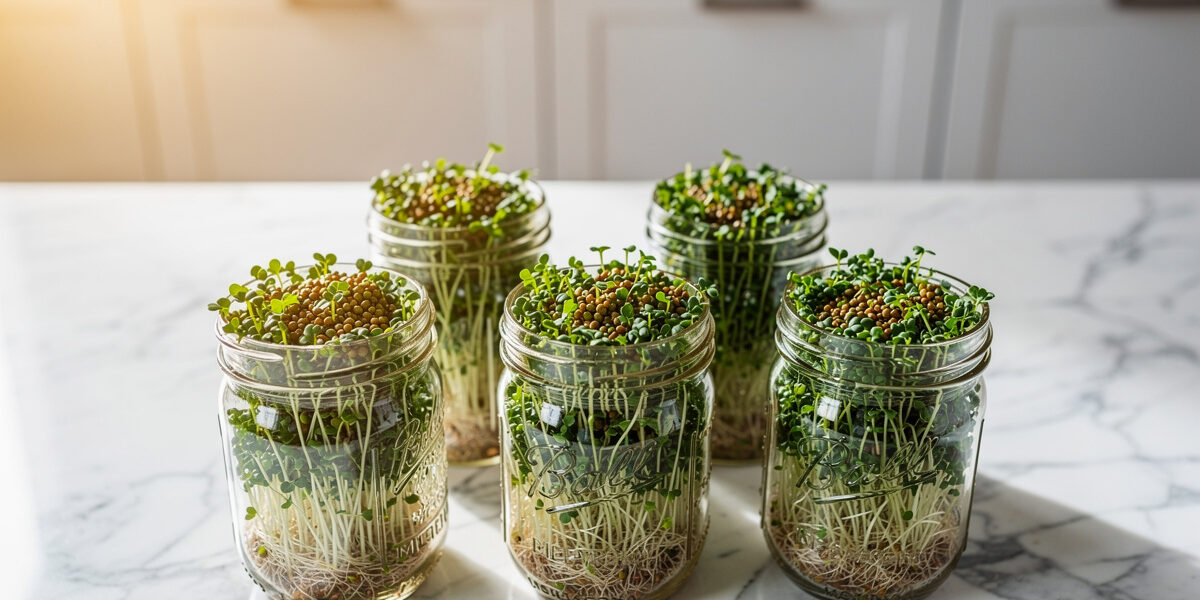
Sprouting requires minimal equipment, no soil, no grow lights, and no outdoor space. A quart mason jar, some mesh, and a handful of seeds are all you need. This makes it the most accessible form of food production available to apartment dwellers, students, and anyone with a kitchen counter.
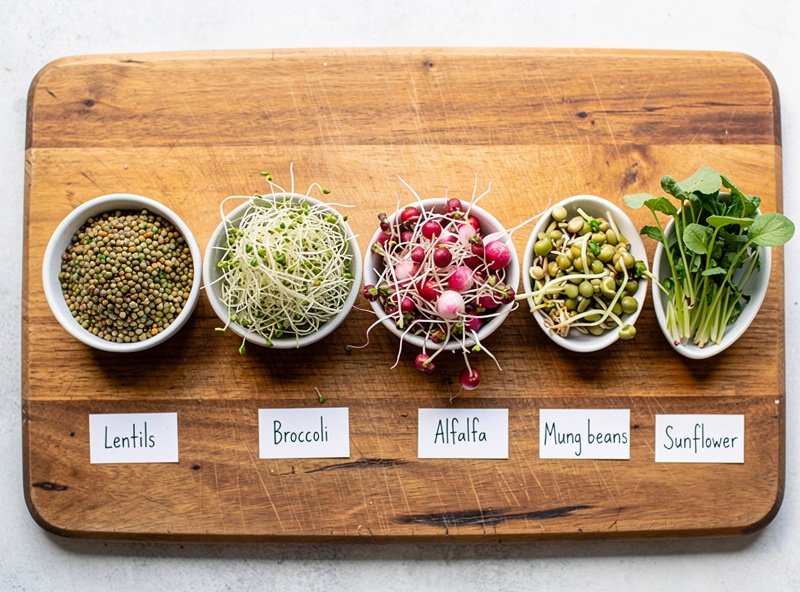
Best Seeds for Sprouting at Home
Not all seeds sprout equally well. The best sprouting seeds share three characteristics: they are whole and unprocessed, they have thin seed coats that absorb water quickly, and they produce edible sprouts within 2-5 days. Here is a breakdown of the top performers.
Legumes: The Protein Powerhouses
Legume sprouts are the fastest and most reliable for beginners. They sprout in 2-3 days and provide substantial protein content.
- Lentils (green, brown, French Puy): Sprout in 2-3 days. Yield 1.5 cups per ½ cup dry. Crunchy texture, peppery flavor. See our complete lentil sprouting guide for step-by-step instructions.
- Mung beans: The classic bean sprout found in Asian cuisine. Sprout in 2-3 days. Thick, juicy sprouts perfect for stir-fries and salads. Learn how in our mung bean sprouting guide.
- Chickpeas: Sprout in 2-3 days. Become sweet and crunchy, excellent for raw snacking and hummus. Our chickpea sprouting guide covers the fastest method.
- Fenugreek: Sprout in 3-4 days. Distinct maple-like aroma, used in Indian cooking. Read our fenugreek sprouting guide.
Vegetable Seeds: The Nutrient Bombs
Vegetable sprouts take slightly longer (4-5 days) but deliver concentrated phytonutrients.
- Broccoli: Sprout in 4-5 days. Contains 10-100 times more glucoraphanin than mature broccoli. The king of medicinal sprouts. Our broccoli sprouting guide covers mold prevention and maximum sulforaphane extraction.
- Radish: Sprout in 4-5 days. Spicy, horseradish-like flavor. Excellent for sandwiches and salads. See our radish sprouting guide.
- Sunflower: Sprout in 8-10 days (these become microgreens). Nutty, substantial sprouts. Learn more in our sunflower sprouting guide.
Grains and Pseudocereals: The Quick Sprouters
These are the absolute fastest sprouts you can grow.
- Quinoa: Sprouts in just 1-2 days. The fastest sprout available. Tiny but nutritionally complete. Our quinoa sprouting guide explains why and how.
- Alfalfa: Sprout in 4-5 days. Delicate, mild flavor. Classic sandwich sprout. Learn the method in our alfalfa sprouting guide.
Speed Comparison Table
| Seed | Days to Harvest | Yield Ratio | Best For |
|---|---|---|---|
| Quinoa | 1-2 days | 1:3 | Fastest sprout |
| Lentils | 2-3 days | 1:3 | Beginner protein |
| Mung Beans | 2-3 days | 1:5 | Stir-fries |
| Chickpeas | 2-3 days | 1:2 | Raw snacking |
| Fenugreek | 3-4 days | 1:4 | Cooking spice |
| Alfalfa | 4-5 days | 1:8 | Sandwiches |
| Broccoli | 4-5 days | 1:6 | Health benefits |
| Radish | 4-5 days | 1:6 | Spicy flavor |
For a complete ranking of the fastest sprouting seeds with detailed timing for each variety, see our guide to the fastest seeds to sprout at home.
Sprouting Methods: Choose Your Setup
There are three primary methods for sprouting at home. Each has advantages depending on your space, budget, and the types of seeds you want to grow.
The Mason Jar Method (Most Popular)
The mason jar method is the gold standard for home sprouting. It requires a quart-sized wide-mouth jar, a mesh sprouting lid (or cheesecloth), and a bowl for drainage. Seeds are soaked in the jar, then rinsed and drained twice daily while the jar sits upside-down at a 45-degree angle. This method works for virtually all seed types and produces consistent results.
The key advantage is drainage. When the jar sits inverted, excess water drips out while air circulates through the mesh. This prevents the standing water that causes rot and bacterial growth. Wide-mouth jars are essential because they allow you to remove the sprout cake without crushing it.
For a complete walkthrough of the mason jar method, including lid comparisons and DIY alternatives, read our sprouting in mason jars guide.
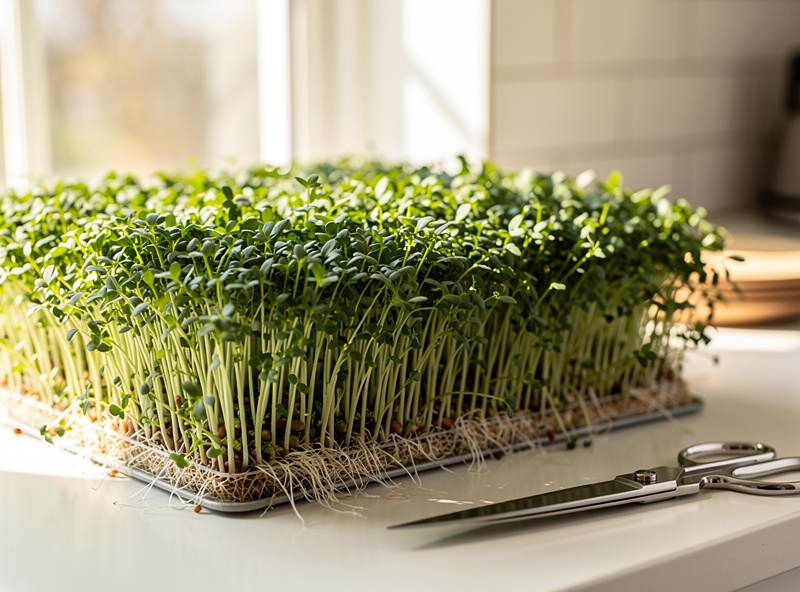
The Tray Method (For Larger Harvests)
Tray sprouting uses shallow plastic or wooden trays with drainage holes. Seeds are spread in a thin layer and misted twice daily. This method is better for larger quantities and for sprouts that need more surface area, like sunflower and wheatgrass. Trays stack vertically, allowing you to grow multiple varieties in the same footprint.
The tray method requires more space than jars but scales better. If you want to produce enough sprouts for daily juicing or to share with family, trays are the way to go. They also work better for sprouts that need light exposure to develop chlorophyll and green leaves.
Soilless Medium Method
Some sprouts benefit from a soilless growing medium like coconut coir, hemp mats, or burlap. This method bridges the gap between sprouting and microgreen growing. The medium provides support and moisture retention while remaining food-safe and compostable.
This approach is particularly useful for seeds that are too small to sprout reliably in jars, or for sprouts that benefit from root anchoring. For detailed instructions on all soilless methods, see our guide to sprouting without soil.
Method Comparison
| Method | Cost | Space Needed | Best For |
|---|---|---|---|
| Mason Jar | $5-10 | Countertop corner | Beginners, daily use |
| Stacking Trays | $15-30 | Shelf space | Large harvests |
| Soilless Medium | $10-20 | Windowsill | Small seeds, microgreens |
Wondering which method is best for your situation? Our sprouting tray vs jar comparison breaks down the pros and cons of each approach.
Step-by-Step Sprouting Process
Regardless of which method you choose, the core sprouting process follows the same five stages. Mastering these steps ensures consistent, safe, and delicious sprouts every time.
Stage 1: Seed Selection and Sorting
Always use seeds specifically labeled for sprouting. Garden seeds are often treated with fungicides and are not safe for consumption. Measure your seeds carefully — ½ cup of dry lentils yields about 1.5 cups of sprouts. Sort through dry seeds and remove any broken pieces, stones, or debris. Broken seeds will not sprout and can rot, contaminating the entire batch.
Stage 2: Initial Soak
Place seeds in your sprouting vessel and cover with cool water. Soak times vary by seed type: lentils and mung beans need 8-12 hours, broccoli seeds need 6-8 hours, and quinoa needs just 2-4 hours. The soak rehydrates the seed and triggers the germination process. Use filtered water if your tap water is heavily chlorinated, as chlorine can inhibit germination.
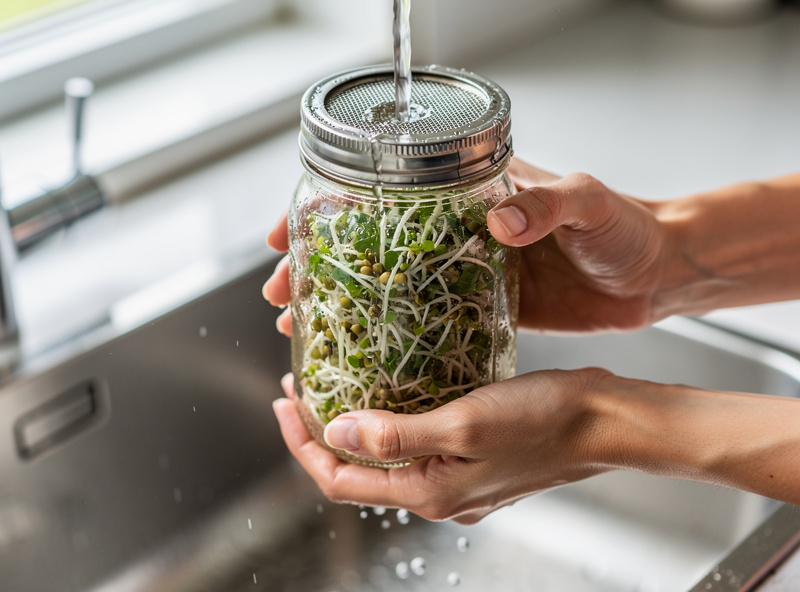
Stage 3: Drain and Rinse Cycle
After soaking, drain completely. This is the most critical step — standing water causes rot. Rinse seeds with fresh water and drain thoroughly twice daily (morning and evening). Keep the sprouting vessel at a 45-degree angle to allow continuous drainage. Maintain room temperature between 65-75°F (18-24°C) for optimal growth.
Stage 4: Growth and Monitoring
During days 2-5, you will see tails (radicles) emerging from the seeds. The sprouts will expand significantly — expect 3-8x volume increase depending on the seed. Monitor for any off odors. Healthy sprouts smell fresh and slightly sweet. If you detect sour, fermented, or rotten smells, discard the batch immediately. See our sprouting safety guide for detailed food safety protocols.
Stage 5: Harvest and Storage
Harvest when sprouts reach your preferred length — typically when tails are ½ to 1 inch long. Give sprouts a final rinse and spread them on a clean towel to air dry for 30-60 minutes. This drying step is essential for storage longevity. Store dried sprouts in an airtight container with a paper towel in the refrigerator. Properly stored sprouts last 5-7 days.
Sprouting Safety: Essential Guidelines
Food safety is the most important aspect of home sprouting. The warm, humid conditions that seeds love are also ideal for bacterial growth. Following proper safety protocols eliminates virtually all risk.
The foundation of safe sprouting starts with seed quality. Only purchase seeds specifically tested and labeled for sprouting. These seeds are tested for Salmonella and E. coli to 99.999% standards. Garden seeds from hardware stores are often treated with chemical fungicides and should never be consumed.
Equipment sanitation is equally critical. Wash your jars, trays, and lids with hot soapy water between every batch. A weekly soak in a diluted vinegar solution (1 part vinegar to 10 parts water) eliminates biofilm buildup. Never use the same equipment for sprouting without cleaning it first.
During the sprouting process, the single most important safety practice is drainage. Seeds should never sit in standing water. The rinse-and-drain cycle twice daily removes metabolic waste products and prevents bacterial proliferation. If your sprouts develop a sour smell, slimy texture, or unusual coloration, discard them immediately.
Vulnerable populations — pregnant women, elderly individuals, young children, and immune-compromised people — should cook sprouts before eating. Cooking to 165°F (74°C) eliminates any potential pathogens while preserving most nutritional benefits. For comprehensive safety protocols, read our complete sprouting safety guide.
Sprouting vs Microgreens: What’s the Difference?
Many people confuse sprouts and microgreens, but they are fundamentally different products with different growing methods, nutritional profiles, and culinary uses.
Sprouts are 2-5 day old germinated seeds grown entirely in water. You eat the entire plant — root, seed, stem, and tiny leaves. They are grown in darkness or low light and harvested while still living off the seed’s stored energy. Sprouts are typically used raw in salads, sandwiches, and smoothies.
Microgreens are 7-21 day old seedlings grown in soil or a soilless medium. You harvest by cutting the stem above the soil line — roots and growing medium are discarded. Microgreens require light for photosynthesis and develop true leaves, giving them more complex flavors and higher concentrations of certain vitamins than sprouts.
Nutritionally, both are excellent but in different ways. Sprouts excel in enzyme content and digestibility. Microgreens contain higher concentrations of vitamins C, E, and K, plus more diverse phytonutrients because they have begun photosynthesis. Broccoli microgreens contain even more sulforaphane than broccoli sprouts, but require significantly more time, space, and equipment to grow.
For beginners, sprouting is the easier entry point. It requires less equipment, less time, and less space. Once you master sprouting, microgreens are a natural progression. For a detailed comparison of both methods, see our sprouting vs microgreens guide.
Nutritional Benefits of Sprouted Seeds
Sprouting transforms the nutritional profile of seeds in remarkable ways. Understanding these changes helps you choose the right sprouts for your health goals.
Increased Vitamin Content
The most dramatic change during sprouting is vitamin synthesis. Vitamin C, which is absent in dry seeds, increases by 500-600% during germination. B-vitamins including folate, thiamine (B1), riboflavin (B2), and niacin (B3) all increase significantly. Vitamin K content rises as chlorophyll develops in green sprouts. These vitamin increases make sprouts one of the most nutrient-dense foods per calorie available.
Improved Mineral Bioavailability
Seeds naturally contain phytic acid, which binds to minerals like iron, zinc, calcium, and magnesium, preventing their absorption. Sprouting activates phytase enzymes that break down phytic acid by 30-60%. This means your body can actually absorb the minerals in sprouted seeds rather than passing them through undigested. For people with mineral deficiencies, sprouted seeds are significantly more effective than raw seeds.
Enhanced Protein Digestibility
During sprouting, complex storage proteins break down into simpler amino acids and peptides. This makes sprouted legumes much easier to digest than cooked legumes. People who experience gas and bloating from beans often tolerate sprouted beans without issue. The protein content itself does not increase dramatically, but the proportion of usable protein does.
Antioxidant and Phytonutrient Boost
Sprouting increases antioxidant activity by activating dormant phytonutrients. Broccoli sprouts contain glucoraphanin, which converts to sulforaphane — one of the most potent natural anti-cancer compounds known. Radish sprouts contain isothiocyanates that support liver detoxification. Alfalfa sprouts contain saponins that help regulate cholesterol levels.
Troubleshooting Common Sprouting Problems
Even experienced sprouters encounter issues occasionally. Here are the most common problems and their solutions.
Sprouts Smell Sour or Rotten
This is almost always caused by inadequate drainage or poor air circulation. Bacteria ferment the leftover moisture, creating sour odors. Fix: Drain more thoroughly after each rinse. Prop your jar at a steeper angle. Ensure the room is not too warm (above 75°F accelerates bacterial growth). If the smell is strong or the sprouts are slimy, discard the batch.
Seeds Are Not Sprouting
Several factors can prevent germination. The seeds may be old, heat-treated, or split (removing the germ). Chlorinated tap water can inhibit sprouting. Water that is too cold slows germination significantly. Fix: Use fresh sprouting seeds from a reliable source. Switch to filtered water. Move your setup to a warmer location (65-75°F is ideal).
Mold Growth on Sprouts
White fuzzy growth on sprouts is often confused with mold but is usually just root hairs — tiny white filaments that roots use to absorb water. True mold is gray, green, or black and has a musty smell. Root hairs disappear when you rinse the sprouts; mold does not. Fix: Increase air circulation. Reduce humidity in the growing area. Ensure seeds are not overcrowded in the jar.
Sprouts Are Too Crunchy or Hard
This typically happens with legumes that were not soaked long enough or are old seeds. Fix: Extend the initial soak to 12-14 hours. Try a fresh batch of seeds. Some people prefer to lightly steam crunchy sprouts for 2-3 minutes to soften them while preserving most nutrients.
Essential Sprouting Equipment
You can start sprouting with almost nothing, but having the right equipment makes the process easier and more consistent.
Must-Have Equipment
- Quart wide-mouth mason jars: The standard sprouting vessel. Wide mouths allow easy removal of sprouts and thorough cleaning.
- Mesh sprouting lids: Stainless steel mesh lids are superior to plastic. They drain faster, last longer, and are easier to clean. A set of assorted mesh sizes costs $8-12.
- Sprouting seeds: Buy from reputable suppliers who test for pathogens. A 1-pound bag of sprouting seeds costs $8-15 and produces 3-5 pounds of sprouts.
Nice-to-Have Equipment
- Stacking sprouting trays: For larger harvests. Stackable systems grow 4-6 varieties simultaneously in the space of one jar.
- Automatic sprouter: Electric sprouters with timed watering cycles. Good for busy people but not necessary for beginners.
- Seed storage containers: Airtight glass jars in a cool, dark place keep sprouting seeds viable for 1-2 years.
How to Eat and Use Sprouted Seeds
Sprouts are incredibly versatile in the kitchen. Here are the most popular ways to incorporate them into your daily meals.
Raw Applications
The simplest way to enjoy sprouts is raw. They add crunch, nutrition, and visual appeal to almost any dish. Add lentil or mung bean sprouts to salads for protein. Top avocado toast with alfalfa sprouts. Blend broccoli sprouts into green smoothies — the strong flavor is masked by fruit. Stuff sprouts into wraps and sandwiches as a lettuce replacement.
Cooked Applications
While raw sprouts retain maximum enzyme activity, lightly cooking them preserves most nutrients while improving safety and digestibility. Stir-fry mung bean sprouts with vegetables for the last 2 minutes of cooking. Add sprouted lentils to soups just before serving. Sauté broccoli sprouts with garlic and sesame oil for a quick side dish. Lightly steaming sprouts for 2-3 minutes kills surface bacteria while preserving 80-90% of the nutritional benefits.
Preservation Methods
If you produce more sprouts than you can eat within a week, you have options. Dehydrating sprouts at 115°F (46°C) creates shelf-stable sprout powder that can be added to smoothies and baked goods. Freezing sprouts works but changes texture — best for cooked applications. Pickling sprouts in vinegar extends their life to 2-3 weeks while adding a tangy flavor.
Frequently Asked Questions
How long does it take to sprout seeds?
Most seeds sprout in 2-5 days. Quinoa is fastest at 1-2 days. Lentils and mung beans take 2-3 days. Broccoli and alfalfa need 4-5 days. The sprouting time depends on seed type, temperature, and moisture levels.
Can you sprout any seed?
No. Only use seeds specifically labeled for sprouting. Garden seeds are often treated with fungicides and are unsafe to eat. Split, processed, or cooked seeds will not sprout. Buy from reputable sprouting seed suppliers.
Are sprouts safe to eat raw?
Yes, for most healthy adults. Use tested sprouting seeds, sanitize equipment, and rinse twice daily. Vulnerable groups (pregnant, elderly, immune-compromised) should cook sprouts to 165°F before eating.
How do you store sprouted seeds?
Air dry sprouts for 30-60 minutes, then store in an airtight container with a paper towel in the refrigerator. Properly stored sprouts last 5-7 days. Rinse every 2 days to maintain freshness.
What is the easiest seed to sprout for beginners?
Lentils are the easiest. They sprout in 2-3 days, are forgiving of mistakes, and produce reliable results. Mung beans are a close second. Both require only a jar, water, and twice-daily rinsing.
How much do sprouts expand during sprouting?
Most seeds expand 3-8 times their dry volume. Alfalfa expands the most (up to 8x). Lentils and mung beans expand about 3x. This means ½ cup of dry seeds produces 1.5-4 cups of sprouts.
Related Sprouting Guides
Explore our complete sprouting library for detailed instructions on every seed and method:
- How to Sprout Lentils at Home in 2 Days
- How to Sprout Mung Beans — Easy Kitchen Method
- How to Sprout Broccoli Seeds for Maximum Nutrition
- How to Sprout Alfalfa at Home — 5 Day Guide
- How to Sprout Chickpeas — Fastest Method
- How to Sprout Sunflower Seeds for Salads
- How to Sprout Fenugreek Seeds — Complete Guide
- How to Sprout Quinoa — Why and How
- How to Sprout Radish Seeds — Spicy Microgreens
- Sprouting in Mason Jars — Beginner Method
- Sprouting Without Soil — 3 Easy Methods
- Sprouting Tray vs Jar — Which Is Better?
- 10 Fastest Seeds to Sprout at Home
- Sprouting Safety Tips — Avoid Mold and Bacteria
- Sprouting vs Microgreens — What’s the Difference?
Related Articles
Expand your indoor growing knowledge beyond sprouting: