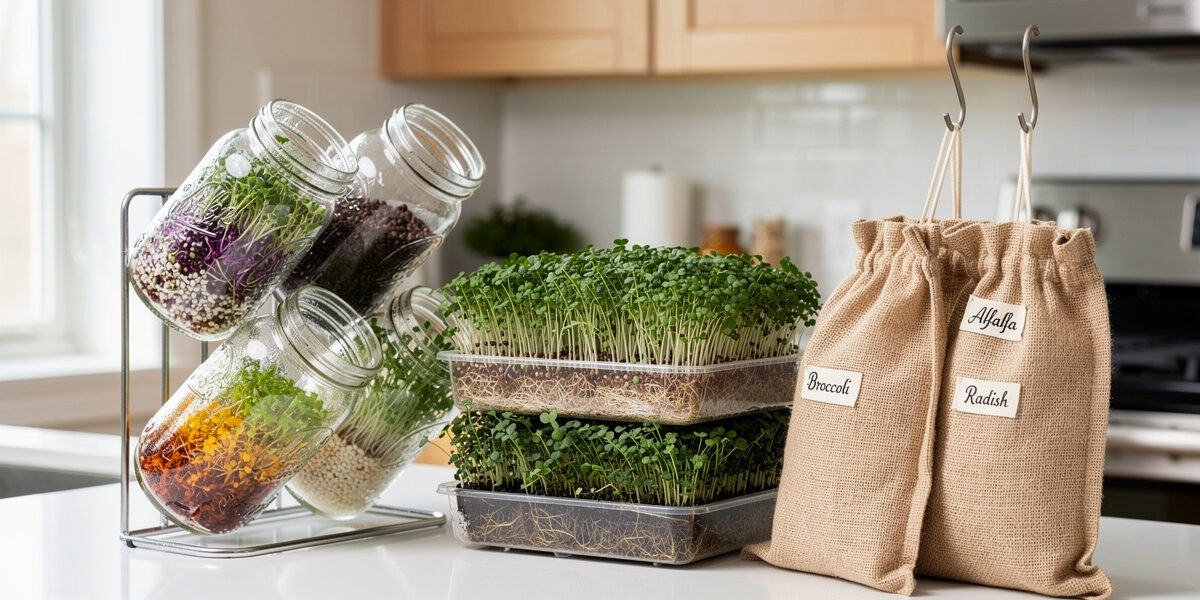
Sprouting without soil: You can grow fresh food using just water and a container. The three most common soil-free methods are the Mason Jar Method (for most seeds), the Colander Method (for beans), and the Paper Towel Method (for mucilaginous seeds like chia). This form of “countertop hydroponics” is the cleanest way to garden indoors.
For a complete overview of all sprouting methods and seeds, see our complete sprouting guide.
One of the biggest misconceptions about gardening is that you need dirt, compost, and a mess in your living room. Sprouting is arguably the purest form of hydroponic gardening. The seed carries all the stored energy the plant needs for the first week of its life; all you need to provide is moisture and oxygen.
In this guide, we will break down the three primary techniques for growing food without a single grain of soil. By matching the method to the seed, you can grow everything from massive bean sprouts to delicate chia greens.
Why No Soil? The Countertop-Only Approach
Sprouting without soil is the simplest growing method I use — no dirt, no pots, no drainage trays, no grow lights. The sprout lives entirely on the energy stored in the seed, fed by nothing but water and air, for the 2-7 days it takes to go from dry seed to crunchy harvest.
The trade-off is that you are eating the seed and the young root-shoot together — the entire organism — rather than the above-ground leaves only. The flavor is concentrated, the texture ranges from watery-crisp (mung beans) to peppery and intense (radish and broccoli). There is no soil to buffer moisture, which means proper drainage IS the skill. Get the angle of the jar wrong by 10 degrees and the batch rots. Get it right and the sprouts come out dry and perfect. More about that in the jar method below.
For an apartment grower, soil-free is what makes a year-round fresh-greens habit possible. Through a Swedish winter, when the balcony beds are frozen and the windowsill is too dark for herbs, three or four jars on the counter are the only fresh “garden” the kitchen has. They take up roughly the same space as a coffee maker.
As an Amazon Associate I earn from qualifying purchases.Method 1: The Mason Jar (The All-Rounder)
The mason jar method is the entry point I would pick for almost any soil-free sprout — alfalfa, broccoli, radish, lentils, clover, fenugreek all do well in a jar. The mesh lid handles gas exchange (CO2 out, oxygen in) while holding enough moisture for germination, and the transparent glass lets you watch the whole process from soak to harvest. A standard quart (32oz) wide-mouth jar gives a tablespoon or two of seed enough room to expand to fill the jar. I use a stainless-steel sprouting lid on a wide-mouth quart jar, with the jar propped at an angle in a cereal bowl for drainage — total equipment cost around $10-15.
How to Do It:
- Soak: 8-12 hours in the jar.
- Drain: Pour water out through the lid.
- Invert: Leave the jar upside down at an angle.
- Rinse: Twice a day.
Pros: Cheap, clean, easy to observe.
Cons: Seeds can clump; poor drainage can lead to rot.
Method 2: The Colander (The Heavyweights)
The colander method is the right call for large beans — mung beans, chickpeas, peas, soybeans, and bulk lentil batches — that generate substantial metabolic heat as they germinate. When packed into enclosed jars, the center of a large seed mass heats up to the point of fermentation and rot rather than healthy sprouting. The colander provides 360-degree airflow through the mesh or tea-towel lining, dissipating that heat while keeping the seeds moist. This method takes more counter space than jars but handles much larger batches; rinse three times a day for the best results.
How to Do It:
- Soak: 12 hours in a big bowl.
- Transfer: Move beans to a colander lined with a wet tea towel.
- Cover: Place another wet towel on top to keep moisture in.
- Rinse: Run water through the towel/colander 3 times a day.
Pros: Excellent airflow, grows massive quantities.
Cons: Takes up more counter space; requires more frequent rinsing in dry climates.
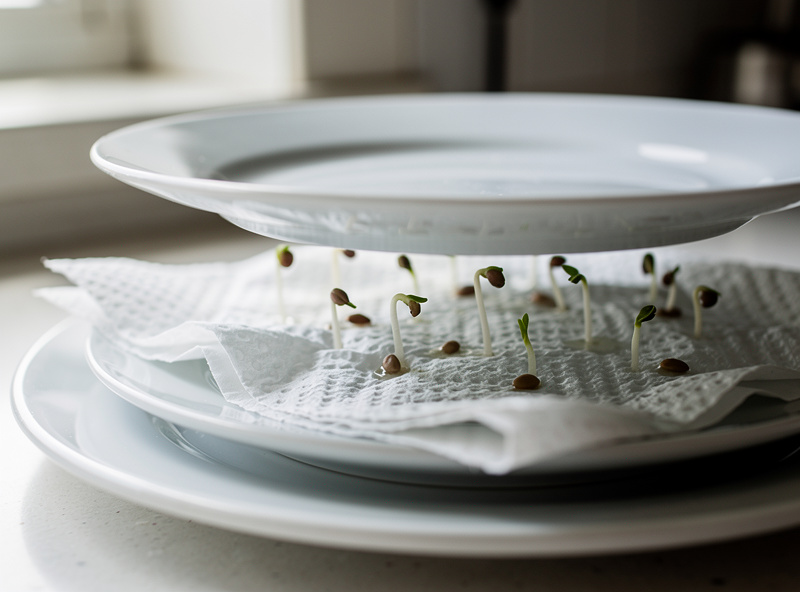
Method 3: The Paper Towel / Plate (The Gel-Formers)
The paper towel method solves the unique challenge of mucilaginous seeds — chia, flax, arugula, cress, and basil — that develop an impermeable gel coat when wet. These seeds suffocate in enclosed jars, forming a solid slime brick that blocks oxygen exchange. The open-surface technique uses folded paper towels or unglazed clay saucers on plates, allowing seeds to absorb moisture from below while breathing from above. This is the only method I have ever gotten to work reliably for chia and flax, and it produces 1-2 inch microgreen shoots within 7-10 days with twice-daily misting.
How to Do It:
- The Base: Place a folded paper towel (or unglazed clay saucer) on a plate.
- Wet it: Saturate the towel but pour off excess standing water.
- Sprinkle: Spread dry seeds evenly on the damp towel. Do NOT soak them first.
- Mist: Spray them with water.
- Cover: Invert a bowl over them for 2 days to keep humidity up.
- Grow: Once they sprout, remove the bowl. Keep the towel damp by pouring water into the corner of the plate.
Harvest: Snip them off with scissors. You cannot eat the root because it is stuck to the paper.
Storage and Shelf Life Tips
Proper storage is the difference between sprouts that hold for a week and sprouts that go slimy in two days. Different sprouting methods may require slightly different storage approaches, but the core principles remain the same: dry them well, pack them loosely, refrigerate, and check daily.
After harvesting, rinse your sprouts thoroughly in cold water to remove any seed hulls and loose material. Allow them to dry completely before storage—excess moisture dramatically shortens shelf life. You can use a salad spinner for jar and colander-grown sprouts, or gently blot paper towel sprouts with additional paper towels.
Store dry sprouts in an airtight container lined with paper towels. The paper absorbs residual moisture and helps prevent the development of slimy textures. Keep the container in the refrigerator at 35-40 degrees Fahrenheit. Most sprouts will remain fresh for 5-7 days under proper conditions.
For mucilaginous sprouts like chia and flax grown on paper towels, harvest only what you need and leave the rest growing. These sprouts do not store as well once cut, so it is better to snip them fresh as needed. If you must store them, place in a loosely covered container and consume within 2-3 days.
Check stored sprouts daily and remove any that show signs of spoilage—sliminess, brown discoloration, or off odors. One spoiled sprout can quickly affect the entire batch. Do not freeze sprouts, as the ice crystals rupture cell walls and result in mushy, unappetizing texture upon thawing.
Water Quality: Chlorine vs. Chloramine
Water chemistry affects germination more than people expect, and the chlorine vs. chloramine distinction is the one that matters. Chlorine, the older disinfectant, evaporates from tap water within 24 hours of exposure to air — fill a pitcher, leave it open overnight, and the water is fine for sprouting. Chloramine, used by an increasing number of municipal water utilities, is more stable and does not off-gas the same way. It is generally safe for sprouts, but if you struggle with germination on sensitive seeds (alfalfa, broccoli) and your city uses chloramine, try filtering the water or buying a jug of spring water for the rinse cycle.
- Chlorine: Most municipal tap water has chlorine. It can inhibit sensitive seeds. If you let water sit in an open pitcher for 24 hours, the chlorine evaporates.
- Chloramine: Many cities now use chloramine, which does not evaporate. It is generally safe for sprouts, but if you struggle with germination, try using filtered water.
Troubleshooting Common Problems
Soil-free sprouting failures usually trace back to one of five things: water quality problems (chloramine inhibition), temperature extremes (above 75°F or below 60°F), inadequate drainage (standing water causing rot), seed quality degradation (age over 2-3 years), or premature light exposure (causing bitterness). The three-method system — jars, colanders, and paper towels — each has its own failure modes, but most problems resolve through systematic adjustments to water source, rinse frequency, drainage angle, and temperature rather than equipment changes.
A Quick Word on Sprout Safety
Soil-free does not mean risk-free. The warm, wet conditions inside any sprouting vessel suit Salmonella and E. coli as much as they suit the seed, which is why every public-health agency that comments on sprouts is conservative about them. The home-grower version of the official guidance: source seed sold specifically for sprouting (it is grown, harvested, and handled to a higher standard than field seed or food-grade seed), rinse in clean cold running water at every step, drain thoroughly, refrigerate the finished sprouts, and discard any batch that smells off. People who are pregnant, elderly, very young, or immunocompromised should cook sprouts rather than eat them raw. The FDA Sprout Safety Alliance publishes the full industry-side guidance, and our own sprouting safety tips page has the short version for home growers.
- Seeds are not germinating.
- Check seed freshness—older seeds have lower germination rates. Ensure proper soaking times (too short prevents adequate hydration, too long can drown seeds). Verify your water temperature is appropriate—most seeds germinate best at 65-75 degrees Fahrenheit.
- Sprouts smell sour or rotten.
- This indicates bacterial growth from inadequate drainage, insufficient rinsing, or contamination. Discard the batch immediately. Sanitize all equipment with boiling water before starting again. Increase rinse frequency and ensure complete drainage.
- Mucilaginous seeds are not sprouting on paper towels.
- These seeds require consistent moisture without standing water. Mist them 2-3 times daily rather than pouring water. Ensure the inverted bowl is creating adequate humidity during the first 48 hours. The paper towel should be damp but never waterlogged.
- Large beans are rotting in the center of the mass.
- This is heat damage from inadequate ventilation. Switch to the colander method for large bean batches. Spread beans in thinner layers and increase rinse frequency to 3-4 times daily. Cold water rinses help dissipate metabolic heat.
- Sprouts are growing mold.
- True mold (fuzzy, colored, persistent when wet) indicates contamination. Discard the batch and sanitize all equipment. Start with fresh, high-quality sprouting seeds from a reputable source. Ensure adequate air circulation—stagnant air promotes mold growth.
- Sprouts taste bitter.
- Bitterness often results from too much light exposure during early growth or harvesting too late. Keep sprouts in darkness for the first 2-3 days, then provide indirect light only. Harvest promptly when leaves are fully developed.
What’s the easiest way to sprout without soil?
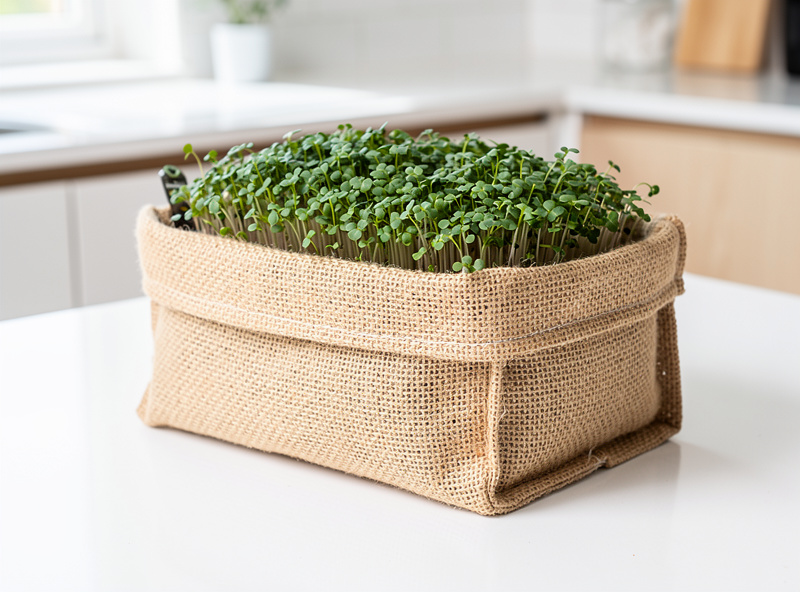
Mason jar sprouting is the simplest soil-free method. Just soak seeds, drain, and rinse twice daily. Other options include sprouting trays with drainage holes, hemp bags, and stackable sprouters—all work without soil.
Do sprouts need soil to grow?
No, sprouts don’t need soil at all. They grow using the energy stored in the seed itself. Water, air circulation, and proper drainage are all that’s required. This makes sprouting perfect for apartments and kitchens.
What’s the difference between sprouts and microgreens without soil?
Sprouts grow entirely without growing medium and are eaten whole (root, seed, and shoot). Soil-free microgreens use hydroponic mats or hemp pads—you harvest just the stems and leaves. Microgreens need light; sprouts don’t.
Can I sprout seeds on paper towels?
Yes, paper towel sprouting works for larger seeds like mung beans and lentils. Dampen the towels, spread seeds in a single layer, cover loosely, and mist daily. Transfer to jars once tails emerge for easier rinsing.
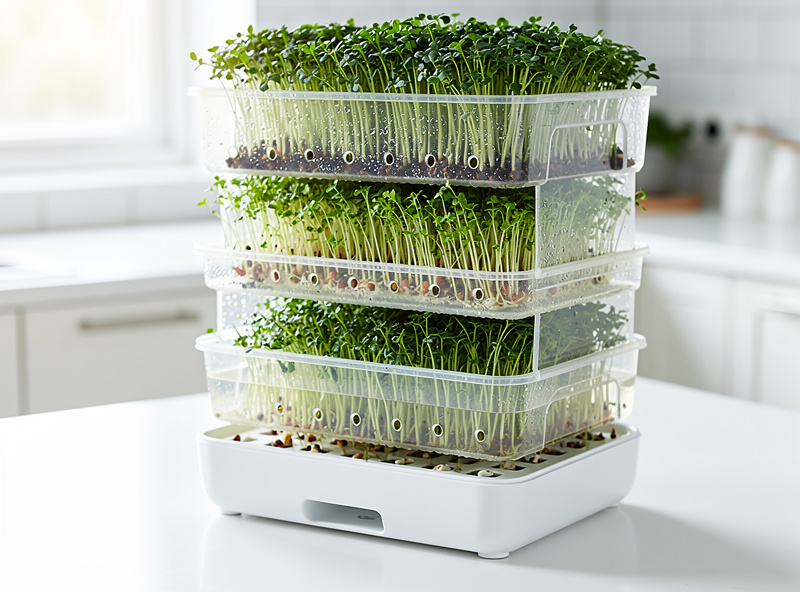
What grows best in sprouting trays without soil?
Sprouting trays work best for alfalfa, broccoli, radish, and mix varieties. The horizontal surface allows even airflow and drainage. Avoid large seeds like chickpeas—they do better in jars with more vertical space.
How do soil-free sprouts differ in flavor from soil-grown?
Soil-free sprouts are eaten whole — root, seed, and shoot together — which gives them a more concentrated flavor than soil-grown microgreens (where you harvest only the stems and leaves above the soil line). The flavor is sharper, more seed-forward, and usually spicier. Microgreens are milder and leafier.
How do I clean sprouting equipment without soil?
Clean all equipment after each batch with hot soapy water, then sanitize with a 10% white vinegar solution. Air dry completely. Mason jars can go in the dishwasher. Trays and hemp bags should air dry fully before storage.