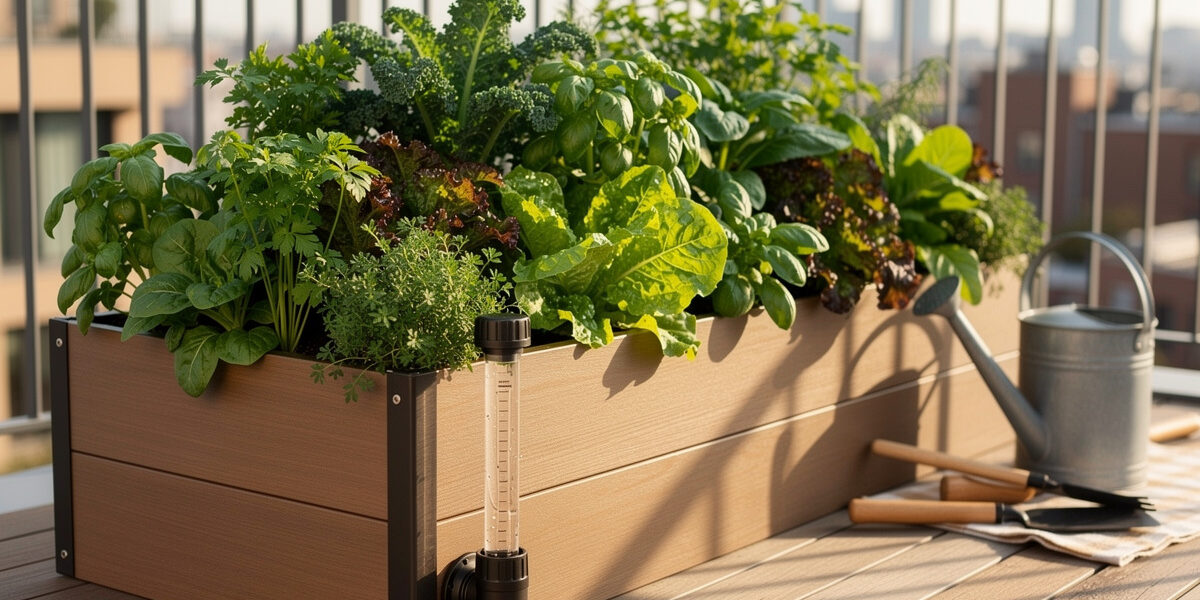
A wicking bed is a raised bed or container with a sealed water reservoir built into the bottom; soil draws moisture upward by capillary action, so plants water themselves from below and you refill a pipe every one to two weeks instead of daily. On my balcony a DIY wicking bed cut my high-summer watering from every day to roughly twice a week.
The principle is the same one that makes a paper towel pull a spill uphill: water climbs through the fine pores of damp soil against gravity, a process called wicking or capillary rise. Build a reservoir under the root zone, separate the two with a barrier that still lets water climb, and the bed self-irrigates from the bottom up. That suits a Nordic apartment grower perfectly — even moisture, no runoff off the balcony edge, and a setup you can leave for a week in July. Here is exactly how I build mine, the materials that matter, the depths that make or break it, and the winter step the warm-climate guides never mention.
Disclosure: CityRooted is reader-supported. As an Amazon Associate I earn from qualifying purchases made through links in this article, at no extra cost to you. I only point to gear I actually use or would buy for my own garden.
How a Wicking Bed Works
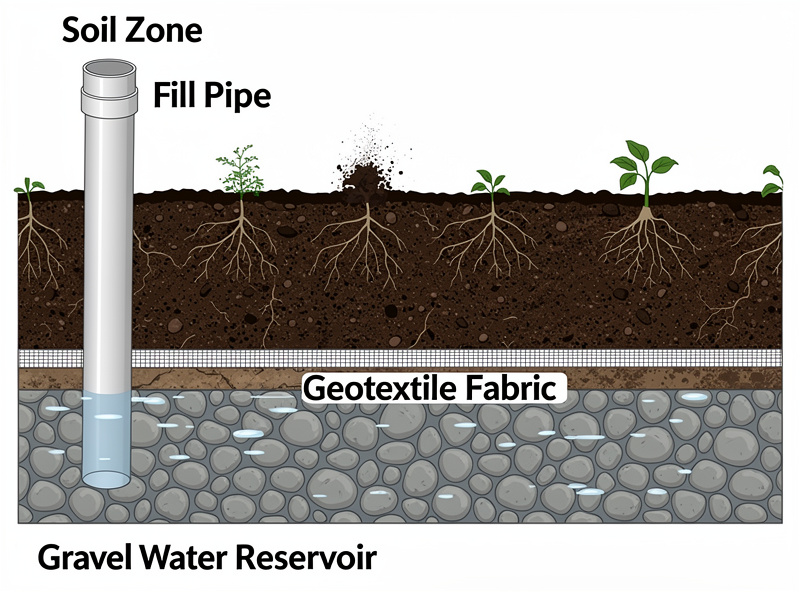
A wicking bed has two zones: a sealed reservoir at the bottom holding water in a gravel or coarse layer, and a soil zone above it. Capillary action pulls water up from the reservoir into the soil, keeping the root zone evenly damp. An overflow outlet at the top of the reservoir stops the soil from ever going waterlogged.
The genius of it is that the plant controls the draw. As roots take up water and the soil dries, capillary tension pulls more moisture up from the reservoir; when the soil is already moist, wicking slows. It is the same demand-driven behaviour that makes a buried olla clay pot so forgiving, just scaled to a whole bed. Because the water sits below the surface, almost none is lost to evaporation, and because it rises from underneath, the surface stays drier and weeds struggle. To see how this stacks up against drip, soaker, and overhead watering, my complete garden watering guide compares every method side by side.
Materials You Need
A DIY wicking bed needs five things: a waterproof container or liner, a reservoir fill material, a wicking barrier, a fill pipe, and an overflow outlet. Total cost for a balcony-sized bed runs well under what a season of bagged compost costs, and most of it lasts years.
For the waterproof shell I use a sturdy tub, a lined timber box, or a fabric-free raised bed sealed with a food-safe pond liner. The reservoir is filled with washed gravel or scoria, topped with a layer of geotextile landscape fabric to stop soil washing down into the stones while still letting water wick up. A vertical perforated pipe set into the gravel becomes your fill point, and a single hole or pipe at the top of the reservoir height is the overflow. If you would rather not build from scratch, a ready reservoir planter does the same job — I cover that route in my DIY self-watering planter with 3D-printed inserts.
Reservoir Depth and Soil Depth That Actually Wick
The numbers matter more than anything else in a wicking bed. Capillary rise in typical container soil only reaches about 30 cm reliably, so keep the soil above the reservoir to 25–30 cm maximum. A reservoir 10–15 cm deep gives a good water buffer without making the bed too heavy or too deep to wick.
The table below shows the layer stack I use and why each depth is chosen. Get the soil-to-reservoir ratio wrong and you either drown the roots or the water never reaches them.
| Layer (bottom to top) | Depth | Material | Job | Common mistake |
|---|---|---|---|---|
| Liner / shell | — | Pond liner or sealed tub | Holds water, no leaks | Puncturing it with gravel |
| Reservoir | 10–15 cm | Washed gravel / scoria | Stores water, lets it move | Using fine sand that clogs |
| Overflow outlet | at reservoir top | Hole or short pipe | Caps water level, drains excess | Setting it too high |
| Wicking barrier | 1 layer | Geotextile fabric | Separates soil from gravel | Using solid plastic, blocks wicking |
| Soil zone | 25–30 cm | Light container mix | Root zone, wicks moisture up | Soil deeper than 30 cm dries on top |
| Mulch | 2–3 cm | Bark or straw | Cuts surface evaporation | Skipping it on a windy balcony |
Building It Step by Step
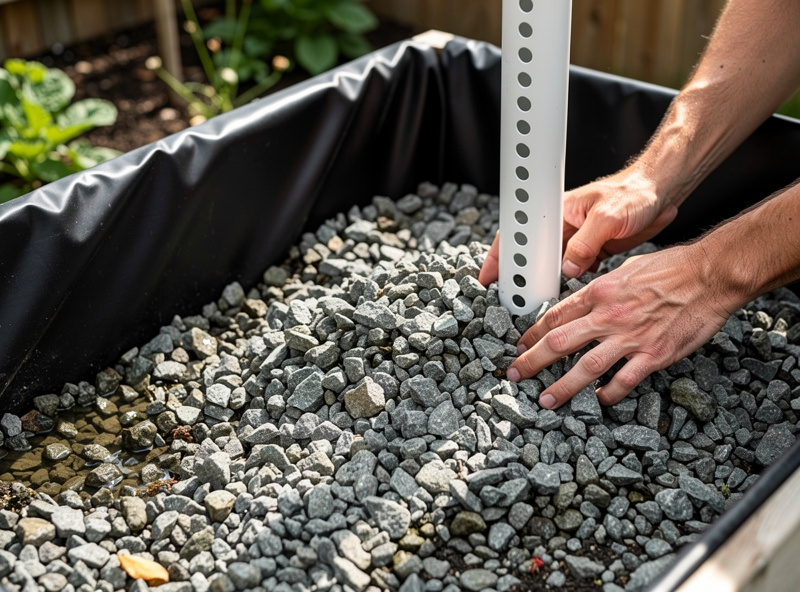
The build is an afternoon’s work. Line the container, lay the reservoir gravel, set the vertical fill pipe and drill the overflow hole at the top of the gravel layer, cover the gravel with geotextile, then fill with a light container mix to within a few centimetres of the rim and plant.
A few details make the difference between a bed that wicks and one that just sits wet. Use a light, open container mix, not heavy garden soil — dense soil compacts and stops wicking. Keep the soil column at or under 30 cm so moisture reaches the surface. Set the overflow precisely at the top of the gravel so the soil base never sits submerged, which would rot roots. Fill through the pipe slowly the first time and watch for water at the overflow — that is your “full” signal. After that, a soil moisture meter in the root zone tells you when the wick is keeping up. For the structural choices on the box itself, my raised beds and planters guide covers depth, material, and balcony weight limits.
Weight: The Balcony Constraint Nobody Mentions
A full wicking bed is heavy. Water alone adds about 1 kg per litre, so a 15 cm reservoir under a one-square-metre bed holds well over 100 litres — more than 100 kg of water on top of soil and gravel. On a balcony that is a real structural number you cannot ignore.
This is the part US homesteader builds skip entirely, because they sit their wicking beds on the ground. On a balcony I keep beds smaller, position them over a load-bearing edge near the wall rather than out at the unsupported rail, and use lightweight scoria instead of dense gravel to shave weight. If your balcony cannot take a full wicking bed, a cluster of smaller reservoir containers spreads the load and gives you the same self-watering benefit. The whole logic of working within container weight and depth limits runs through my complete container gardening guide.
Winterising a Wicking Bed Up North
In a cold climate, drain the reservoir before the first hard freeze. A sealed reservoir full of water becomes a block of ice that expands, and that pressure can split a liner, crack a rigid tub, or push a timber box apart at the seams. Pull the overflow plug or siphon the pipe dry in late autumn.
I drain mine when I shut the balcony beds down for winter, leave the soil to freeze dry, and recharge the reservoir in spring once the hard frosts pass. An empty reservoir tolerates a Nordic winter fine; a full one is asking to be replaced. Through the growing season, the wicking bed pairs naturally with the stage-based plan in my vegetable garden watering schedule — you are still matching water to growth stage, just topping a reservoir instead of standing there with a can.

Frequently Asked Questions
How does a wicking bed water plants?
A wicking bed has a sealed water reservoir at the bottom and soil above it. Capillary action pulls water up from the reservoir into the root zone, keeping soil evenly damp. An overflow outlet at the reservoir top prevents waterlogging.
How deep should the soil be in a wicking bed?
Keep the soil zone to 25 to 30 cm. Capillary rise in typical container mix only reaches about 30 cm reliably, so deeper soil dries out on top while the base stays wet. A reservoir 10 to 15 cm deep gives a good water buffer.
How often do you fill a wicking bed?
Most wicking beds need refilling every one to two weeks, far less often than hand watering. In a summer heatwave it may be every few days; in cool weather a single fill can last well over two weeks. Refill through the pipe until water shows at the overflow.
What goes between the gravel and soil in a wicking bed?
A single layer of permeable geotextile landscape fabric. It stops soil washing down into the gravel reservoir while still letting water wick upward. Never use solid plastic between the layers, as it blocks the capillary rise that makes the bed work.
Can you build a wicking bed on a balcony?
Yes, but watch the weight. Water adds about 1 kg per litre, so a full reservoir can exceed 100 kg per square metre. Keep beds small, place them near a load-bearing wall, and use lightweight scoria instead of dense gravel to reduce load.
Do wicking beds need winterising in cold climates?
Yes. Drain the reservoir before the first hard freeze. Trapped water turns to ice and expands, which can split the liner or crack a rigid container. Pull the overflow plug or siphon the fill pipe dry in autumn and recharge in spring.