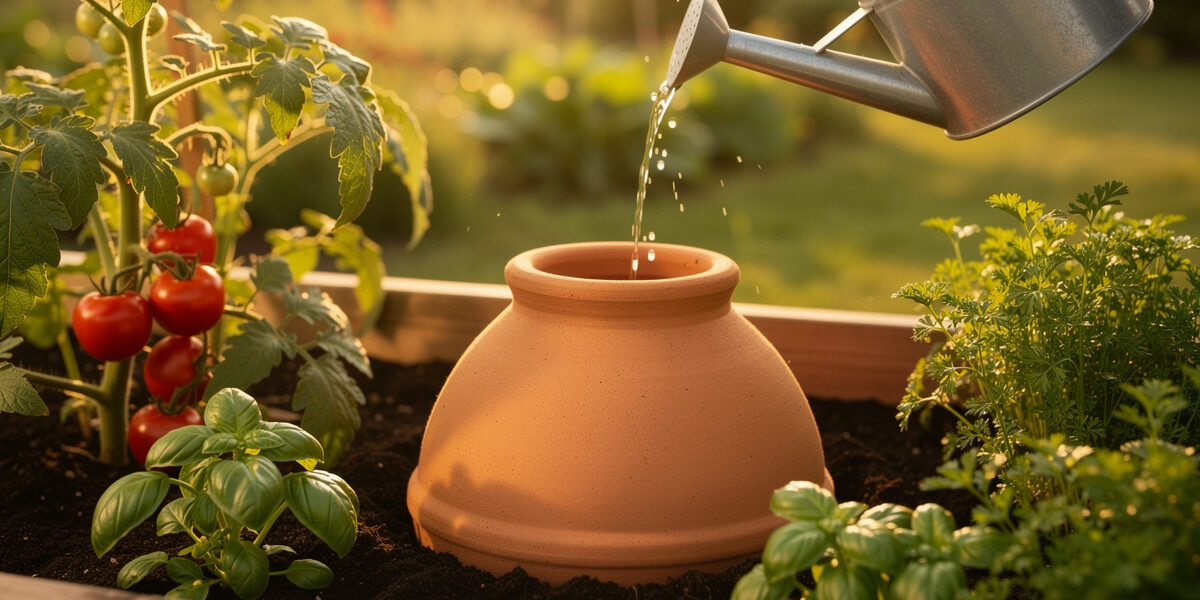
An olla is an unglazed clay pot you bury to the neck and keep filled with water; the porous terracotta seeps moisture straight into the root zone on demand, cutting watering frequency by roughly 50–70% and watering loss to near zero. I run several across my balcony containers and raised beds, and they are the most genuinely hands-off low-tech irrigation I have tested in a Nordic season.
The word olla (pronounced “oya”) is just Spanish for pot, and the method is ancient — buried unglazed vessels have watered crops for thousands of years across North Africa and the Americas. What makes it relevant to an apartment grower like me is that it solves the exact problem balconies have: thirsty containers in wind and sun that dry out faster than anything in the ground. Below is how ollas actually work, where they shine and where they fail, how to size and space them, and the cold-climate gotcha nobody writing from California will warn you about.
Disclosure: CityRooted is reader-supported. As an Amazon Associate I earn from qualifying purchases made through links in this article, at no extra cost to you. I only point to gear I actually use or would buy for my own garden.
How Olla Irrigation Actually Works
An olla works by soil moisture tension, not gravity. Unglazed terracotta is microporous, so water seeps out only when the surrounding soil is drier than the clay; as roots drink and the soil dries, it pulls more water through the wall. When the soil is already moist, the seepage nearly stops. It is self-regulating, which is why it almost never overwaters.
That demand-driven behaviour is the whole magic. A drip emitter dumps the same volume whether the soil needs it or not, but an olla matches delivery to what the plant is actually using. Roots sense the damp zone around the buried pot and grow toward it, wrapping the clay in a fine root mat within a few weeks. You fill the neck, cap it to stop evaporation and mosquitoes, and top it up every few days. For anyone who wants to understand where this sits among all the watering options, my complete garden watering guide compares it head-to-head with drip, soaker, and self-watering systems.
Why I Use Ollas in Small Spaces
For containers and balcony beds, ollas hit a sweet spot drip systems miss: no pump, no power, no timer, no tubing to trip over, and no water sprayed where it evaporates. A buried olla delivers water below the surface where it cannot evaporate and weeds cannot reach it, which is why claimed water savings of 50–70% over surface watering are believable.
The practical wins stack up fast on a balcony. I can leave for a long weekend and a well-sized olla keeps a pepper or tomato evenly supplied, which is exactly the steadiness that prevents blossom-end rot and splitting. There is nothing to clog the way fine drip emitters clog with hard water up here. And the look is calm and tidy — a clay neck and a stone cap rather than a web of black tubing. The one rig that beats it for total walk-away time is a reservoir planter, and I cover that route in my DIY self-watering planter build with 3D-printed inserts.
Sizing and Spacing Ollas
Olla coverage radius roughly equals the buried pot’s diameter. A 1–2 litre olla waters a circle about 30 cm across — right for a single container or a tight cluster of herbs — while a 4–6 litre olla covers 45–60 cm, enough for a group of vegetables in a raised bed. Plant within that radius and roots will find the water.
The table below is the sizing grid I work from. Match olla volume to the container or bed, and remember that in high summer even a correctly sized olla may need topping up every two to three days rather than weekly.
| Olla size | Wetting radius | Best for | Typical refill interval (summer) | Plants per olla |
|---|---|---|---|---|
| 0.5–1 L | ~20 cm | Single pot, herbs | 2–3 days | 1–2 small plants |
| 1–2 L | ~30 cm | Large container, salad bowl | 3–4 days | 2–4 plants |
| 4 L | ~45 cm | Raised bed cluster | 3–5 days | 4–6 plants |
| 6–8 L | ~55–60 cm | Large raised bed section | 4–7 days | 6–9 plants |
| DIY (2 stacked pots) | ~30–40 cm | Budget container setup | 2–4 days | 2–5 plants |
Making a DIY Olla From Terracotta Pots
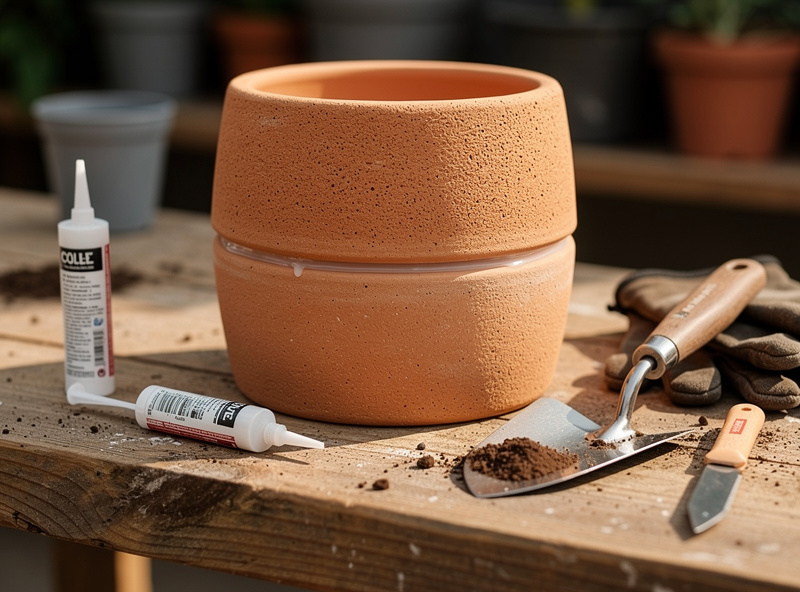
You do not need to buy a purpose-made vessel. The classic DIY olla is two unglazed terracotta pots glued rim to rim with the drainage hole of the top pot plugged: it gives you a sealed buried reservoir for the price of two cheap pots and a tube of silicone. I have made several and they perform within a hair of bought ollas.
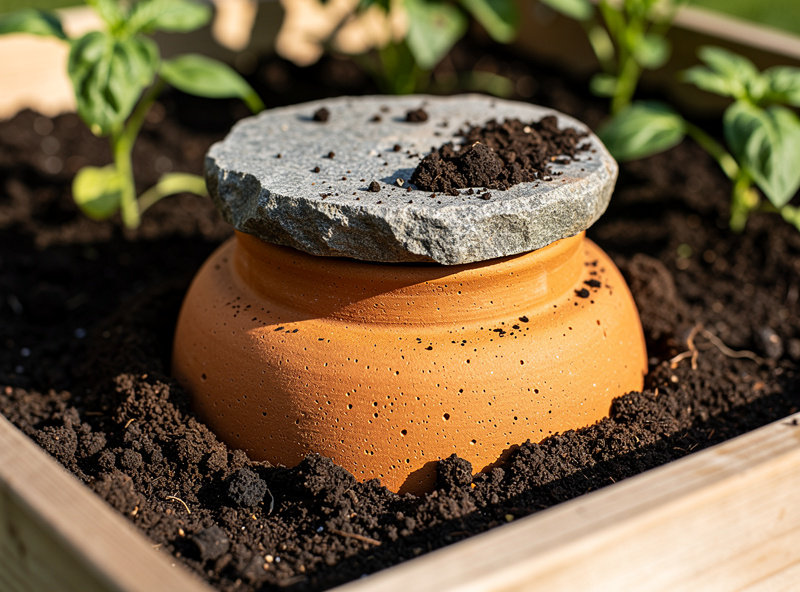
To build one, take two matching unglazed terracotta pots, seal the drainage hole of one with a cork or waterproof silicone, run a bead of food-safe silicone around one rim, press the pots together rim to rim, and let it cure. Bury the assembly to the seam, leaving the upper drainage hole exposed as your fill port, and cap it with a flat stone. The only hard rule is the clay must be unglazed — glaze seals the pores and the whole thing stops working. If you would rather skip the build, ready-made olla watering pots come shaped and capped.
Installing and Planting Around an Olla
Install the olla first, plant around it second. Bury the pot so only the neck and cap sit above soil, fill it with water, then set seedlings or sow within the wetting radius so young roots grow straight toward the moisture. Disturbing an established bed to add an olla later tears roots, so plan it in from the start.
Keep the olla filled from day one even before roots reach it — the damp halo is what draws them in. Always cap the neck: an open olla loses water to evaporation and becomes a mosquito nursery, neither of which you want. Check the water level with a finger or a dipstick every couple of days at first until you learn the refill rhythm for your plants and weather; a soil moisture meter pushed into the bed near the pot confirms the water is actually reaching the root zone rather than the clay sealing up with mineral scale.
The Cold-Climate Catch: Frost and Clay
Here is the warning the warm-climate guides skip: a buried olla full of water will crack when it freezes, because water expands as it turns to ice and unglazed terracotta has no give. In a Nordic garden you must empty and lift your ollas before the first hard frost, every single year, or you replace them every spring.
My routine is to drain and pull the ollas when I clear the balcony beds in autumn, dry them out, and store them frost-free in the cellar over winter. This is the same reason terracotta pots shatter outdoors up north — it is not the cold itself but the freeze-thaw cycle on water trapped in the porous wall. Ollas are a summer tool here, paired with the season. For the rest of the year my watering shifts to the indoor setups and, when the season turns again, back to the schedule I lay out in my vegetable garden watering schedule. If you want a fully plumbed alternative for the balcony, the Gardena balcony watering system handles freezing differently because you drain the lines, not lift buried pots.

Frequently Asked Questions
How does an olla water plants?
An olla is a buried unglazed clay pot kept full of water. The porous terracotta seeps moisture into the soil only when the surrounding soil is drier than the clay, so delivery matches what roots actually use. It is self-regulating and rarely overwaters.
How often do you refill an olla?
In summer most ollas need topping up every two to five days depending on size, heat, and how many plants draw on them. A 1 to 2 litre olla in hot weather may need refilling every three days; larger 6 litre ollas can go a week.
How many plants can one olla water?
Coverage roughly equals the buried pot’s diameter. A 1 to 2 litre olla waters a 30 cm circle and 2 to 4 plants; a 4 litre olla covers about 45 cm and 4 to 6 plants. Plant within the wetting radius so roots reach the moisture.
Can I make a DIY olla from terracotta pots?
Yes. Glue two matching unglazed terracotta pots rim to rim with food-safe silicone and plug the top drainage hole, leaving it as a fill port. The clay must be unglazed; glaze seals the pores and stops the seepage that makes an olla work.
Do ollas crack in winter?
Yes, if left buried and full. Water expands as it freezes and cracks the porous terracotta. In cold climates, drain and lift your ollas before the first hard frost and store them frost-free over winter, then reinstall in spring.
Are ollas better than drip irrigation?
For small spaces, ollas need no pump, power, timer, or tubing and almost never overwater because they deliver on demand. Drip covers larger areas and longer rows more easily. Many growers use ollas for containers and beds, drip for bigger plantings.