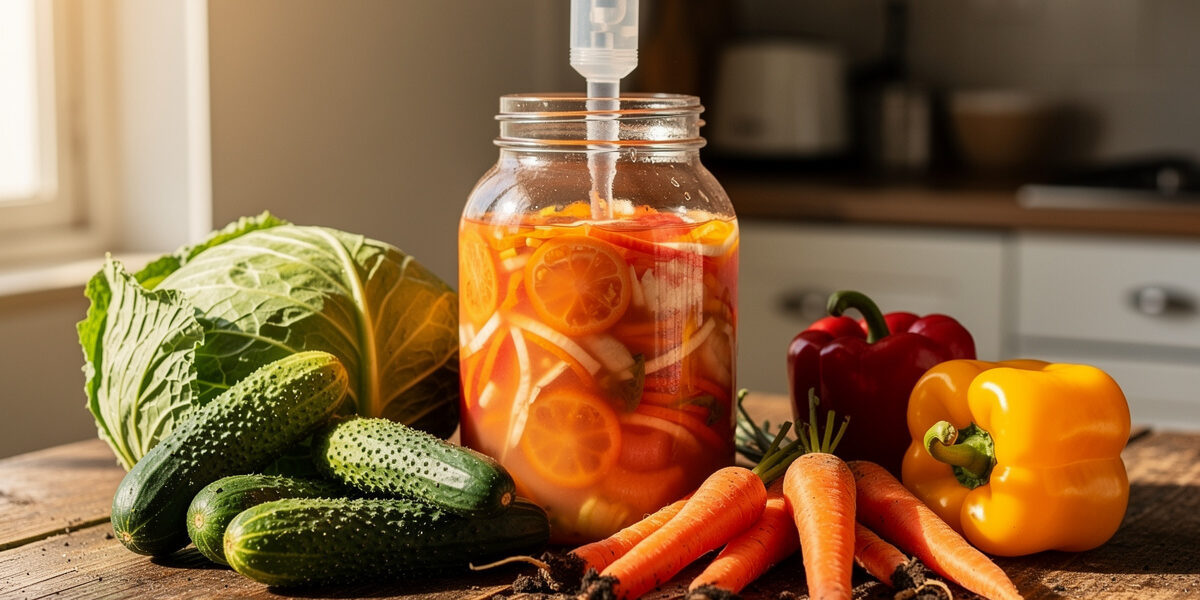
Fermenting your garden surplus is the simplest way to turn a glut of cucumbers, cabbage, or peppers into shelf-stable food that lasts 6–12 months without freezing or canning. A basic lacto-fermentation setup costs under $20 — a jar, salt, and vegetables — and produces live-culture ferments within 3–10 days.
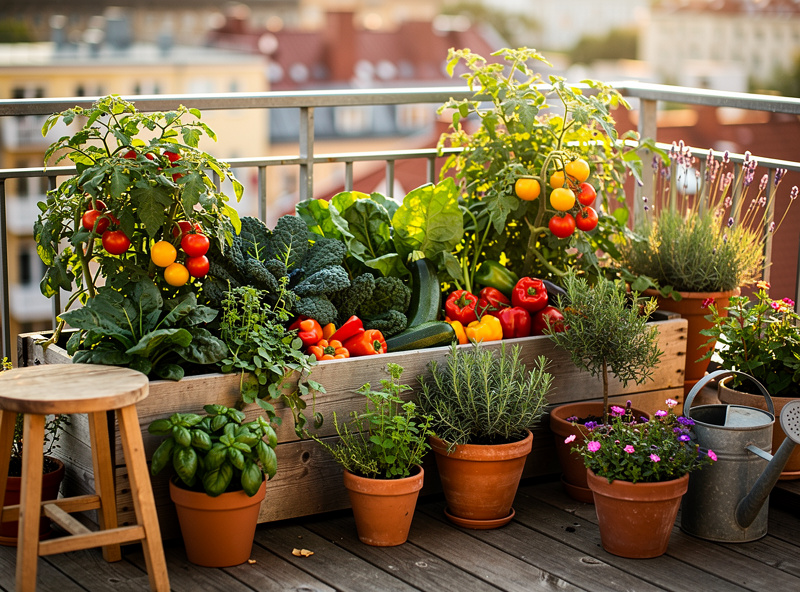
I have been on both sides of this equation. In a good season, the raised bed produces more cabbage than two people can eat fresh, and the balcony containers spit out peppers faster than I can cook them. In Sweden, the growing window is short — late May to early September — and the harvest all arrives at once. Freezing works for some things, but cabbage, cucumbers, and root vegetables lose their texture. Fermentation solves the storage problem and adds something freezing never will: complexity and live cultures that change every week the jar sits in the fridge.
As an Amazon Associate I earn from qualifying purchases.
What I am describing here is the garden-to-crock pipeline. You grow it, you harvest it, you salt it, you wait. The fermentation itself is not the deep topic here — lacto-fermentation covers the full chemistry and process on fermentfoundry.com, where the starter maintenance, salt-percentage-by-weight math, and mold-vs-kahm identification are covered in detail. What this article focuses on is the garden side: which surplus crops ferment best, how to time your harvest for fermentation quality, and what the numbers look like when you match what a small garden actually produces to what a crock actually needs.
Which Garden Vegetables Ferment Best
Not everything from the garden ferments well. The plants that work are the ones with enough natural sugar to feed lactic acid bacteria and enough structure to survive weeks in brine without turning to mush. Cabbage, cucumbers, peppers, carrots, green beans, beets, radishes, and garlic are the reliable performers that produce consistent results from garden-to-crock. Leafy greens like lettuce, spinach, and chard break down too fast — they wilt into slime within 48 hours of salting and produce off-flavors that even a heavy spice load cannot mask. Summer squash and zucchini are borderline: thin slices hold for about 5 days before softening past the point of pleasant texture, so they are best as a small component of a mixed ferment rather than the main ingredient.
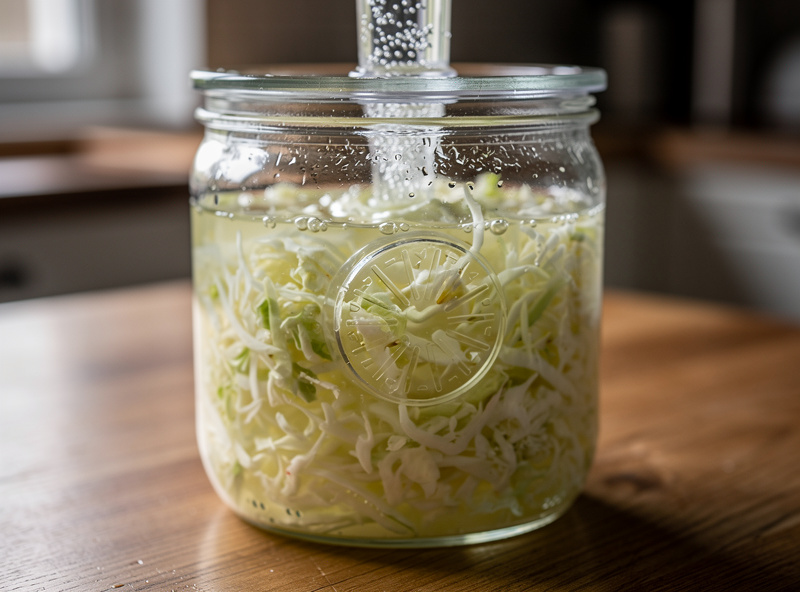
In my setup, the vegetables that actually get fermented each year are the ones that produce a surplus. A balcony with four tomato plants gives me more than I can eat fresh in August, but tomatoes do not lacto-ferment well — they go into sauce. The raised bed cabbage, on the other hand, is the star. One well-grown Danish Ballhead or Brunswick cabbage weighs 4–6 pounds (1.8–2.7 kg), which fills a 3-liter fermentation crock by itself. The cabbage that fills the raised bed is the cabbage that ends up in the sauerkraut crock — that single plant bridges two hobbies most people keep in separate mental boxes. Three cabbages from a small raised bed can produce 15–20 quart jars of sauerkraut, which is a year’s supply for two people eating it twice a week.
Timing the Harvest for Fermentation Quality
Fermentation vegetables should be harvested at peak maturity, not overripe. A cabbage that has begun to split or a cucumber that has yellowed is already losing the sugar content that lactic acid bacteria need. The 48-hour window matters: vegetables fermented within a day or two of harvest hold noticeably more of the natural sugar that feeds fermentation than ones that have sat in the fridge for a week, and the difference shows in both fermentation speed and final acidity. I plan my harvest around the crock, not the other way around — if the cabbage is ready but the crock is full from last week’s batch, I either start a second crock or give the surplus away, because waiting a week for the crock to free up means fermenting tired vegetables.
The soil and compost health matters here too, though indirectly. Vegetables grown in well-fed soil with consistent moisture develop denser structure and higher sugar content than stressed plants. A cabbage that survived a dry spell and then got a heavy watering will be watery and low-sugar — fine for coleslaw, disappointing for sauerkraut. I learned this the hard way with a batch of cucumbers that went through a heat wave the week before harvest: the brine went cloudy fast, the pickles softened within 5 days, and the flavor was dull and vegetal instead of bright and sour.
The Salt Math That Makes It Safe
Lacto-fermentation safety comes down to one number: salt percentage by weight. Not by volume, not by taste, not by eye. For sauerkraut, 2–2.5% salt by weight of the shredded cabbage keeps the right bacteria happy while suppressing the wrong ones. For cucumber pickles, 3.5–5% brine concentration keeps them crunchy. For hot sauce pepper mashes, 3–5% prevents mold during the 2–4 week ferment. These ranges line up with the safety windows that the USDA National Center for Home Food Preservation (NCHFP) fermenting guidance publishes for home producers — below 2% you lose pathogen suppression, above 5% you stall lactic acid bacteria. I weigh on an Escali Primo P115 (about $25) — reads to 1 g, tares cleanly, and the flat platform handles a 4-pound cabbage without tipping. The bargain $9 scales from the supermarket drift by 5 g between batches and that drift compounds at the 2.5% margin where home ferments live.
Here is the practical math for the garden quantities most home growers actually produce:
| Garden Harvest | Typical Weight | Salt at 2.5% | Approximate Yield |
|---|---|---|---|
| 1 medium cabbage | 4 lbs (1.8 kg) | 1.6 oz (45 g) | 2 quart jars sauerkraut |
| 10 pickling cucumbers | 2 lbs (0.9 kg) | 0.8 oz (22 g) | 1 quart jar pickles |
| 1 lb hot peppers | 1 lb (0.45 kg) | 0.5 oz (14 g) | 1 pint fermented hot sauce |
| 2 lbs carrots | 2 lbs (0.9 kg) | 0.8 oz (22 g) | 1 quart jar carrot sticks |
| 3 lbs green beans | 3 lbs (1.4 kg) | 1.2 oz (34 g) | 1.5 quarts dilly beans |
The salt percentage changes by vegetable type. Firmer vegetables — carrots, beets, green beans — can handle 2–3% because their structure resists softening. Softer vegetables — cucumbers, zucchini — need 3.5–5% to stay crunchy. The higher salt pulls more water out of the vegetable cells faster, which concentrates the pectin and keeps the texture from collapsing. If a batch of container-grown vegetables comes out soft, try bumping the salt up by half a percent before blaming the vegetable variety.
What Equipment You Actually Need
The equipment barrier for fermentation is lower than most gardeners expect. You do not need a dedicated fermentation crock, though I use one for sauerkraut — a 3 L Polish-style Boleslawiec stoneware crock with a water-seal lip — because the wide mouth makes packing cabbage easier and the water-seal keeps oxygen out without daily attention. A wide-mouth Mason jar with an airlock lid works for everything else — cucumbers, carrots, peppers, mixed vegetable ferments. I run Masontops Pickle Pipe silicone airlocks ($15 for a four-pack) on standard wide-mouth Ball jars. Pickle Pipes never clog like the three-piece plastic airlocks the home-brew shops sell, and they vent CO2 quietly instead of bubbling on the counter all night. Without an airlock, a sealed jar builds CO2 pressure fast enough to crack the glass or spray brine across the kitchen when you open it on day three.
Beyond the vessel, the list is short: a kitchen scale, non-iodized salt (iodine inhibits fermentation bacteria), a knife or mandoline for consistent cuts, and fermentation weights — glass or ceramic discs that keep vegetables submerged below the brine surface. Vegetables that float above the brine develop mold within days because oxygen reaches them. I use Easy Fermenter glass weights (4-pack about $14) that fit standard wide-mouth Ball jars with a finger-loop notch that lets me pull them out one-handed without dipping a utensil into the brine. A small ziplock bag filled with extra brine works as a backup in a pinch.
This is where the garden-to-crock pipeline intersects with the herb garden in a useful way. Fresh dill, garlic scapes, bay leaves, and grape leaves all serve double duty: they add flavor and they contain tannins that help keep fermented vegetables crunchy. I plant extra dill specifically for pickle season — the fronds go into the brine, the seeds go into the seed bank for next year, and anything left over dries for winter cooking.
What Goes Wrong and How to Fix It
Most fermentation failures have the same root cause: oxygen where it should not be. Vegetables exposed above the brine surface grow mold. Jars without airlocks pop open from CO2 pressure and then reseal with a gulp of oxygen-rich air. Fermentation weights that shift let a piece of cabbage drift to the surface where it turns dark and fuzzy within 48 hours. The fix is simple: keep everything submerged and keep the airlock working.
The other common failure is misidentifying kahm yeast as mold and throwing out a perfectly good batch. Kahm yeast forms a thin, white, powdery or wrinkled film on the brine surface that smells yeasty or slightly sour but never rotten. Mold is fuzzy, colored (green, black, pink, or blue), and smells unmistakably off. Kahm yeast is harmless and can be scraped off. Mold means the batch is lost — toss it, sanitize the jar, and start again. The visible-mold rule lines up with Penn State Extension guidance on mold in food: its filaments grow down into soft, high-moisture foods, so scraping the surface does not remove the toxins that may already have spread below it. The difference is visible even to a beginner once you have seen both, but the first time a white film appears on your sauerkraut brine, it is panic-inducing. Scrape a little onto a spoon: if it is flat and white, it is kahm. If it is raised and fuzzy, it is mold.
A third failure point that garden-fermenters hit is chlorinated tap water. Municipal water treated with chlorine or chloramine kills the lactic acid bacteria you are trying to cultivate. If your brine goes cloudy and inactive within the first 24 hours with no visible fermentation activity, the water is the first thing to check. Boil the water and let it cool, or let it sit uncovered overnight to dissipate chlorine. Chloramine requires a campden tablet or filtration — boiling does not remove it. In Sweden, my tap water is clean enough that I use it straight, but when I travel I switch to filtered water for ferments and the difference is measurable in fermentation speed.
Storing the Finished Ferment
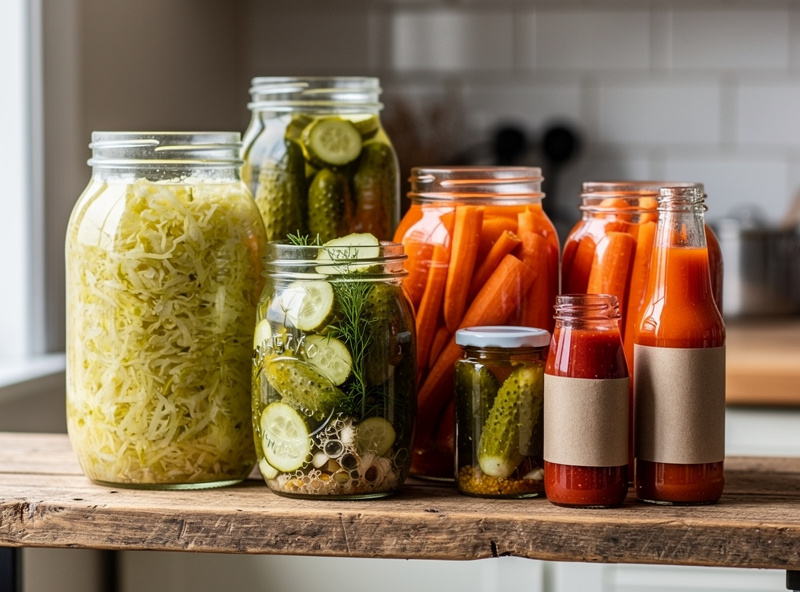
Once the ferment tastes right — usually 5–14 days at room temperature depending on the vegetable and ambient warmth — it moves to the fridge. Cold storage at 35–40°F (2–4°C) slows fermentation nearly to a stop. The flavor still evolves, but over months instead of days. A batch of sauerkraut that tastes sharp and bright at 2 weeks will be deeper and more complex at 3 months, and mellow and yeasty at 6. I keep jars at the back of the fridge and pull them forward as I eat them, which means I am usually eating 2–4 month old ferments that have had time to develop fully.
Home composting closes the loop on the other end of this pipeline: the outer cabbage leaves, cucumber ends, and pepper cores that do not go into the crock go into the compost bin. Even the spent brine has a use — a tablespoon in salad dressing, a splash in soup, or poured onto garden soil as a mild microbial inoculant, though the salt means you should not overdo it in any one spot.
Frequently Asked Questions
Can I ferment vegetables that have been in the fridge for a week?
Yes, but the results are less reliable. Vegetables lose a meaningful share of their natural sugars after a week of refrigeration, which means less food for lactic acid bacteria and a slower, sometimes incomplete fermentation. Use them within 48 hours of harvest for the best texture and acidity.
What is the minimum amount of vegetables needed to start a ferment?
About 1 pound (450 g) of vegetables plus salt fills a quart jar — enough for a test batch. Smaller quantities work in pint jars. The key is keeping the vegetables packed tightly below the brine; a half-empty jar leaves too much headspace for oxygen and mold risk increases.
Do I need special fermentation salt or can I use table salt?
Use non-iodized salt. Iodine in table salt inhibits the lactic acid bacteria that drive fermentation. Kosher salt, sea salt, and pickling salt all work. Do not use salt with anti-caking agents — some contain dextrose, which feeds unwanted bacteria and clouds the brine.
How do I know when the ferment is ready to eat?
Taste it. Sauerkraut is typically ready in 5–14 days, cucumber pickles in 4–10 days, hot sauce pepper mashes in 14–28 days. The flavor shifts from salty-raw to sour-complex. When it tastes good to you, move it to the fridge — there is no single correct endpoint.
Can I ferment frozen vegetables from last season?
No. Freezing ruptures cell walls and the thawed vegetables turn to mush in brine within 24 hours. Fermentation requires live, intact plant tissue. If you froze your surplus, use it for cooking, not fermenting.
Why did my fermented vegetables turn soft and mushy?
Three likely causes: salt percentage too low (below 2% for soft vegetables), temperature too high (above 75°F speeds enzyme activity that breaks down pectin), or old vegetables that had already started to lose structure. Add a tannin source — grape leaf, oak leaf, or black tea — and bump the salt up 0.5% next batch.