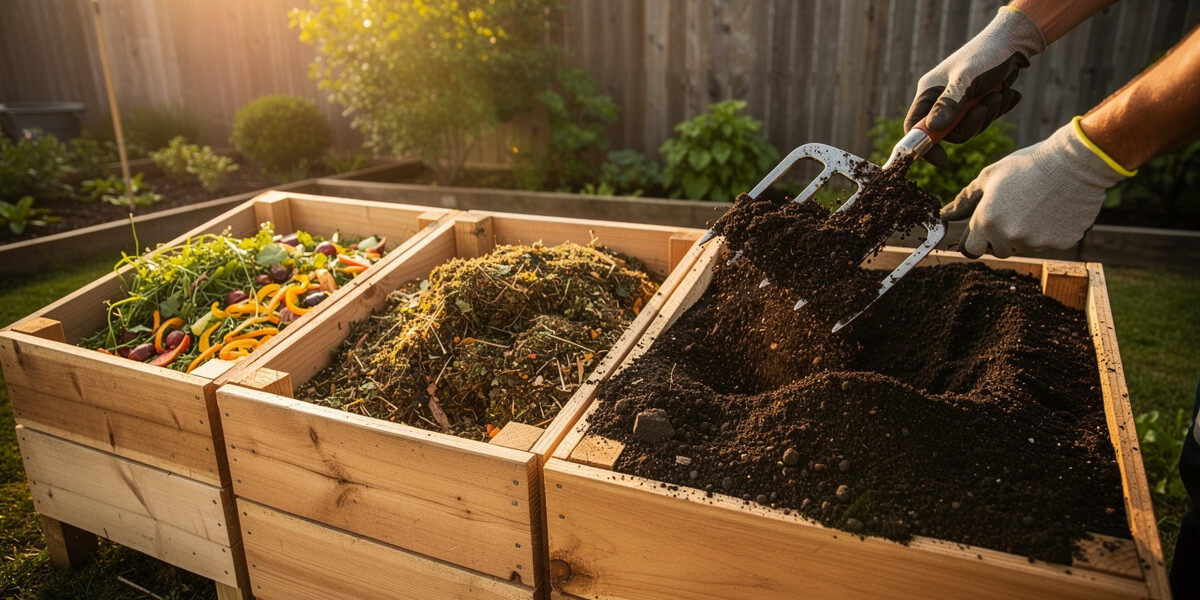
Home composting turns a large share of household waste into free fertilizer that outperforms anything in a bag. Between the hot pile I run on the balcony and the worm bin under my kitchen counter, I have tried every method covered here. The one variable that determines whether a pile cooks or sits cold is the carbon-to-nitrogen ratio below.
Composting is decomposition under managed conditions. When the right balance of carbon, nitrogen, oxygen, and moisture meets a population of microorganisms, organic matter breaks down 4 to 6 times faster than it would on a forest floor. The end product is humus — a stable, nutrient-rich soil amendment that improves drainage, water retention, and microbial activity in any soil type. Whether you garden on a balcony, in a backyard, or only have an under-sink cabinet, there is a home composting method that fits.
As an Amazon Associate I earn from qualifying purchases.
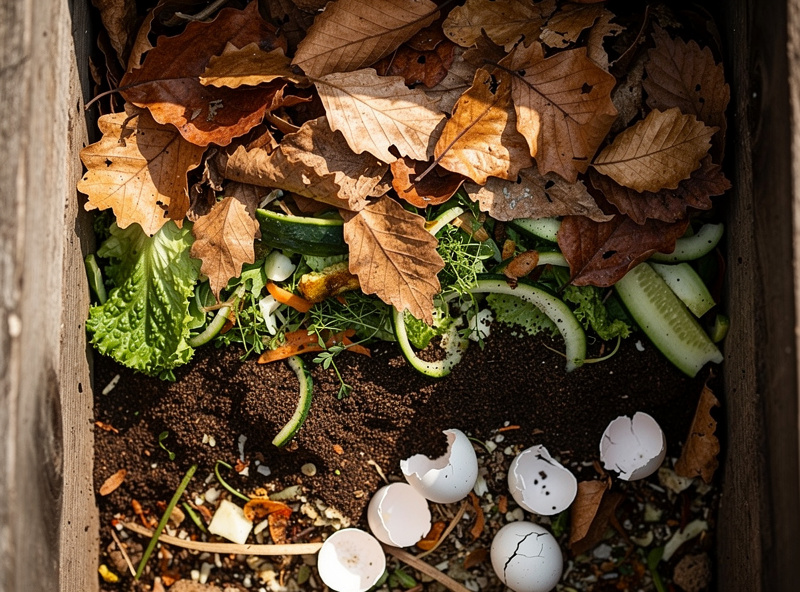
Why Home Composting Pays Off
Food scraps and yard trimmings make up more than a quarter of what Americans throw away, according to the US EPA. Once buried, that organic matter decomposes anaerobically and releases methane — a greenhouse gas far more potent than carbon dioxide over a 100-year span. Diverting it to a backyard pile cuts those emissions dramatically and produces a steady supply of finished compost year after year.
The financial return is small but real. Bagged compost is not expensive per bag, but a working backyard pile replaces dozens of them a year. The bigger payoff is soil structure: adding compost raises a soil’s organic matter, and Michigan State University Extension notes that this measurably increases the water-holding capacity of thirsty, fast-draining soils. In my own containers, the beds I top up with compost every spring simply hold moisture longer and need feeding less often than the ones I neglect.
Time investment is modest. A backyard tumbler takes about 5 minutes a day for the first two weeks, then a quick crank every 2–3 days. A worm bin needs 5–10 minutes of feeding once a week. A cold pile needs nothing — you add material when you have it and harvest in spring.
How Composting Actually Works
Composting is a microbial digestion process driven by bacteria, fungi, actinomycetes, and a supporting cast of mites, beetles, and worms. The active phase happens in three temperature stages: mesophilic (50–104°F) lasting 1–2 days, thermophilic (104–160°F) lasting weeks to months, and a final cooling and curing phase lasting 1–3 months.
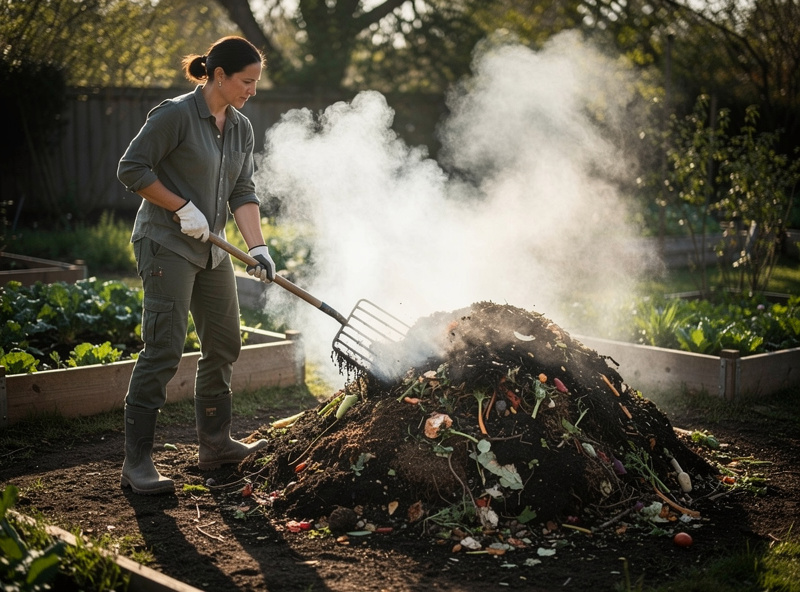
A properly built hot compost pile reaches 140°F within 72 hours. That heat kills weed seeds, pathogens, and most fly larvae while accelerating decomposition. A cold pile that never gets above 90°F still produces compost — it just takes 9–12 months instead of 8–12 weeks. Both methods produce identical end products at the molecular level; the difference is speed and pathogen kill, not quality.
The microbes need four inputs: carbon (browns), nitrogen (greens), oxygen (turning), and water (moisture). Get any one wrong and the pile slows down, smells bad, or refuses to heat up. The single most common beginner mistake is too much nitrogen — a pile that is all grass clippings and food scraps becomes a slimy, ammonia-smelling mess within a week. The fix is almost always the same: more browns, less water, and a turn with a pitchfork.
I learned this the hard way. When I first started the hot pile on my balcony, I loaded three weeks of kitchen scraps — vegetable peels, coffee grounds, the works — and nothing else. Within days it turned into a soupy, ammonia-stinking sludge that fruit flies found from what felt like three streets away. Three buckets of shredded cardboard and a thorough turn later, it hit 140°F within 48 hours. The C:N ratio is not a suggestion; it is the whole game.
5 Home Composting Methods Compared
Five distinct methods cover every home situation, from a 12th-floor apartment to a half-acre suburban yard. The right choice depends on your space, climate, time investment, and whether you want compost in 6 weeks or are content waiting a year.
| Method | Space Required | Time to Finish | Temperature Range | Best For | Setup Cost |
|---|---|---|---|---|---|
| Hot Pile | 27+ cubic feet (3×3×3 ft) | 8–12 weeks | 130–160°F | Yards with regular yard waste | 0–50 dollars |
| Cold Pile | 9+ cubic feet | 9–12 months | Ambient | Set-and-forget gardeners | 0–30 dollars |
| Tumbler | 60–80 gallons | 6–8 weeks | 110–140°F | Suburban yards, pest concerns | 80–250 dollars |
| Vermicomposting | 2 sq ft floor | 3–4 months | 55–77°F | Apartments, indoor use | 30–150 dollars |
| Bokashi | Under-sink bucket | 2 weeks ferment + bury | Ambient | Renters, meat or dairy scraps | 40–90 dollars |
Hot piles produce the most compost the fastest but demand a 3×3×3 minimum to insulate the core, plus weekly turning. Tumblers solve the turning problem but max out at roughly 80 gallons — too small for serious yard waste. Worm bins handle 1–2 pounds of food scraps per day per square foot of surface area, making them perfect for indoor use. Bokashi ferments instead of composts, producing a pre-compost that still needs to be buried in soil for 2–4 weeks to finish breaking down.
For most urban gardeners, the practical choice is vermicomposting (best indoor option) or a 60-gallon tumbler (best outdoor option). In my apartment, the worm bin under my kitchen counter handles all my vegetable scraps, and the castings it produces feed every container on the balcony — no outdoor pile needed. Beginners trying to do hot composting without enough material often struggle to build a 3×3 pile from scratch, then get discouraged when it never heats up. If you read only one section of this guide, read the carbon-to-nitrogen rule below — it solves 80% of the problems people run into.
Greens, Browns, and the 30:1 Ratio
The carbon-to-nitrogen ratio (C:N) determines whether your pile heats up or sits inert. Microbes need roughly 30 parts carbon to 1 part nitrogen by weight to multiply efficiently. Drop below 20:1 and you have excess nitrogen that volatilizes as ammonia (the smell). Climb above 40:1 and microbial activity stalls because there is not enough nitrogen to build proteins.
In practice, you do not measure with a scale. You estimate by volume — roughly 2–3 parts browns to 1 part greens, by sight. Greens are the wet, soft, recently-living stuff. Browns are the dry, fibrous, brittle stuff.
Greens (high nitrogen)
- Fresh grass clippings (C:N 17:1)
- Vegetable and fruit scraps (C:N 15–25:1)
- Coffee grounds, including the paper filter (C:N 20:1)
- Manure from chickens, rabbits, horses, or cows (C:N 10–25:1)
- Fresh garden trimmings and weeds before they seed
- Eggshells (negligible nitrogen, but adds calcium for plant uptake)
Browns (high carbon)
- Dry autumn leaves (C:N 50:1)
- Cardboard and uncoated paper, shredded (C:N 350:1)
- Straw (C:N 75:1)
- Wood chips (C:N 400:1, slow to break down — use sparingly)
- Pine needles (C:N 60:1, mildly acidic but fine in moderation)
- Sawdust from untreated wood (C:N 500:1)
The strongest signal you have is your nose and a thermometer. A pile that smells like ammonia or rotting eggs needs more browns and a turn. A pile that refuses to heat above ambient needs more greens, more water, or both. A healthy active pile smells faintly earthy, like a forest floor after rain.
How to Build Your First Compost Pile
A 3×3×3 hot pile built with proper layering reaches 140°F within 72 hours and produces finished compost in 8–12 weeks. The trick is loading enough material at once — a pile built up gradually over weeks rarely heats up, because the microbe population never reaches critical mass. Save material in a holding bin or pile until you have enough to build all at once.
- Choose the location. Pick a level spot with partial shade and access to a hose. Avoid placing piles directly against wood structures (the moisture rots them) or under fruit trees (drops contaminate the pile).
- Lay a base layer of coarse browns. Twigs, corn stalks, or wood chips, 6 inches deep. This creates airflow under the pile and prevents the bottom from compacting into anaerobic muck.
- Build alternating 4-inch layers. Browns, then greens, then a sprinkle of finished compost or garden soil for microbial inoculation. Repeat until the pile reaches 3 feet tall.
- Wet each layer as you build. Aim for the moisture of a wrung-out sponge — squeeze a handful and you should see a few drops, no streaming water.
- Cap with browns. A 4–6 inch top layer of dry leaves or straw insulates heat and discourages flies from landing on exposed food scraps.
- Turn at days 4, 8, and 14. Move outside material to the center, center material to the outside. This re-oxygenates the pile and exposes new material to thermophilic temperatures, where the real work happens.
- Check temperature with a long-stem compost thermometer. I use a Reotemp 20-inch probe — about 20 dollars — because the 20-inch stem reaches the pile core without me having to dig a hole first. Standard 5-inch probes cannot do that. The pile is "cooking" between 130–160°F. Above 165°F kills beneficial microbes — turn immediately to cool it down.
The pile is ready when it has cooled to ambient temperature, smells like forest floor, and you can no longer identify the original ingredients. This typically takes 8–12 weeks for hot composting. Cold piles take 9–12 months but require zero turning. Tumblers split the difference at 6–8 weeks with a daily crank.
Troubleshooting Common Problems
Most composting failures fall into five recurring problems. Each has a clear cause and a same-day fix. Diagnosing by smell is faster than any other method — your nose tells you what is wrong before you open the bin.
Pile will not heat up. Cause: too dry, too small, or not enough nitrogen. Fix: water until wrung-sponge moisture, add 1–2 buckets of fresh grass clippings or coffee grounds, and turn. A pile under 3×3×3 cannot self-insulate enough to reach thermophilic temperatures regardless of inputs — if your pile is too small, that is the real problem.
Ammonia smell. Cause: excess nitrogen, often from too many grass clippings or food scraps without enough browns. Fix: add 2–3 buckets of dry leaves, shredded cardboard, or straw and turn thoroughly. The ammonia is volatilized nitrogen — you are literally losing fertilizer to the air.
Rotten egg smell. Cause: anaerobic conditions from compaction or excess water. Fix: turn the pile completely, add coarse browns to restore airflow, and cover during heavy rain. Anaerobic decomposition produces hydrogen sulfide and methane instead of useful humus.
Fruit flies. Cause: exposed food scraps. Fix: bury all kitchen scraps under 4 inches of browns, never leave food on the surface. Adding a layer of finished compost on top also helps.
Pests (rats, raccoons). Cause: meat, dairy, or oily food in an open pile. Fix: only compost plant matter in open piles. For meat, dairy, or cooked food, use bokashi (sealed fermentation) or a closed tumbler with a locking lid. A wire-mesh base under the pile blocks burrowing rodents.
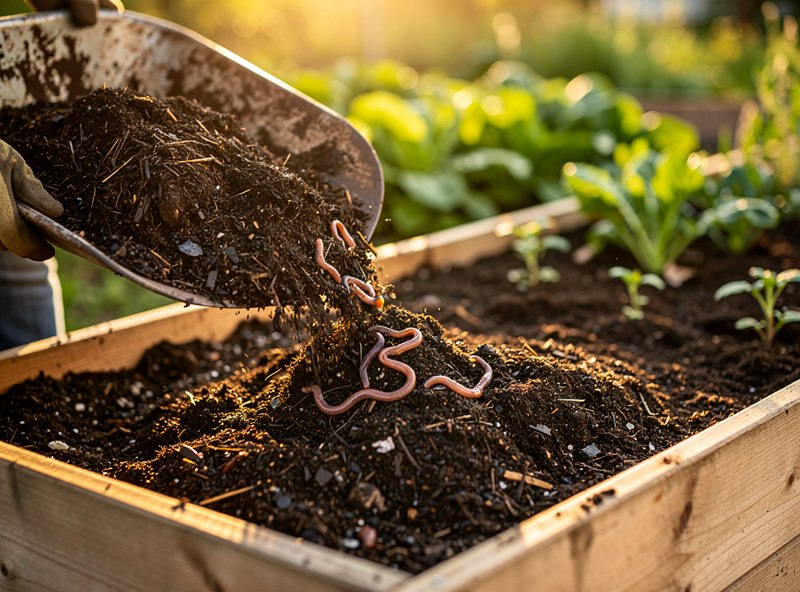
Seasonal Management Through the Year
A pile responds to weather. Knowing what to do each season prevents the most common timing problems — piles that stall in winter, get waterlogged in spring, dry out in summer, or overload with leaves in fall.
Spring (March–May). Turn overwintered piles to re-oxygenate. Add stockpiled browns to balance the influx of grass clippings and garden cleanup greens. This is when most piles hit their fastest decomposition because temperatures and moisture both swing into the ideal zone.
Summer (June–August). Watch moisture closely. Hot piles dry out fast in temperatures above 85°F — check weekly and water when the outer layer crumbles. Add coarse browns if the pile compacts in heavy summer rain. This is also peak harvesting season for hot piles started in late winter.
Fall (September–November). Stockpile dry leaves in a separate holding bin or pile — you will need them all winter to balance kitchen scraps. A 4×4×4 leaf cage holds roughly the volume of leaves a single mature maple sheds, which is enough browns for a year of small-scale composting.
Winter (December–February). Hot piles 3×3×3 or larger continue working under snow. Smaller piles freeze and pause. Use this dormancy period to build a new pile from saved leaves and finally accumulated kitchen scraps. Worm bins need to come indoors below 55°F or the worms slow down and stop processing.
How to Use Finished Compost
Finished compost works as a soil amendment, mulch, potting mix component, and seed-starting medium. The application rate depends on the use, and using too much in containers is one of the most common mistakes — pure compost is denser than potting soil and holds too much water for most pots.
- Garden bed prep: 1–2 inches worked into the top 6 inches of soil before planting. Adds organic matter and slow-release nutrients for the entire season.
- Top dressing established beds: ½ inch around plants once or twice per growing season. Earthworms work it down into the soil for you.
- Mulch layer: 2–3 inches around perennials, trees, and shrubs. Suppresses weeds, holds moisture, and feeds soil microbiology over time.
- Potting mix component: 1 part compost to 2 parts potting soil for vegetables for most container plants. Pure compost is too dense for pots.
- Seed-starting medium: Sieved finished compost mixed 1:1 with coir or perlite. Skip this if your pile never reached 140°F — it may carry weed seeds.
- Compost tea: Steep 1 cup of compost in 5 gallons of water for 24–48 hours, strain, and apply as a liquid fertilizer or foliar spray.
Finished hot compost is safe for food gardens. A pile that never reached 140°F may carry weed seeds and pathogens — bury it deeper, use it on ornamental beds, or save it for tree mulch instead.
Composting is the cheapest, most reliable way to feed an urban garden long-term. If I were starting today with one system and a small apartment, I would pick a worm bin — it runs indoors year-round through a Nordic winter, handles a household’s worth of kitchen scraps in 2 square feet of floor space, and the castings outperform anything I have ever bought in a bag. The hot pile on my balcony picks up during the warm months and handles the overflow, but the worm bin is the workhorse. Pair this guide with my complete soil and compost guide for the soil side of the equation, and use the best compost for vegetable garden guide when you need to supplement what you make at home.
All 10 Composting & Worm Bin Guides
The full Composting and Worm Bins cluster, organized by topic. Each guide goes deeper into one piece of the home composting workflow:
- Vermicomposting for Beginners: Worm Bin Setup Guide — full walkthrough for setting up a 2-square-foot worm bin under the kitchen sink
- Compost Bin for Small Space: 5 Apartment & Balcony Solutions — tumbler, worm bin, and bokashi options for tight footprints
- Hot vs Cold Composting: Which Method Wins for Your Yard — speed vs effort trade-offs and weed-seed kill
- Compost Carbon to Nitrogen Ratio: The 30:1 Formula Explained — the math behind why piles heat up or sit cold
- Bokashi Composting Indoor: Anaerobic Fermentation Guide — the only home method that handles meat, dairy, and cooked food
- How to Make Compost Tea: Brewing & Application Guide — 24-hour aerated brew recipe with realistic benefits
- What Not to Compost: 23 Items to Keep Out of the Pile — pest attractors, contaminants, and pathogens to avoid
- Compost Tumbler vs Pile: Which Is Right for Your Yard — capacity, cost, and pest exclusion compared
- Worm Castings Benefits: How to Harvest and Use Vermicompost — application rates and the documented research
- Apartment Composting: 4 Indoor Methods That Work — zero-yard methods including worm bins, bokashi, and electric composters
Broader Urban Gardening Resources
Connecting composting to the broader urban gardening picture:
- Soil and Compost: Complete Guide for Gardeners — pillar guide on the soil side of the equation
- Best Compost for Vegetable Garden — buying guide when you need more than you produce
- How to Make Compost for Vegetables: Fast Method — narrower hot-pile recipe
- Best Soil for Raised Beds — where most homemade compost ends up
- Raised Beds and Planters Guide — the structures themselves
- Container Gardening Complete Guide — feeding pots with compost
- Balcony Gardening Complete Guide — context for apartment growers
- Urban Gardening Beginners Guide — the broader CityRooted starting point
- Best Soil for Houseplants — where worm castings shine
- Best Vegetables for Urban Gardens — what compost feeds best
Composting Through a Nordic Winter
Most composting advice online is written for climates where the pile keeps ticking over most of the year. That is not my reality. The outdoor compost pile on my balcony goes effectively dormant from November through March, when the temperature sits below freezing for weeks at a stretch and the whole thing sets like a brick. Nothing decomposes at those temperatures — the microbes are not dead, just idling near zero. So the winter question up north is not “how do I keep the pile hot” but “where do the kitchen scraps go for five months.”
My answer is a two-track system. The scraps that accumulate through the dark months go into a sealed bucket under the sink and wait for the April thaw, when they get folded back into the pile as it wakes up. In parallel, the worm bin in the utility room runs year-round and swallows roughly half of the household’s kitchen waste through winter — worms do not care whether it is January or July as long as they stay above about 13°C indoors. Between the two, nothing goes to the bin, and by the time the first spring seedlings need potting, there are fresh castings ready to mix into the container soil. If you only run one system through a Nordic winter, make it the worm bin; it is the only one that keeps working while the balcony is frozen solid.
Choosing a Method for a Small Nordic Apartment
If you garden from a balcony and a kitchen window rather than a backyard, three of the five methods above quietly drop off the table. A proper 3×3×3 hot pile needs a volume of material and a footprint that most apartments simply cannot supply — you will never gather enough browns and greens at once to reach critical mass, and even if you did, there is nowhere to put it. A cold pile has the same footprint problem. That leaves the three methods that actually scale down: a compact tumbler if you have a sturdy balcony and produce a lot of garden waste, a worm bin for indoors, and bokashi for renters who want to compost cooked food and meat without any outdoor space at all.
My honest recommendation for a first-time apartment composter is to start with the worm bin and add bokashi only if you cook a lot of meat or dairy. The worm bin is forgiving, silent, odourless when balanced, and it produces the single best amendment I have used for container growing. Bokashi is a useful companion because it ferments the things the worm bin cannot take — but bokashi output is a sour pre-compost, not finished compost, so it still needs to be buried in a pot of soil for a few weeks to mellow before roots will tolerate it. For most people in a flat, the worm bin alone covers the whole kitchen-scrap stream.
The Balcony Constraint Nobody Mentions
Every backyard composting guide skips the one thing that dominates apartment composting: weight and drainage on a structure you do not own. A tumbler full of wet compost is heavy, and a balcony has a load rating for a reason. I keep my outdoor tumbler modest in size and positioned over a load-bearing edge rather than the middle of the deck, and I never let it sit as a solid saturated mass — turning it is as much about shedding excess water as about oxygen. A drip tray underneath catches leachate that would otherwise stain the balcony below mine, and that liquid, diluted heavily, becomes an occasional feed for the containers.
Indoors, the worm bin has its own quiet logistics. It lives on a tray to catch any escaping moisture, it gets a handful of shredded cardboard whenever it trends too wet, and it never smells as long as the food is buried under bedding and the balance stays right. The reward for managing those small constraints is a closed loop that runs in a two-room flat: kitchen scraps become castings, castings feed the balcony containers, and the containers feed the kitchen. That loop — not the size of the harvest — is the real reason to compost in a small space.
Why Compost Beats a Bag of Fertilizer
It is worth being clear about what compost actually does, because it is not a fertilizer in the way a bottled feed is. A bag of synthetic fertilizer delivers a precise, immediate dose of nitrogen, phosphorus, and potassium and nothing else. Compost delivers a smaller, slower dose of those same nutrients wrapped inside something a bottle cannot supply: organic matter, living microbes, and structure. The nutrients release gradually as the microbes keep working, so there is no salt spike to scorch fine roots and nothing to leach straight through a container in the first heavy watering.
That difference shows up over a season. A container fed only with liquid fertilizer looks fine for a few weeks, then the soil compacts, drainage worsens, and the plant becomes dependent on the next dose. A container topped with compost each spring builds a soil that gets better every year — looser, darker, quicker to drink water and slower to dry out. I have pots on the balcony running on nothing but a spring handful of worm castings and an annual top-up of compost, and they consistently outperform anything I have kept alive on bottled feed alone. For anyone deciding whether the effort is worth it, that is the honest case: compost is not the fastest way to green up a plant this week, but it is the only way to build soil that needs you less each year.
Frequently Asked Questions
How long does home composting take?
Hot compost finishes in 8 to 12 weeks with weekly turning. Tumblers take 6 to 8 weeks. Cold piles need 9 to 12 months. Worm bins produce castings in 3 to 4 months. Speed depends on the carbon-to-nitrogen ratio, moisture, and how often you turn.
Can you compost in winter?
Yes. Hot piles continue working under snow if the pile is at least 3 by 3 by 3 feet — the thermophilic core stays above 100 degrees Fahrenheit even at freezing temperatures. Smaller piles freeze and pause until spring. Bring worm bins indoors below 55 degrees.
Do compost piles attract rats?
Open piles attract rodents only when they contain meat, dairy, oils, or cooked food. Plant-matter-only piles in tumblers or bins with wire-mesh bases see almost no rodent activity. For food waste that does attract pests, use bokashi fermentation in a sealed bucket instead.
Is composting worth it for a single person?
Yes. A single person generates 200 to 300 pounds of compostable waste per year — enough to fill a 60-gallon tumbler twice or feed a 1-square-foot worm bin continuously. The output covers fertilizer needs for 30 to 40 square feet of garden, with no recurring cost beyond the initial bin.
Does compost smell bad?
A properly managed compost pile smells faintly earthy, like a forest floor. Bad smells signal a problem: ammonia means too much nitrogen, rotten eggs means anaerobic conditions from too much water or compaction. Add browns, turn the pile, and the smell clears within 24 to 48 hours.
Can you compost meat and dairy at home?
Not in open piles or standard tumblers — they attract rats and create odor. Bokashi composting handles meat, dairy, cooked food, and bones because it ferments anaerobically in a sealed bucket. After 2 weeks of fermentation, bury the bokashi pre-compost in soil for 2 to 4 weeks to finish.
What is the difference between compost and mulch?
Compost is fully decomposed organic matter applied as a soil amendment, worked into the top 6 inches of soil. Mulch is undecomposed material like wood chips or straw applied on top of soil to suppress weeds and hold moisture. Compost feeds plants directly. Mulch protects soil and feeds it slowly as it breaks down.