
How to sprout mung beans: Rinse the beans and soak them for 8-12 hours. Drain and rinse every 8-12 hours for 2-5 days. To get the thick, white bean sprouts seen in stir-fries, you must grow them in the dark and apply weight to force them to grow thicker.
For a complete overview of all sprouting methods and seeds, see our complete sprouting guide.
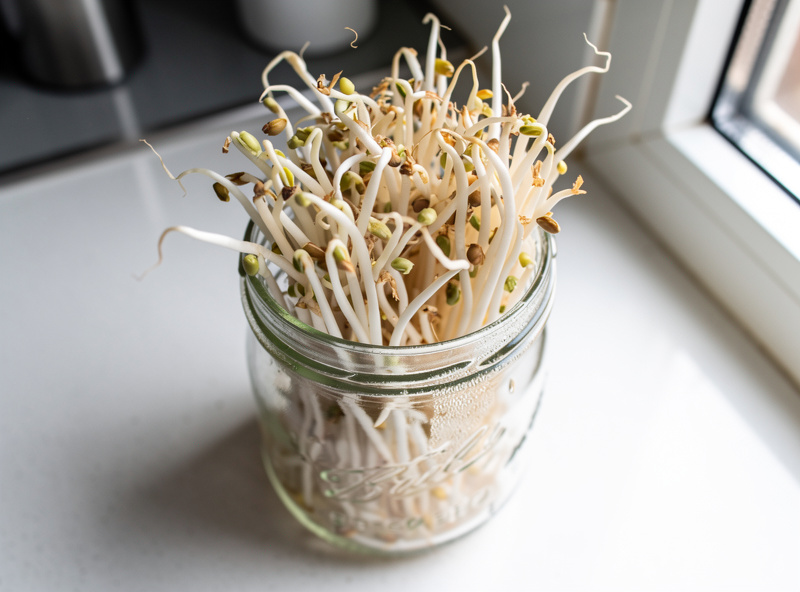
Mung beans are the undisputed king of sprouts in Asian cuisine. From Pad Thai to Korean side dishes (Sukju Namul), these crunchy, watery cylinders are a staple. However, many home growers are disappointed when their homegrown version turns out thin, stringy, and leafy.
The secret lies in the technique. Growing mung beans requires a slightly different approach than the standard mason jar method. The colander method produces thick, white, grocery-store quality sprouts on your countertop in just 4-5 days.
The Two Types of Mung Bean Sprouts
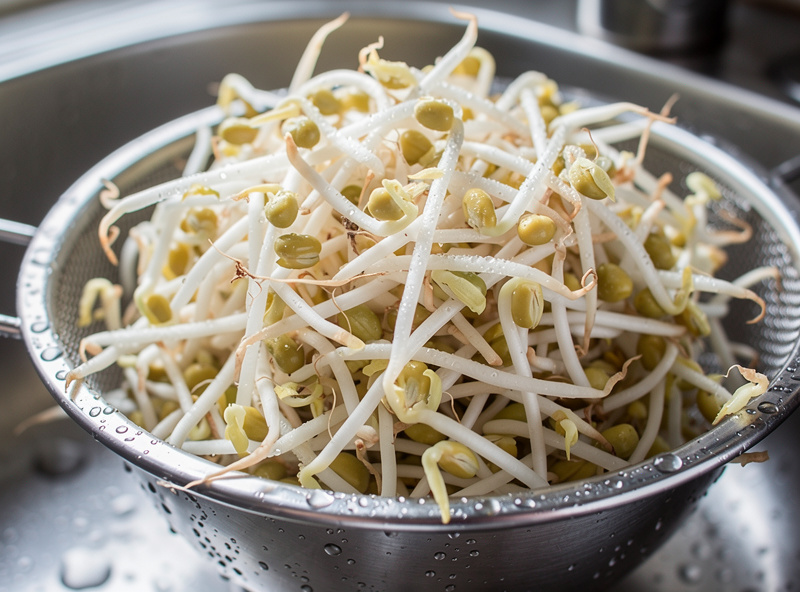
Mung beans produce two distinct sprout types: thin green leafy sprouts grown in light (more bitter, more vegetal) and thick white sprouts grown in darkness under pressure (mild, crunchy, preferred for stir-fries). Most cooks prefer the thick white variety.
- The Leafy Sprout: Grown in the light, these are long, thin, and have green leaves at the end. They have a stronger, more bitter vegetable flavor and look closer to a long alfalfa sprout.
- The Thick White Sprout: Grown in total darkness and under pressure (weight). These are thick, juicy, mild, and mostly white / pale yellow. This is the variety most people want for cooking.
Why Grow Your Own Mung Bean Sprouts
I have run mung beans in jars, in a tiered sprouter, and finally in the colander method I describe below — and the difference between home-grown thick white sprouts and the bagged ones from the grocery store is night and day. Store-bought mung bean sprouts are often soggy, a day from turning, and packaged in plastic that traps condensation. The ones from my colander come out crisp, bone-dry on the surface, and thick enough to snap when you bend them.
The Yield: A half cup of dry mung beans expands to about 3 cups of finished sprouts in 4-5 days, for roughly 30 cents of seed. That is the same volume you would pay $4-5 for fresh at the store, and yours will be days fresher.
Texture Control: When you grow your own, you control the thickness directly through the weight you place on top. Want pencil-thick sprouts for a stir-fry? Add more weight. Prefer a lighter, leafier sprout for raw salads? Skip the weight and expose them to a little light on the final day. No bagged sprouts give you that choice.
Freshness and Shelf Life: Sprouts from the grocery store travel from a commercial facility to a warehouse to a shelf — they might be a week old before you open the bag. The jar I pull from my cupboard was harvested hours ago. That freshness is why home sprouts stay crisp in the fridge for 5-7 days while store-bought ones go slimy in 3.
Zero Packaging, Zero Transport: The colander method uses only what is already in your kitchen — a colander, a bowl, a plate, and a can for weight. No plastic clamshells, no refrigerated shipping, no supply chain. Just dry beans, water, and a dark cupboard.
Equipment: The Colander Setup
As an Amazon Associate I earn from qualifying purchases.You need a colander, bowl, paper towels, plate, and weight (28oz can or jar). Most of these are already in your kitchen, so the total cash outlay is zero unless you want a dedicated colander for the task. A flat-bottomed stainless steel colander works best — the fine mesh drains faster than plastic and does not trap water in the beads. The colander method provides superior drainage and airflow compared to mason jars, which is critical since mung beans generate heat as they grow.
- A Colander: Ideally flat-bottomed.
- A Bowl: That the colander can sit in (to catch water) without the beans touching the wastewater.
- Paper Towels or Cheesecloth: To line the colander.
- A Weight: A plate that fits inside the colander, plus a heavy can or jar of water.
- Black Plastic Bag or Cloth: To block out 100% of the light.
Step-by-Step Guide
The colander method is the only way I bother with mung beans now. The jar method gives you thin, leggy sprouts; the colander with weight gives you those thick, white, restaurant-style stems. Here is my exact routine.
Step 1: The Soak
Take 1/2 cup of dry mung beans — sprouting-grade mung beans germinate more reliably than generic grocery store stock. Rinse them until the water runs clear. Place them in a bowl and cover with plenty of water (they will double or triple in size). Soak for 8-12 hours or overnight.
Step 2: Prepare the Bed
Line your colander with a damp paper towel or a piece of cheesecloth. This keeps the beans from falling through the holes while allowing water to drain. Pour the soaked beans into the colander. Spread them out evenly.
Step 3: Cover and Weigh Down
Place another damp paper towel or cloth directly on top of the beans. Then, place a plate on top of that towel. The plate should rest on the beans, not on the rim of the colander. Place a heavy object (like a 28oz can of tomatoes or a jar of water) on the plate.
Why weight? As the beans grow, they push against the weight. This mechanical stress causes the stems to grow thicker and stronger, giving you that satisfying crunch.
Step 4: The Blackout
Place the entire setup (bowl + colander + weights) inside a black trash bag or cover it with a thick dark towel. Place it in a cupboard. Light exposure will trigger photosynthesis, turning the sprouts green and potentially bitter.
Step 5: The Rinse Cycle
Rinse the beans 2-3 times a day. You do not need to disassemble everything.
- Remove the weight and the top towel.
- Run cold water gently over the beans (or spray them).
- Replace the damp towel, the plate, and the weight.
- Put them back in the dark.
Alternatively, you can just run water through the plate if it fits loosely, but ensure the beans get wet. Crucial: Empty the catch bowl underneath every time. Do not let the bottom roots sit in stale water.
Step 6: Harvest (Day 4-5)
Check them on day 4. They should be 2-3 inches long, thick, and white. If you want them longer, go to day 5. When you are ready, remove them and wash them in a large bowl of water.
The Great Hull Debate
Mung beans have green shells (hulls) that detach as they sprout. They are edible — I eat them all the time when I am in a rush — but they do distract from the clean white look and crisp texture. For guests or special dishes I take the extra five minutes to hull.
How to De-hull: Submerge your harvest in a large bowl of cold water. Agitate gently with your hands. The sprouts will sink, and the green hulls will float to the top. Skim the hulls off with a sieve. Repeat 2-3 times — you will never get them all and that is fine. I stop when 80% are gone and call it done.
Storage and Shelf Life
Home-grown mung sprouts stay crisp far longer than the bagged ones because they have never been shipped. Drain the finished sprouts well, give them a final rinse, then spread them on a clean tea towel for 15 minutes to wick surface moisture. Transfer to a sealed container lined with a paper towel and keep them in the coldest part of the fridge — usually the back of the bottom shelf. Properly dried and stored, they will hold their snap for 5-7 days.
Signs of spoilage: Discard the batch immediately if you notice a slimy texture, brown or black discoloration, or a sour, musty, or off smell. Fresh mung sprouts should smell clean and slightly earthy, with a faint cucumber note — never sour.
Freezing: Mung sprouts lose their crunch on thaw, so freezing only makes sense if you will cook them afterward. Blanch for 30 seconds, drain, freeze on a sheet pan, then bag for up to 3 months. Use straight from frozen in stir-fries and soups.
Best practice: Sprout in small batches more often rather than one large jar every two weeks. A half-cup of dry mung beans yields about 3 cups of finished sprouts — enough for a week of meals for two people, eaten at their peak.
A Quick Word on Sprout Safety
Mung sprouts are one of the crops most often flagged in foodborne-illness outbreaks, because the warm, wet, dark conditions they need to thicken up are exactly the conditions Salmonella and E. coli multiply in. The home-grower version of public-health guidance is straightforward: source mung beans sold specifically for sprouting (the seed is grown and handled to a higher standard), rinse in clean cold running water at every step, drain thoroughly each time, refrigerate the finished sprouts, and discard any batch that smells off. People who are pregnant, elderly, very young, or immunocompromised should cook mung sprouts rather than eat them raw. The FDA Sprout Safety Alliance publishes the full industry-side guidance if you want to read the source material.
Troubleshooting Common Problems
I have seen every one of these failures come out of my own cupboard. Pink sprouts indicate light exposure (safe but bitter). Brown rotting roots mean poor drainage or overheating — use colder water and ensure air gap. Thin stringy sprouts need more weight. Musty smell indicates bacterial growth from insufficient rinsing. Here is what to do.
- My sprouts are pink/purple.
- They saw the light. Even a sliver of light sneaking under the cupboard door can trigger anthocyanins (purple pigment). They are safe to eat, just more bitter. When this happened to me I used those pink batches in braised dishes where the bitterness disappears into the sauce.
- The roots are brown and rotting.
- Mung beans generate a surprising amount of heat as they grow fast in a mass. I learned to keep the colander elevated — at least an inch of air between the bottom of the colander and the drainage water in the bowl. Use cold water for the rinse, not lukewarm.
- They are thin and stringy.
- Not enough weight. I use a 28oz can of tomatoes and it produces consistently thick sprouts. If yours are still thin, stack a second weight. And harvest earlier — the longer they grow under low weight, the leggier they get.
- Sprouts have a musty or off smell.
- Insufficient rinsing in warm weather — this one I have caused by skipping the midday rinse when the kitchen is warm. Drain thoroughly after every rinse and keep the cupboard door cracked for airflow if your kitchen runs hot.
- Seeds did not germinate.
- Old seeds or chlorinated water. I buy organic mung beans sold for sprouting — grocery bulk bins work sometimes but fail unpredictably. If your tap water smells like a pool, let it sit out for 24 hours or run it through a charcoal filter.
Culinary Uses
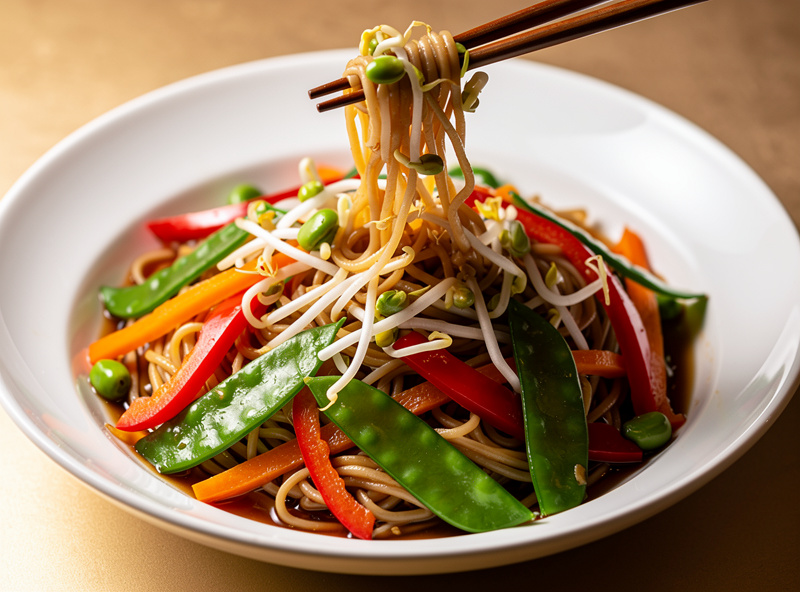
These are the ways I use a fresh batch of mung bean sprouts. They hold their crunch better than any other sprout I grow, which makes them the workhorse for stir-fries and hot dishes where lentils or alfalfa would wilt.
- Stir Fries: Add them in the last 30 seconds of cooking to keep the crunch.
- Raw Salads: Excellent in Vietnamese style salads with mint and coriander.
- Soup Garnish: Essential for Pho and Ramen.
- Korean Banchan: Blanch for 1 minute, drain, and toss with sesame oil, garlic, and salt.
- Spring Rolls: A classic filling for fresh Vietnamese spring rolls.
- Egg Dishes: Add to omelets or scrambled eggs for extra crunch and texture.
How long does it take to sprout mung beans?
Mung beans sprout quickly—typically 2-4 days. After an 8-12 hour soak, you’ll see tails within 24 hours. Harvest when sprouts are 1-2 inches long for the best texture and flavor.
Why are my mung bean sprouts thin and stringy?
Thin sprouts result from too much light or heat. For plump, crispy sprouts like store-bought ones, keep them in darkness, use a weight on top to create pressure, and maintain temperatures around 68-72°F (20-22°C).
Should I remove the green hulls from mung bean sprouts?
Removing hulls is optional but recommended for better texture. The easiest method is to soak finished sprouts in a bowl of water—the hulls float to the top and can be skimmed off.
Can I eat mung bean sprouts raw?
Yes, properly grown mung bean sprouts are safe to eat raw. Add them to salads, spring rolls, sandwiches, or as a garnish. If you have a compromised immune system, lightly cooking them is recommended.
What equipment do I need for mung bean sprouts?
You need a large colander or tray with drainage holes, two clean cloths or paper towels, a plate that fits inside the colander, and a heavy weight like a jar of water or a can. No special sprouting equipment required—total cost under $5.
Do mung beans need darkness to sprout?
Yes, mung beans need complete darkness during sprouting to produce thick, white, crispy sprouts. Any light exposure causes them to turn green and develop bitter flavor. Cover the colander with a second plate and keep it in a dark cabinet or closet.
How much do mung beans yield when sprouted?
Mung beans yield approximately 5-6 times their dry volume. One half cup of dry beans (about 100g) produces 2.5-3 cups of finished sprouts. Scale your batch based on how much you eat within 3-4 days.