How to sprout chickpeas: Soak chickpeas (garbanzo beans) for 12-24 hours. Drain and rinse. Repeat rinsing every 8-12 hours. Harvest in 2 days when the tail is 1/4 to 1/2 inch long. Sprouting cuts the cooking time from 2 hours to 15 minutes and gives them a fresh, nutty sweetness canned chickpeas never have.
For a complete overview of all sprouting methods and seeds, see our complete sprouting guide.
Chickpeas (garbanzo beans) are a staple of Mediterranean and Middle Eastern diets. Usually, we eat them cooked from a can or boiled for hours. But sprouting them changes the food entirely. It transforms a heavy, starchy bean into a lighter, fresher ingredient with a nutty, creamy flavor profile.
If you have ever made hummus from dried chickpeas you know the drill: soak overnight, boil for an hour, and pray they soften. Sprouting skips all of that. The beans go into the blender tender and raw after a 2-day countertop soak-and-rinse cycle. The flavor is sweeter, the texture lighter, and the hummus comes together in half the time.
Why Sprout Chickpeas?
I sprout chickpeas almost exclusively for hummus and falafel, because the difference is that large. A sprouted chickpea makes a lighter, creamier hummus than a cooked one — the texture is airier, the flavor sweeter and nuttier, with none of the metallic flatness you get from canned beans. The cooking time drops from 1-2 hours to 10-15 minutes, which means hummus goes from a planned project to something I make on a Tuesday because the beans are already sprouted.
- Cook Time: Sprouted chickpeas cook in 10-15 minutes, compared to 1-2 hours for unsprouted dried beans. I steam mine for 5 minutes and they are hummus-ready.
- Flavor: They develop a sweet, nutty flavor that is a different food entirely from canned chickpeas. The metallic taste of tinned beans is gone. The sprout brings a fresh, almost green undertone.
- Texture: Creamier in hummus, with better body in falafel. Sprouted chickpeas hold less water in their structure, so your blends need less liquid — the hummus comes out thicker naturally.
- Cost: A pound of dried chickpeas costs $2-3 and produces the equivalent of 6-8 cans. At that math, sprouting pays for its own jar and lid in the first week.

Flavor and Texture: What Changes When You Sprout
Canned chickpeas taste metallic and flat. Cooked dried chickpeas taste earthy and starchy. Sprouted chickpeas taste sweet, nutty, and almost green — as if someone crossed a raw peanut with a fresh pea. The transformation in 48 hours on the counter is more dramatic than the change in any other sprout I grow.
Raw Sprouted Chickpeas: Firm and crunchy, like a fresh raw peanut. The flavor is mild and sweet, with a clean finish. I eat them raw straight from the colander as a snack, tossed with olive oil and salt. They are entirely different from the dry, chalky crunch of an unsprouted dried chickpea.
Lightly Steamed: A 5-10 minute steam softens them to a tender-crisp texture that works in grain salads, pasta, and anywhere you would use edamame. The steam brings out the sweetness and tames the slight raw-starch edge.
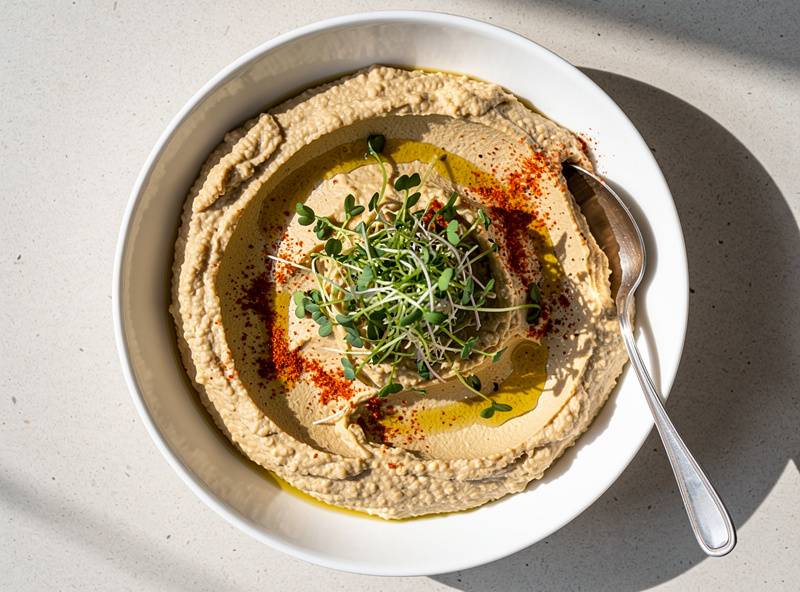
For Hummus: Steamed sprouted chickpeas make a hummus that is airier, creamier, and less heavy than versions made from canned or boiled beans. You need less tahini and less oil because the beans themselves carry more moisture and a smoother mouthfeel.
Equipment
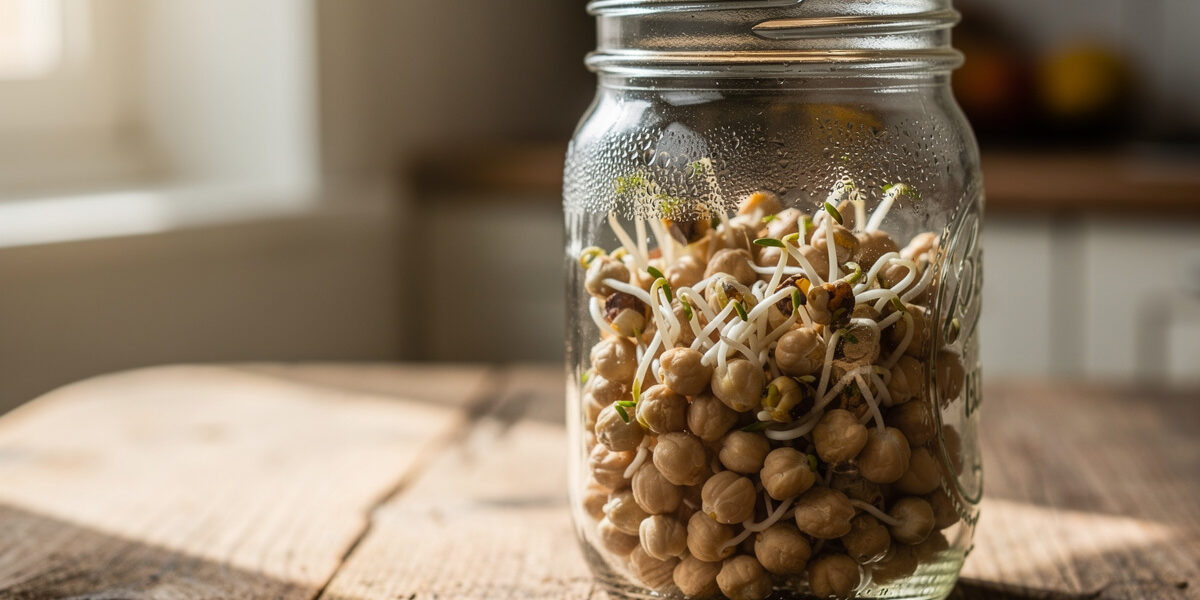
As an Amazon Associate I earn from qualifying purchases.Chickpeas expand to 3x their dry volume during soaking, so a half-gallon wide-mouth mason jar or a large stainless steel colander is the right vessel. I prefer the colander for chickpeas — the open airflow keeps them from getting slimy, which happens fast in a sealed jar. If using a jar, a stainless mesh lid with 3mm or larger openings gives the airflow chickpeas demand, and fill the jar only ⅓ full.
While a jar works for small batches, a Colander (as described in our Mung Bean guide) is actually better to prevent them from getting slimy. If using a jar, fill it only 1/3 full to allow massive expansion.
Step-by-Step Instructions
Chickpeas are the easiest of the larger seeds to sprout. The routine is soak, rinse, repeat — the colander does most of the work. The one rule I follow religiously is the short-tail harvest. Chickpeas taste best when you pull them at the nub stage rather than letting the tail run long.
Step 1: Selection and Soak
Buy organic dried chickpeas. Do not buy “roasted” or canned ones.
The Long Soak: Chickpeas are hard. They need to soak for at least 12 hours, and up to 24 hours in winter.
Tip: Use a very large bowl and plenty of water. They will triple in size. If soaking for 24 hours, change the water halfway through to keep it fresh.
Step 2: Rinse and Drain
Drain the soak water. Rinse the beans well.
Place them in your colander or jar. If using a colander, cover with a damp towel to keep moisture in but allow air to flow.
Step 3: The Rinse Cycle
Rinse them 2-3 times a day. Chickpeas can get slimy if they dry out or get too hot. Frequent rinsing keeps them cool and hydrated.
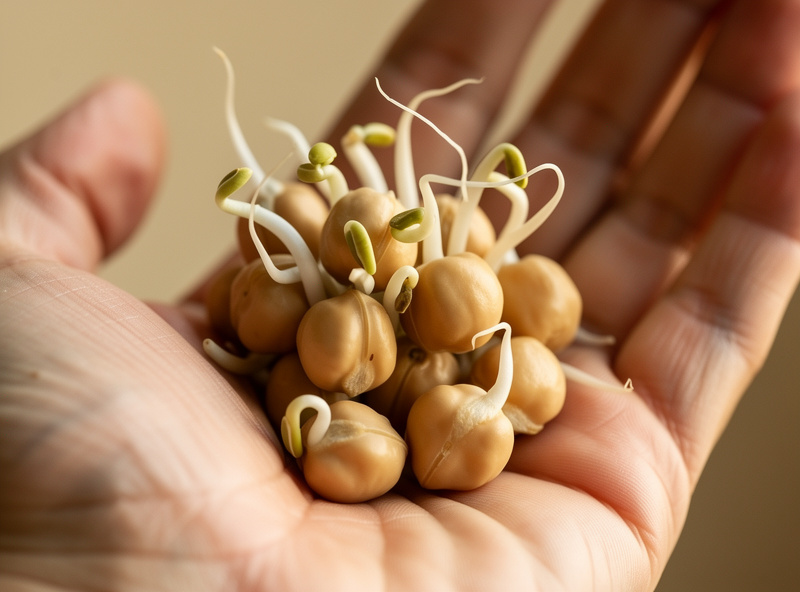
Step 4: Harvest (The “Short Tail” Rule)
This is where chickpeas differ from alfalfa. You do not want a long green sprout.
Harvest them when the white tail is just a nub – about 1/4 to 1/2 inch long (usually 2 days).
Why? Let the tail run past ½ inch and the chickpea starts spending its starch on the plant. The flavor turns bitter and the texture goes woody — I pulled a batch at 3 days once and they went straight to the compost. The short-tail stage is peak flavor.
Storage and Shelf Life
Sprouted chickpeas are one of the few sprouts that keep well — they are dense and dry compared to leafy sprouts like alfalfa. After the final rinse, spread them on a clean tea towel for 15-30 minutes to wick surface moisture, then transfer to an airtight container lined with a paper towel and refrigerate at 35-40°F. They keep for 5-7 days.
Freezing: Chickpeas freeze exceptionally well — unlike delicate sprouts. Spread the dried sprouted chickpeas on a baking sheet, freeze until solid (about 2 hours), then transfer to freezer bags for up to 6 months. Cook them straight from frozen in soups, stews, and curries — no thawing required. This is the move I use to batch-process a pound of dried beans at once and keep hummus-ready chickpeas on hand all month.
Cooked storage: If you have already steamed your sprouted chickpeas, they keep in the fridge for 4-5 days, or freeze well in their cooking liquid for up to 3 months.
Signs of spoilage: Discard the batch if you see visible mold, a slimy texture, or a sour or off smell. Fresh sprouted chickpeas should smell clean, slightly earthy, with a faint nutty note.
A Quick Word on Sprout Safety
The same hygiene rules apply to chickpea sprouts as to every other raw sprout: source seed sold for sprouting or cooking (not seed treated for planting), rinse in clean cold running water at every step, drain thoroughly, refrigerate the finished sprouts, and discard anything that smells off. People who are pregnant, elderly, very young, or immunocompromised should cook chickpea sprouts rather than eat them raw. The FDA Sprout Safety Alliance publishes the full industry-side guidance, and our own sprouting safety tips page has the short version for home growers.
Raw vs. Cooked: The Debate
This is a common question in the sprouting community.
Eating Them Raw
Many raw foodists eat sprouted chickpeas raw. They are crunchy (like a fresh peanut) and creamy.
Pros: Freshest, crunchiest texture; no cooking required.
Cons: Firm and quite dense; some people prefer them cooked for the softer texture.
Eating Them Cooked (Recommended)
Steaming sprouted chickpeas for just 5-10 minutes softens them perfectly without turning them to mush.
Pros: Creamier texture, better for hummus.
Recipe: Sprouted Hummus
Once you try this, you will not go back to canned.
- Take 2 cups of sprouted chickpeas.
- Steam them for 10 minutes (optional but recommended for creaminess).
- Blend with tahini, lemon juice, garlic, olive oil, and cumin.
- Secret: You need less water/oil because sprouts have high water content.
More Culinary Ideas
Beyond hummus, sprouted chickpeas are incredibly versatile in the kitchen:
- Salads: Add raw or lightly steamed sprouted chickpeas to grain salads for crunch and nutty sweetness.
- Soups and Stews: Throw frozen sprouted chickpeas directly into soups – they cook quickly and add nutrition.
- Roasted Snacks: Toss with olive oil and spices, then roast at 400 degrees for 20-25 minutes for a crunchy snack.
- Curry: Use in place of canned chickpeas in your favorite curry recipes – they will cook much faster.
- Falafel: Use sprouted chickpeas in place of soaked-but-unsprouted beans for a lighter, sweeter version of this classic dish.
Troubleshooting Common Problems
I have had chickpeas go wrong exactly three ways on my counter: insufficient airflow leading to mold (black spots), fermentation from infrequent rinsing (sour smell), non-viable seeds from old or processed beans (no sprouting), or over-sprouting beyond the 1/2-inch tail stage (woody texture). Addressing these issues requires proper equipment selection (colander over sealed jar for airflow), rinsing 2-3 times daily with cool water, purchasing organic dried chickpeas intended for cooking, and harvesting at the short white tail stage within 48 hours.
- My beans are turning black/dark spots.
- Mold or rot from poor airflow. Chickpeas need more air than any other sprout I grow — the colander is not optional for me anymore after losing two jars. Do not overfill and discard immediately if you see dark spots.
- They smell sour.
- Fermentation has started. This happens if the spot is too warm. Rinse more often with cold water and move to a cooler location.
- Chickpeas are not sprouting at all.
- Check the age of your chickpeas. Very old dried beans may have lost their ability to germinate. Also ensure they were not previously roasted or treated. Always buy beans specifically intended for cooking or sprouting.
- Sprouts have an unpleasant texture.
- Over-sprouting. The short-tail rule is real — harvest at ¼ to ½ inch. I pushed a batch to 3 days wanting longer tails and got woody, bitter chickpeas that even tahini could not rescue.
- Some beans sprouted while others did not.
- This is normal with any batch of seeds. Simply remove the non-sprouted beans before eating or cooking. If a large percentage failed to sprout, your beans may be old or of poor quality.
- The sprouted chickpeas taste bitter.
- Bitterness usually indicates over-sprouting. The longer the tail, the more the bean converts its sweet starches into plant material, which tastes bitter. Harvest earlier next time.
Frequently Asked Questions
How long does it take to sprout chickpeas?
Chickpeas sprout in 2-3 days. After a 12-hour soak (they’re large and need more time), you’ll see short tails emerge within 24-48 hours. Harvest when tails are 1/4 to 1/2 inch—don’t let them grow too long.
Do sprouted chickpeas need to be cooked?
Unlike many sprouts, chickpeas benefit from light cooking even after sprouting. A quick 10-15 minute simmer softens them perfectly. They can be eaten raw but most people prefer the texture after a brief steam.
Why are my chickpeas not sprouting?
Old or processed chickpeas won’t sprout. Use dried chickpeas from the bulk section, not canned. Also ensure they’re fully submerged during soaking—chickpeas absorb a lot of water and may need more added.
What’s the benefit of sprouting chickpeas?
Sprouting cuts cooking time from 2 hours to 10-15 minutes, transforms the flavor from earthy-starchy to sweet-nutty, and creates a lighter, creamier texture for hummus and falafel. Sprouted chickpeas also freeze well, so you can batch-process a pound of dried beans and have hummus-ready chickpeas in the freezer all month.
What equipment do I need for chickpea sprouts?
You need a large mouth quart or half-gallon jar (chickpeas expand significantly), a mesh sprouting lid with medium-large holes (larger than alfalfa lids), and a bowl for drainage. A half-gallon jar is recommended as chickpeas expand 3x during soaking.
Why do chickpea sprouts smell sour?
Chickpeas are prone to fermentation due to their high starch content. Always drain completely after rinsing, keep at room temperature below 75°F, and rinse twice daily. If they smell sour or feel slimy, discard and start fresh.
How much do chickpeas yield when sprouted?
Chickpeas expand approximately 2-3 times their dry volume. One cup of dry chickpeas (about 200g) produces 2-3 cups of sprouted chickpeas. They don’t expand as much as mung beans but provide more substantial texture.