You can build a productive small balcony garden from bare concrete to first harvest in a single weekend for $50-150, even on 20 square feet. The key is matching container depth to root needs, choosing compact cultivars bred for pots, and using vertical space that most beginner balcony growers overlook.
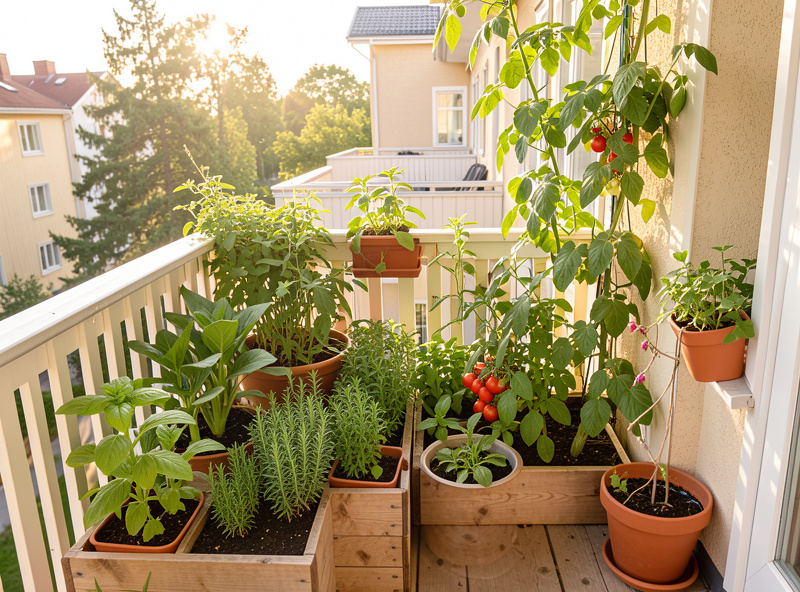
On my Swedish apartment balcony, I started with three fabric grow bags of potting mix and a single cherry tomato seedling in May. By August I was harvesting enough greens, herbs, and tomatoes to cut my grocery-store produce trips in half — and that was on a 25-square-foot balcony that faces east and only gets morning sun. The Nordic short-season constraint actually forced me to get the essentials right immediately: container sizing, drainage, watering rhythm, and cultivar selection. No wasted weeks on plants that would never finish before the September cold hit. Here is the step-by-step process I follow now, whether I am setting up a new balcony from scratch or refreshing one for a new season.
Step 1: Assess Your Balcony Conditions
Before you buy a single plant, spend three days observing your balcony’s light, wind, and weight capacity. South-facing balconies receive 6-8 hours of direct sun — enough for tomatoes, peppers, and Mediterranean herbs. East-facing (like mine) gives 4-5 hours of gentle morning light perfect for leafy greens and bush peas. North-facing and heavily shaded balconies need shade-tolerant crops: lettuce, spinach, mint, parsley, and chives.
Weight is the balcony constraint nobody talks about until a planter cracks a tile. Wet container soil weighs roughly 100 pounds per square foot of planter footprint. A 16-inch pot of saturated soil runs 40-50 pounds; three of them plus a person exceeds what most rental balconies are engineered for. I keep all containers under 14 inches diameter except one dedicated tomato pot in the corner closest to the building wall. Check with your building management before installing anything larger.
Wind exposure matters more the higher you go. My fourth-floor balcony gets gusts that have flipped empty terracotta pots and shredded young basil leaves. I place taller plants against walls and use heavier containers (terracotta over plastic) on outer railing positions to act as wind buffers for more fragile seedlings behind them.
Step 2: Plan Your Layout
Sketch your balcony to scale, marking fixed features like doors, railings, and utility boxes. Identify three growing zones:
Floor Zone: Reserve for larger containers (14+ inches) holding tomatoes, peppers, or dwarf fruit trees. Position these in sunniest spots, nearest the building wall where weight support is strongest.
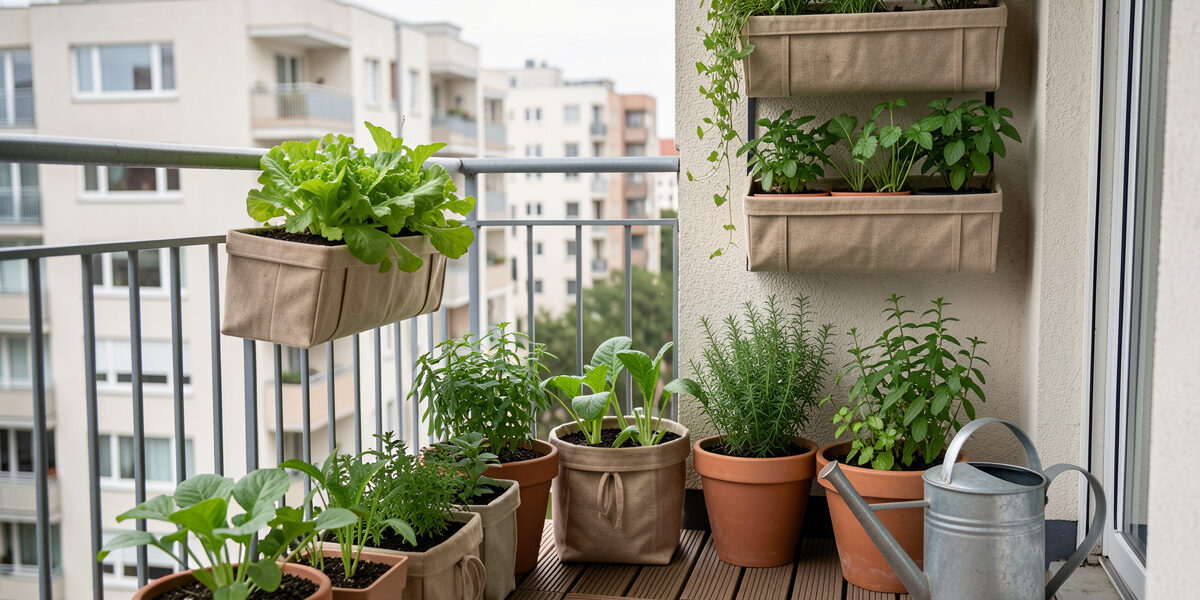
Railing Zone: Attach planters to railings for herbs, strawberries, and trailing flowers. This keeps plants accessible while preserving floor space and reduces the container footprint by roughly 60%.
Vertical Zone: Install trellises, wall planters, or hanging baskets to double or triple your growing area without consuming floor space. A single 6-foot trellis supports 2-3 climbing plants that would otherwise need three separate floor containers.
Leave 18-inch pathways between containers for maintenance access and emergency egress compliance — your landlord will care about this even if you don’t.
Step 3: Select Appropriate Containers
Size Requirements by Plant Type
Large Containers (16-20 inches): Tomatoes, peppers, eggplants, dwarf citrus, compact blueberries. One large pot per balcony corner maximum — weight adds up fast.
Medium Containers (12-14 inches): Leafy greens, bush beans, herbs, strawberries. My workhorse size — I run six 12-inch fabric grow bags and two terracotta pots in this range.
As an Amazon Associate I earn from qualifying purchases.
Small Containers (8-10 inches): Radishes, lettuce, small herbs, edible flowers.
Material Options
Self-Watering Plastic: Lightweight, affordable, and reduce watering frequency through built-in reservoirs. I keep basil and parsley in self-watering planters with 3D-printed reservoir inserts — they stretch my watering interval from daily to every 3 days, which matters enormously during the Swedish summer holiday when nobody is home.
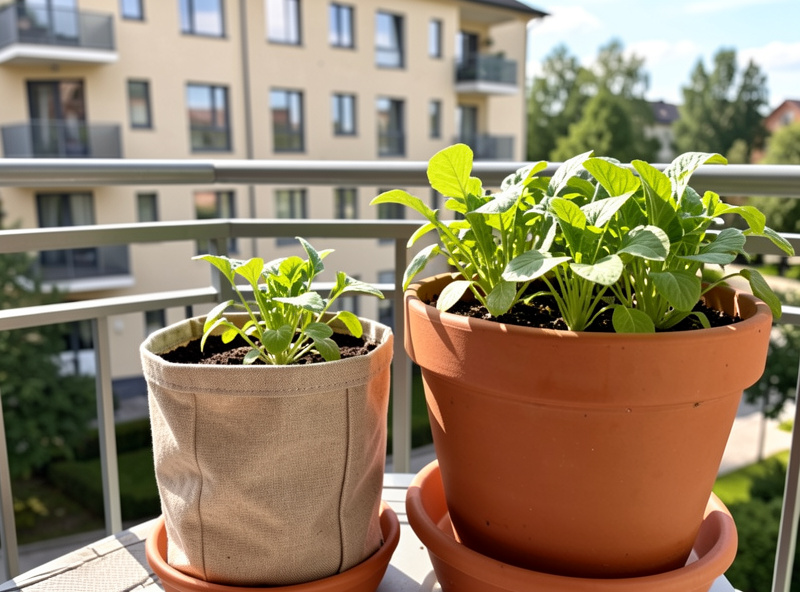
Glazed Ceramic: Attractive and insulating, but heavy. Best for stationary herbs and flowers in sheltered positions.
Fabric Grow Bags: Fold flat for storage over winter, promote excellent root aeration through air-pruning, and drain perfectly. I use heavy-duty 300 GSM bags and get 3-4 seasons before the stitching degrades. They are the lightest option per gallon of soil — important when weight is the limiting factor.
Wooden Planters: Naturally insulating and attractive. Choose rot-resistant cedar or redwood, or line with plastic to extend lifespan.
Step 4: Prepare Quality Growing Medium
Never use garden soil in containers — it compacts, drains poorly, and introduces pests. I learned this by losing an entire batch of lettuce starts to damping-off from bagged garden soil; the University of Wisconsin Extension’s guide to growing vegetables in containers covers exactly why a loose, well-draining medium is non-negotiable in pots. Here is the container mix I make myself:
Basic Container Mix:
- 60% quality potting soil
- 20% compost for nutrients (I use compost from a small hot pile and worm castings)
- 20% perlite or pumice for drainage
For moisture-loving vegetables like leafy greens, increase compost to 30%. For Mediterranean herbs like rosemary and lavender, add coarse sand for improved drainage — they want their root zone to dry out between waterings.
Fill containers to within 1 inch of the rim to allow proper watering without overflow.
Step 5: Choose High-Performing Plants
Select compact, high-yield varieties specifically developed for container culture. In a Nordic climate with a short growing season (last frost mid-May, first frost late September), you cannot afford a cultivar that takes 90 days to mature — it will never finish before the cold returns.
Vegetables for Small Balconies
Tomatoes: ‘Patio Princess,’ ‘Tiny Tim,’ ‘Tumbling Tom’ (dwarf determinate varieties — these finish in 55-65 days, which fits inside a Nordic window)
Peppers: ‘Lunchbox,’ ‘Mohawk,’ ‘Apache’ (compact bush types)
Leafy Greens: ‘Salad Bowl’ lettuce, ‘Bright Lights’ chard, ‘Tokyo Bekana’ bok choy — all cut-and-come-again varieties that produce for weeks
Root Vegetables: ‘French Breakfast’ radishes, ‘Paris Market’ carrots, ‘Round Romeo’ beets
Herbs for Continuous Harvest
Basil: ‘Spicy Globe,’ ‘Greek Columnar’ (compact forms)
Thyme: Any variety — naturally compact and drought-tolerant
Mint: Contain in separate pots to prevent aggressive spreading. I made the mistake of planting peppermint in a corner of a mixed herb trough once — by August the runners had circled the entire container and choked two parsley plants. Separate pot, always.
For more vegetable recommendations, see our complete guide to urban garden vegetables.
Step 6: Install Support Structures
Maximize production through vertical growing systems:
Trellises for Climbing Plants
Install bamboo teepees or metal tomato cages before planting vining crops. Peas, beans, cucumbers, and indeterminate tomatoes require sturdy support reaching 5-6 feet tall. Secure structures to balcony railings for stability in wind — I zip-tie my tomato cages to the railing uprights after losing a loaded cage to an October storm.
Wall-Mounted Systems
Attach vertical planters to blank walls using weather-resistant brackets. These pocket systems excel for herbs, strawberries, and shallow-rooted greens. Ensure wall attachments handle the weight of saturated soil.
Hanging Solutions
Suspend trailing tomatoes (‘Tumbler’ varieties), strawberries, and herbs from ceiling hooks rated for at least 50 pounds. These utilize overhead space while keeping plants away from ground-level pests.
Step 7: Plant and Establish
Timing matters for balcony gardens. In Nordic climates, start after the last frost date when nighttime temperatures consistently exceed 50°F (10°C). For Stockholm, that is reliably the third week of May — I start seeds indoors under my LED grow light bar in early April to have sturdy transplants ready by the frost date.
Direct Seeding vs. Transplants
Direct Seed: Radishes, beans, peas, lettuce, carrots, beets, spinach
Transplant Seedlings: Tomatoes, peppers, eggplant, cucumbers, herbs — these need the head start indoors through April
Plant seeds at depth recommended on packets — generally 2-3 times the seed’s diameter. Water gently with a fine mist to avoid washing seeds away.
Step 8: Implement Smart Watering
Balcony containers dry faster than in-ground gardens — in a Nordic summer with 18-hour daylight, an unshaded 12-inch pot can dry out completely in a single sunny day. Establish these watering practices:
Daily Checks
Test soil moisture by inserting your finger to the second knuckle. Water when the top inch feels dry. Morning watering reduces evaporation and prevents fungal issues. In July and August, I check pots twice — morning and late afternoon — because the long Nordic summer days bake container soil faster than any US gardening guide accounts for.
Deep Watering Technique
Apply water slowly until excess drains from container bottoms — and make sure those drainage holes actually exist, since the gravel-in-the-bottom “drainage layer” myth makes drainage worse rather than better (Illinois Extension’s container drainage guide walks through the soil-physics of why). This ensures complete root zone saturation rather than superficial wetting. Self-watering containers with reservoirs extend time between waterings to 3-5 days — I use these for basil and parsley, the two herbs that sulk hardest when soil dries out.
Seasonal Coverage
For the three-week Swedish summer holiday when nobody is home to water, self-watering reservoirs paired with a simple battery-powered drip irrigation timer keep everything alive. A $40 drip kit on a basic timer is the difference between returning to a thriving garden and returning to a collection of crispy brown stems.
Step 9: Feed for Abundant Harvests
Container plants exhaust nutrients quickly because frequent watering leaches soluble nutrients out the drainage holes. Implement this feeding schedule:
At Planting: Mix slow-release organic fertilizer into potting soil
Every 2 Weeks: Apply liquid organic fertilizer (fish emulsion or seaweed extract). I alternate between the two — fish emulsion for nitrogen-hungry leafy greens, seaweed for micronutrients across everything.
Monthly: Top-dress with compost or worm castings for continuous slow nutrition
Reduce feeding by half during cooler months when growth slows.
Step 10: Maintain and Harvest
Regular maintenance prevents problems and maximizes yields:
Weekly Tasks
Remove yellowing leaves, check for pest signs, and harvest mature vegetables to encourage continued production. Prune tomato suckers and pinch herb flowers to prolong leaf harvest. I harvest basil weekly from June through September — the more you cut, the bushier it gets.
Monthly Tasks
Inspect container drainage, rotate plants for even sun exposure, and replenish mulch layers. Check support structures for stability before storms.
Seasonal Refresh
Replace spent spring crops with summer heat-lovers. Transition summer vegetables to fall greens as temperatures cool. Refresh potting soil annually or when plants show nutrient deficiency signs. In a Nordic climate, the fall transition is tight — I seed my autumn spinach and kale into the same containers the tomatoes vacated, usually the first week of August, to get a harvest before the October frost shuts everything down.
From This Balcony Garden to the Broader Setup
Once your small balcony garden is producing, it slots naturally into a larger growing strategy. The techniques above — container sizing, vertical growing, smart watering — scale directly from a 20-square-foot starter to a full balcony setup. For the complete framework that ties each step together, see our balcony gardening complete guide. For vegetable-specific recommendations optimized for container growing, visit our growing vegetables on your balcony guide. Budget-conscious gardeners find money-saving tips in our urban gardening on a budget guide, and our equipment guide covers essential tools specifically for balcony growing.
How do you create a small balcony garden?
Start by assessing sun exposure for three days. Choose containers that match your light and weight capacity, select compact cultivars bred for pots, and use vertical growing techniques to maximize production. A 20-square-foot balcony can supply herbs and greens for one person from May through October.
What can you grow on a small balcony?
Herbs, lettuce, cherry tomatoes, peppers, strawberries, and compact vegetables all grow well. East-facing balconies suit leafy greens and bush peas; south-facing spaces handle tomatoes and Mediterranean herbs. Use railing planters, wall-mounted systems, and vertical trellises to maximize limited square footage.
How much does a small balcony garden cost?
A basic balcony garden costs $50-150 for containers, potting mix, seeds, and basic tools. Adding grow lights, trellises, and a simple drip irrigation kit increases the total to $150-300. Fabric grow bags ($5-10 each) are the cheapest quality container option per gallon.
How much weight can a balcony garden hold?
Most residential balconies support 40-60 pounds per square foot. Wet container soil weighs roughly 100 pounds per square foot of planter footprint. Keep containers under 14 inches diameter, distribute weight near walls and corners, and check with building management before installing large planters.