Why Start Tomato Seeds Indoors
Every February in my apartment I start tomato seeds under the LED bar on my seedling shelf, because a Nordic spring doesn’t give warm soil until well after the last frost — direct sowing means losing half the season. Starting seeds indoors lets me pick the varieties I actually want, control the timing, and land fruiting transplants ready to go the moment the balcony warms up. A packet of 25 seeds still costs less than a single nursery transplant, and it grows 25 plants instead of one.
For a complete overview of all indoor growing methods and crops, see my LED lights for growing plants indoors guide for lighting specifics and the complete indoor growing guide.
For indoor gardeners and apartment growers, seed starting is the gateway to growing tomatoes in containers on balconies, windowsills, or under grow lights. The process takes 6-8 weeks from seed to transplant-ready seedling, and with proper timing, you can have fruiting plants well before outdoor gardeners have even planted their seeds. When you transplant outside, plan the bed layout up front using my companion planting for tomatoes guide — basil, marigold, and carrot pairings improve fruit set and reduce pest pressure.
Choosing Tomato Varieties for Indoor Seed Starting
The variety you select at the seed stage determines everything about your growing experience — plant size, fruit type, disease resistance, and harvest timeline. Making the right choice prevents disappointment later.
Determinate vs Indeterminate
Determinate tomatoes grow to a fixed height (usually 3-4 feet), produce all their fruit within a 2-3 week window, and then stop growing. They’re ideal for containers because their compact size fits standard pots. Popular determinate varieties include Patio Princess, Bush Early Girl, and Tiny Tim.
Indeterminate tomatoes continue growing and producing fruit until frost kills them. They require staking, caging, or trellising and benefit from larger containers (5+ gallons). While they demand more space, indeterminate varieties like Cherokee Purple, Sungold, and Brandywine offer superior flavor and extended harvests.
Cherry vs Slicing vs Paste Tomatoes
Cherry tomatoes are the easiest to grow indoors and produce the most reliably. Varieties like Sungold and Sweet 100 fruit heavily even in modest conditions. Slicing tomatoes (beefsteak types) require more light, larger containers, and longer growing seasons but reward with substantial fruit. Paste tomatoes like Roma and San Marzano are excellent for sauce-making and tend to be more disease-resistant.
Disease Resistance Codes
Seed packets include disease resistance codes like “VFN” — these letters indicate resistance to specific pathogens. V stands for verticillium wilt, F for fusarium wilt, N for nematodes, and T for tobacco mosaic virus. Choosing resistant varieties significantly reduces problems, especially when growing in containers where soil-borne diseases can accumulate over time.
Timing Your Indoor Seed Start
Starting seeds at the right time is critical. Too early and seedlings become leggy and root-bound. Too late and you miss the optimal transplant window.
The 6-8 Week Rule
Tomato seeds need 6-8 weeks indoors before they’re ready to transplant to their final containers. Count backward from your intended transplant date — typically after the last frost for outdoor containers, or any time for purely indoor growing under lights. For most growers, this means starting seeds between mid-February and late March.
Succession Sowing Strategy
Start a new batch of seeds every 2-3 weeks for a continuous supply of young plants. This approach hedges against seedling failures and ensures you always have plants at different growth stages. If your first batch fails due to damping-off or other issues, your second batch provides a safety net without losing the entire season.
Seed Starting Mix and Containers
Regular potting soil is too heavy and nutrient-rich for tomato seed germination. Seed starting requires a specialized medium that’s fine-textured, sterile, and low in nutrients.
Seed Starting Mix Requirements
A quality seed starting mix contains fine peat moss or coco coir, perlite or vermiculite for drainage, and minimal fertilizer. The mix should be sterile to prevent damping-off disease — a fungal condition that kills seedlings at the soil line. Look for mixes specifically labeled “seed starting” rather than “potting mix.” Popular options include FoxFarm Light Warrior, Espoma Organic Seed Starter, and Jiffy Seed Starting Mix.
Container Options
Almost any clean container with drainage holes works for starting tomato seeds. Cell trays with individual compartments prevent root entanglement and make transplanting easier. Peat pellets expand when soaked and can be planted directly into larger pots — convenient but more expensive per seedling. Recycled containers like yogurt cups, egg cartons, or toilet paper rolls work well if you punch drainage holes in the bottom.
Container Size for Seedlings
Each tomato seed needs about 1 cubic inch of space initially. Cell trays with 1-2 inch cells are ideal. Once seedlings develop their first true leaves (the second set of leaves that appear), they’re ready to be transplanted into larger 3-4 inch pots for continued indoor growth before final transplanting.
Sowing Tomato Seeds: Step by Step
The actual planting process is straightforward, but attention to detail improves germination rates significantly.
Pre-Soaking Seeds (Optional)
Soaking tomato seeds in warm water for 12-24 hours before planting can speed germination by 1-2 days. The warm water softens the seed coat and triggers the germination process. Use water at about 75°F (24°C) — not hot enough to damage the seeds. This step is optional but helpful for older seeds with lower viability.
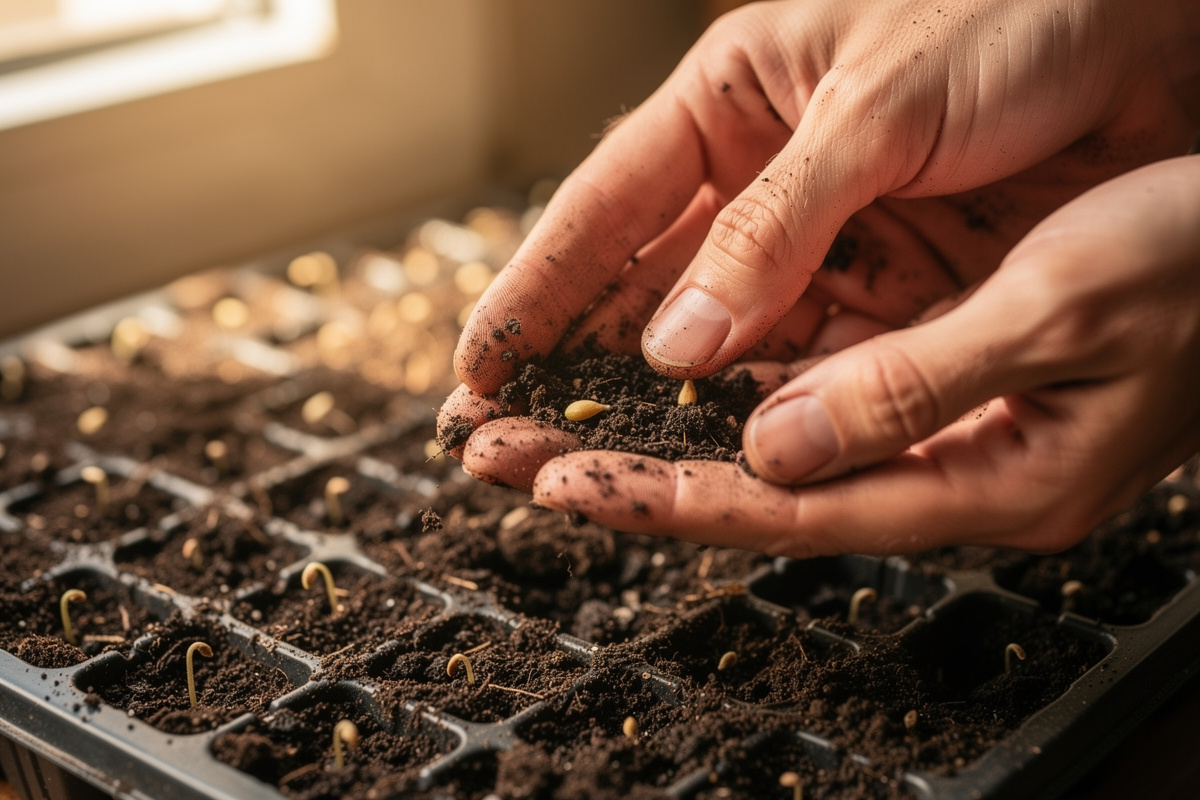
Planting Depth and Spacing
Plant tomato seeds shallow — about 1/4 inch deep in sterile seed starting mix — and cover with a thin layer. Tomato seeds do not need light to germinate; the shallow depth simply lets the seedlings emerge without struggling through deep mix. Cornell’s tomato growing guide is the cleanest reference for the timing, sterile-mix, and temperature basics I follow, and it confirms seeds germinate fastest in warm soil (Cornell Garden-Based Learning — tomato growing guide). Space seeds about 1 inch apart in cell trays or seed flats. Plant 2-3 seeds per cell and thin to the strongest seedling after germination.
Watering After Sowing
Moisten the seed starting mix before planting, not after. The mix should feel like a wrung-out sponge — damp but not dripping. After sowing, mist the surface lightly with a spray bottle to settle the seeds. Cover the tray with a clear plastic dome or plastic wrap to maintain humidity until germination occurs.
Germination Conditions
Tomato seeds germinate fastest and most reliably under specific conditions that differ from what mature plants need.
Temperature for Germination
Tomato seeds germinate best at soil temperatures between 70-80°F (21-27°C). At 70°F, germination takes 7-10 days. At 80°F, seeds sprout in 5-7 days. Below 60°F, germination is slow and uneven. A seedling heat mat provides consistent bottom heat and is the single most effective tool for reliable tomato seed germination. Place the mat under the seed tray and set it to 75°F.
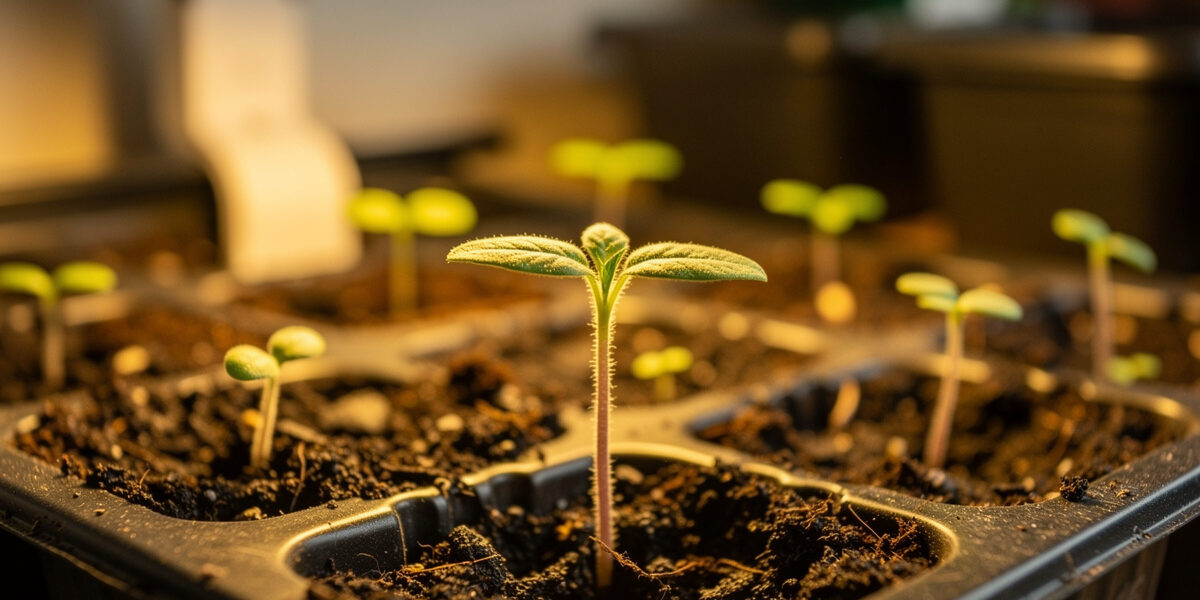
Light After Germination
As soon as the first seedlings emerge (you’ll see tiny green loops pushing through the soil), remove the humidity dome and provide bright light immediately. Seedlings stretched toward a weak light source become leggy and weak within days. Position grow lights 2-3 inches above the seedlings and adjust upward as they grow. Fluorescent shop lights or LED grow panels both work effectively.
Humidity Management
High humidity (covered tray) is essential until germination but harmful afterward. Remove the cover within 24 hours of the first seedlings emerging to prevent damping-off disease. Provide gentle air circulation with a small fan on low speed — this strengthens seedling stems and reduces fungal disease risk.
Caring for Tomato Seedlings Indoors
The period between germination and transplant readiness requires specific care that determines plant quality.
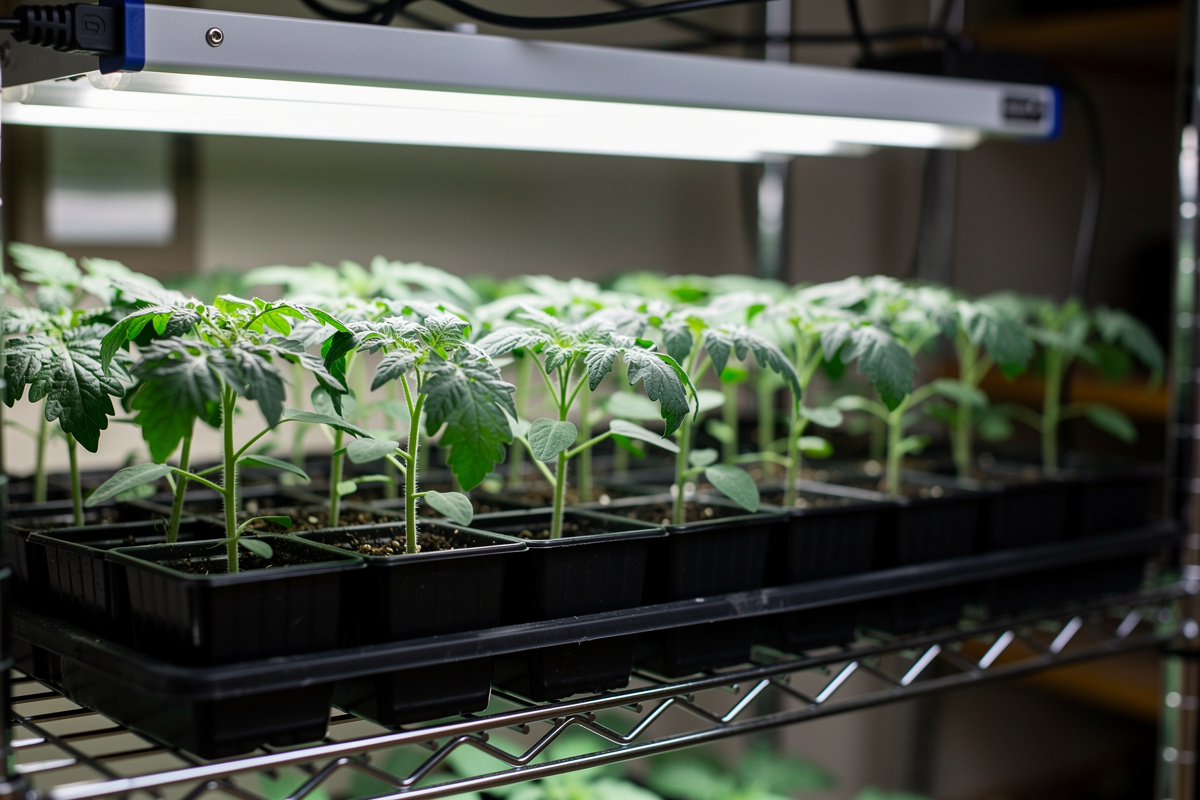
Light Requirements for Seedlings
Tomato seedlings need 14-16 hours of bright light daily. Position lights 2-4 inches above the canopy and raise them as plants grow. If seedlings stretch tall and thin with wide spaces between leaves, they’re not getting enough light. Move lights closer or increase intensity. A south-facing window alone rarely provides sufficient light for strong tomato seedling growth.
Watering Seedlings
Water tomato seedlings from below by placing the tray in a shallow dish of water for 10-15 minutes. Bottom watering keeps the surface dry (preventing damping-off) and encourages roots to grow downward. Water when the surface of the mix begins to dry — typically every 2-3 days. Overwatering is the most common cause of seedling death.
Thinning Seedlings
When multiple seeds germinate in one cell, thin to the strongest seedling by snipping the extras at soil level with small scissors. Don’t pull them out — this disturbs the roots of the seedling you want to keep. The strongest seedling is usually the tallest with the darkest green leaves.
Transplanting to Larger Pots
When seedlings develop 2-3 sets of true leaves and roots begin emerging from drainage holes, transplant them into 3-4 inch pots filled with regular potting soil. Bury the stem up to the first set of leaves — tomato stems develop roots along their length, and deeper planting creates a stronger root system. Handle seedlings by their leaves, never the stem, to avoid crushing delicate tissue.
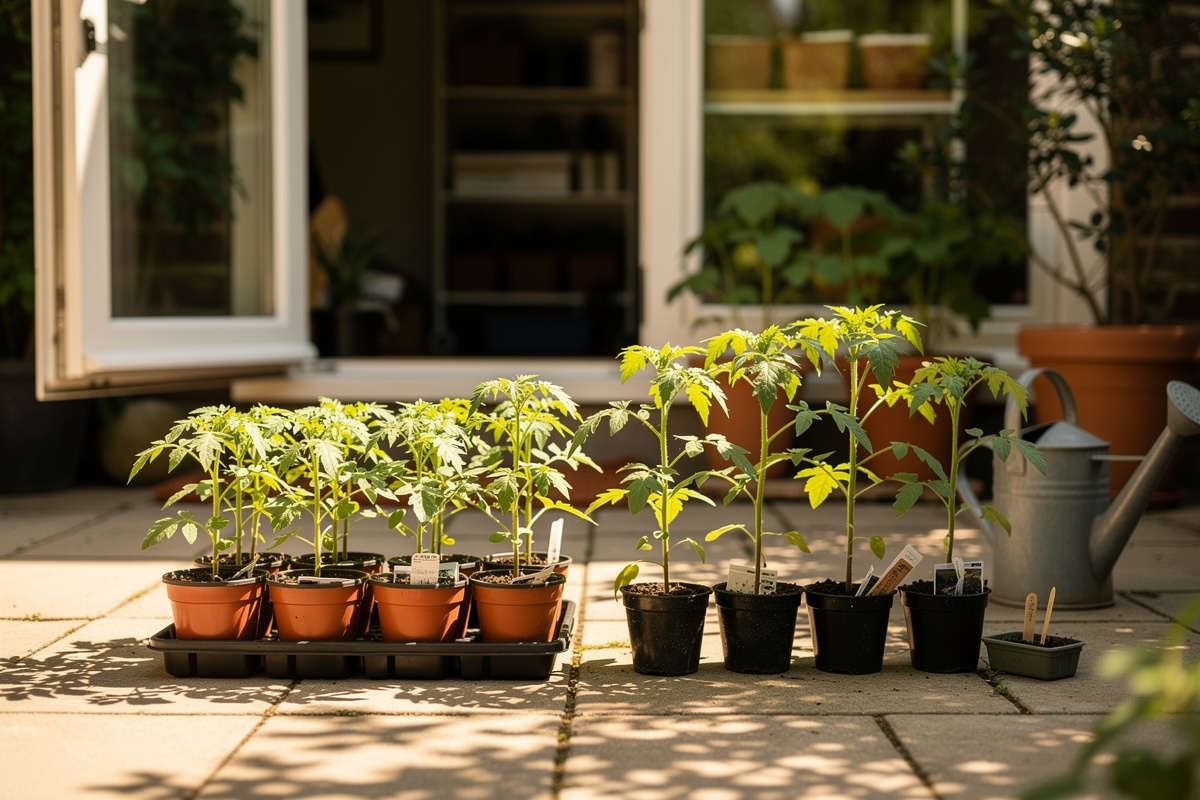
Hardening Off Before Final Transplant
Seedlings grown indoors under controlled conditions need gradual exposure to outdoor conditions before permanent transplanting. This process, called hardening off, takes 7-10 days. University of Illinois Extension walks through the same gradual-exposure schedule I follow, starting with a couple of hours of protected outdoor time and building up (Starting a Garden: Hardening Off Indoor Seedlings).
The Hardening Off Schedule
| Day | Outdoor Exposure | Protection |
|---|---|---|
| 1-2 | 1-2 hours in shade | Protected from wind |
| 3-4 | 2-4 hours with morning sun | Partial shade afternoon |
| 5-6 | 4-6 hours with full sun | Bring in if windy |
| 7-8 | 6-8 hours full conditions | Leave out overnight if above 50°F |
| 9-10 | Full day and night outdoors | Ready for transplant |
Indoor-Only Growing (No Hardening Needed)
If you’re growing tomatoes entirely indoors under lights, skip the hardening off process. Simply transplant seedlings directly into their final containers and maintain consistent light, temperature, and watering conditions. The transition is still stressful, so minimize root disturbance during transplanting.
Common Seed Starting Problems
| Problem | Cause | Solution |
|---|---|---|
| Seeds don’t germinate | Soil too cold or old seeds | Use heat mat, check seed expiration date, test viability |
| Seedlings fall over at soil line | Damping-off disease | Use sterile mix, improve air circulation, reduce watering |
| Leggy, stretched seedlings | Insufficient light | Move lights closer (2-3 inches), increase light duration |
| Yellowing lower leaves | Overwatering or nutrient deficiency | Reduce watering, transplant to larger pot with fresh soil |
| White mold on soil surface | Excess moisture, poor air flow | Remove mold, increase fan circulation, water from below |
| Seedlings growing slowly | Temperature too low | Increase temperature to 65-75°F during day, 60°F at night |
Fertilizing Tomato Seedlings
Seed starting mix contains minimal nutrients by design. Once seedlings develop their first true leaves, they begin needing supplemental feeding.
When to Start Feeding
Begin fertilizing 1-2 weeks after germination, once the first true leaves appear. Use a diluted liquid fertilizer at 1/4 strength — full-strength fertilizer burns delicate seedling roots. A balanced fertilizer (10-10-10 or 20-20-20) diluted to 1/4 strength applied weekly provides adequate nutrition until transplanting.
Organic Fertilizer Options
Fish emulsion diluted to 1/4 strength is an excellent organic option for tomato seedlings. It provides nitrogen for leaf growth along with trace minerals. Worm casting tea (steep worm castings in water for 24 hours, then strain) is another gentle organic fertilizer that adds beneficial microorganisms to the root zone.
From Seed to Harvest: Timeline
Understanding the full timeline helps you plan effectively and set realistic expectations.
- Days 1-7: Germination — seeds sprout under warm, moist conditions
- Days 7-14: Cotyledon stage — first seed leaves appear, light becomes critical
- Days 14-28: True leaf development — 2-4 sets of true leaves, begin fertilizing
- Days 28-42: Transplant to larger pots — stems thicken, root systems expand
- Days 42-56: Hardening off and final transplant — plants adapt to outdoor conditions
- Days 56-90: Vegetative growth — plants establish in final containers, begin flowering
- Days 90-120: Fruit set and ripening — first harvest depending on variety
Fast-maturing varieties like Early Girl (50-60 days to maturity) can produce fruit sooner, while large beefsteak types may take 80-90 days from transplant to first ripe tomato.
How many weeks before last frost should I start tomato seeds indoors?
Start tomato seeds indoors 6-8 weeks before your last expected frost date. For most regions, this means starting seeds between mid-February and late March. Starting earlier produces leggy, root-bound seedlings that struggle after transplanting. Starting later delays your harvest by the same number of days.
Do tomato seeds need light to germinate?
Tomato seeds do not need light to germinate — warmth and moisture do the work. Plant them about 1/4 inch deep in sterile seed starting mix. Light becomes critical the moment seedlings emerge: they need 14-16 hours of bright light daily to grow stocky rather than tall and leggy.
What temperature do tomato seeds need to germinate?
Tomato seeds germinate best at soil temperatures between 70-80°F (21-27°C). At these temperatures, germination takes 5-10 days. Below 60°F, germination is slow and unreliable. A seedling heat mat set to 75°F provides consistent bottom heat and significantly improves germination rates.
Can I start tomato seeds in regular potting soil?
Regular potting soil is not ideal for starting tomato seeds. It’s too heavy, may contain fungal spores that cause damping-off disease, and often has fertilizer levels too high for delicate seedlings. Use a sterile seed starting mix that’s fine-textured, well-draining, and low in nutrients for best germination results.
How do I prevent damping-off in tomato seedlings?
Prevent damping-off by using sterile seed starting mix, providing good air circulation with a small fan, watering from below to keep the surface dry, avoiding overcrowding, and removing humidity covers as soon as seedlings emerge. These practices create conditions that favor healthy seedlings over fungal pathogens.