Worm castings are the closest thing I have to a secret weapon, and I make them in a bin that lives indoors year-round — under cover in a cool corner, because an outdoor worm bin would freeze solid in a Swedish winter. That detail matters: while the garden sleeps from November to March, my worms keep eating kitchen scraps and turning out the richest soil amendment a home grower can produce. By the time I’m starting seeds and feeding houseplants through the dark months, I’ve got a steady supply of fresh castings that no bagged product can match. Here’s what they actually do, exactly how much to use, and how to harvest your own.
The short version: castings deliver several times more plant-available nitrogen, phosphorus, and potassium than the scraps the worms ate, plus a living community of beneficial microbes that survives the worm’s gut and arrives on the roots ready to work. A tablespoon or two worked into a houseplant pot every few months covers most of its feeding.
As an Amazon Associate I earn from qualifying purchases.
What Worm Castings Actually Are
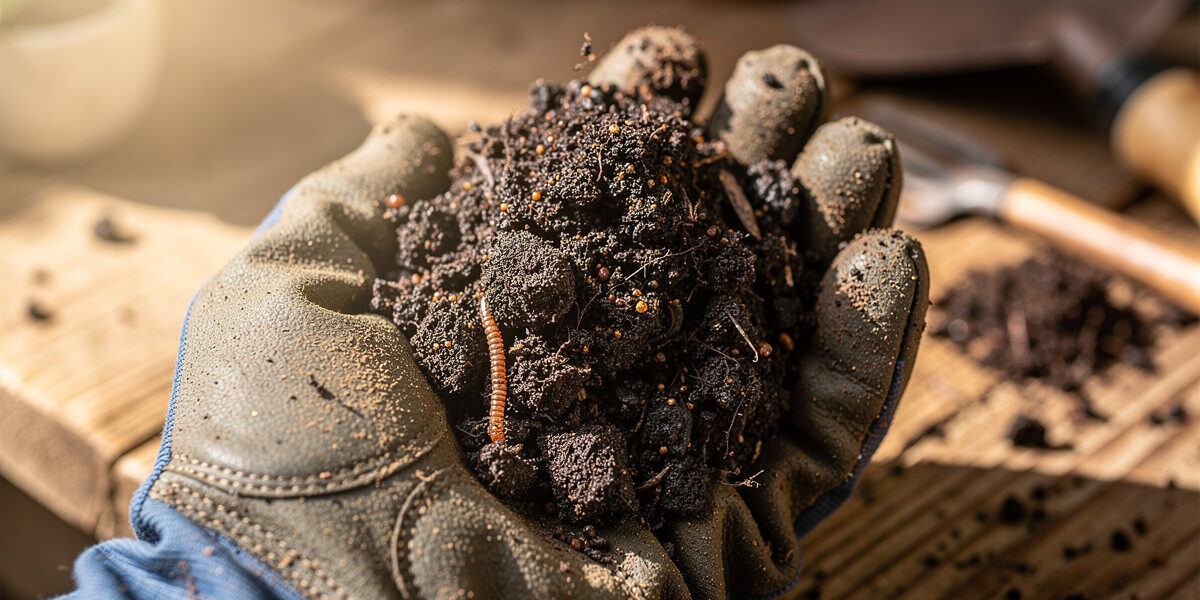
Castings — also called vermicompost — are the digestive output of red wigglers (Eisenia fetida) and similar composting worms. Unlike ordinary compost, where microbes do all the work, vermicompost passes organic matter through a worm’s gut: the gizzard grinds plant cell walls, gut enzymes break complex molecules into simple sugars and amino acids, and gut bacteria multiply explosively and attach to the resulting humus. What comes out is darker, far finer, and far more biologically alive than any hot or cold compost.
The numbers are striking. A gram of fresh castings holds hundreds of millions of bacteria, and the community shifts toward beneficial, plant-growth-promoting species like Pseudomonas fluorescens and Bacillus subtilis during gut transit. The chemistry shifts too: plant-available nitrogen, phosphorus, and potassium all rise to several times their levels in the starting material — typically cited as 5 to 11 times more plant-available NPK overall. The scraps didn’t gain nutrients; the worm just unlocked the ones already there.
7 Documented Benefits for Plants
This is one of the few amendments where a good deal of the research backs the hype — decades of university vermicompost trials have measured real effects on germination, growth, and yield. UC Santa Barbara’s vermicomposting program puts it plainly: because castings are rich in nitrogen, they help vegetables grow stronger, taller, and greener, and mature plants are forgiving of over-application. The credible list of benefits:
- Faster germination. Seeds in a 10–20% casting mix come up a day or three sooner, with the biggest effect on slow starters like peppers and basil — which, in a short season, is real time I don’t have to spare.
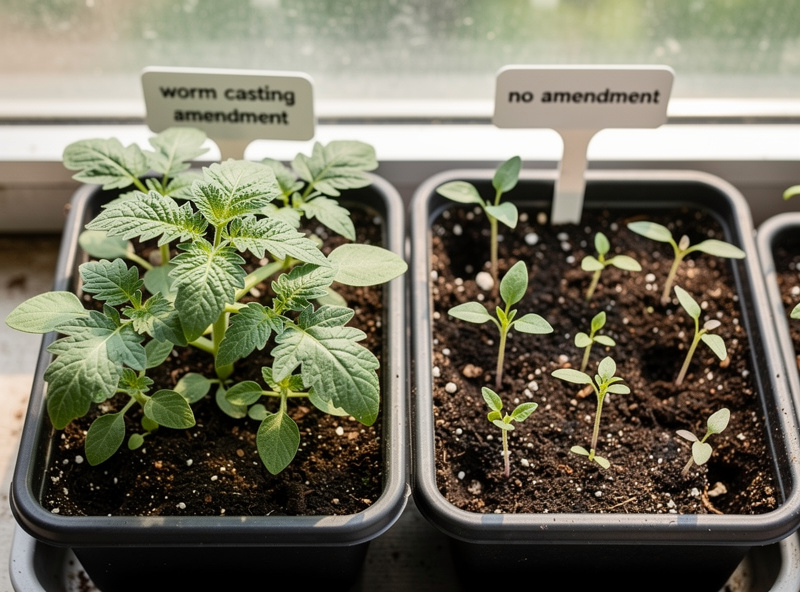
- Faster early growth. Trials show seedlings reaching transplant size noticeably faster in casting-amended mix. The edge shrinks but persists as plants mature.
- Stronger transplant survival. Research records markedly higher survival for tomato and pepper transplants given castings versus unamended controls.
- Increased yield. Studies on tomatoes, cucurbits, peppers, and beans have measured meaningfully higher fruit yields in casting-amended soil.
- Reduced disease pressure. Castings suppress seedling damping-off and Pythium root rot — beneficial microbes simply out-compete the pathogens.
- Reduced pest pressure. Castings carry chitinase enzymes that disrupt soft-bodied pests like aphids and spider mites; foliar tea applications show measurable reductions.
- Better drought tolerance. By improving soil structure and water-holding capacity, castings help plants wilt more slowly under stress.
One honest caveat: these effects are largest on poor or new soil. If your soil is already well-managed and biologically rich, the gains are smaller — still real, just less dramatic.
How to Use Worm Castings
Castings are concentrated, so you use far less than compost — and too much can actually burn delicate seedling roots. My rates:
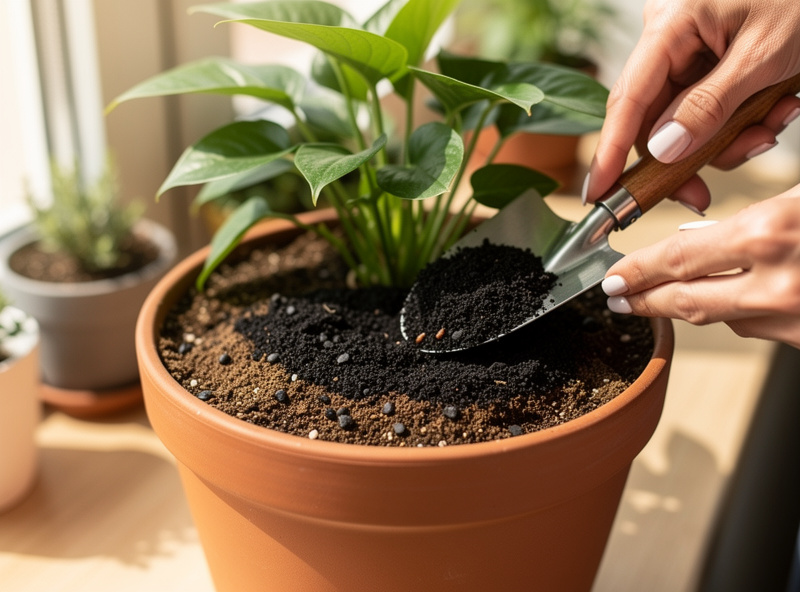
Houseplants: 1–2 tablespoons per 6-inch pot, worked into the top inch, every 3 months. Scale up for bigger pots (about 3 tablespoons for an 8-inch, ¼ cup for a 12-inch).
Seed-starting mix: 20% castings to 80% potting mix by volume — no more, or you risk burning seedlings. Skip it for acid-lovers like blueberries.
Transplant booster: a couple of tablespoons in the planting hole for tomatoes, peppers, cucumbers, or any heavy feeder, mixed into the hole before setting the plant.
Top-dressing beds: about a ½ inch worked into the top couple of inches, twice a season — earthworms carry it deeper over time.
Casting tea: steep a cup of castings in a gallon of dechlorinated water for 12–24 hours, strain, dilute 1:4, and use as a foliar feed or root drench. See my how to make compost tea guide for the brewing side.
No bin yet and need castings now? Bagged organic worm castings are a fine way to start — just know that fresh home-made ones are more biologically active (more on that below).
Harvesting Castings From Your Bin
If you want a steady free supply, a worm bin is the answer — and it’s genuinely easy. Start one with a worm bin kit and a starter portion of live red wigglers (the full setup is in my vermicomposting for beginners guide). Castings are ready when most of the bedding has turned dark and crumbly — usually three to four months in. Three ways to separate worms from finished castings:
Migration (free, ~2 weeks): push the finished castings to one side, add fresh bedding and food to the other; the worms move over in a week or two and you scoop out the casting side.
Pyramid sort (free, ~1 hour): tip the bin onto a tarp under bright light, build little pyramids; the worms dive away from the light, so you scrape castings off the top every few minutes until only worms remain.
Stacked-tray self-harvest (built in): stop feeding the bottom tray and the worms climb up to fresh food in the tray above over two or three weeks; lift the bottom tray out, castings and no worms.
Sieve the harvest through quarter-inch hardware cloth — coarse bits go back in the bin, the fine stuff is your finished product.
Storing Worm Castings
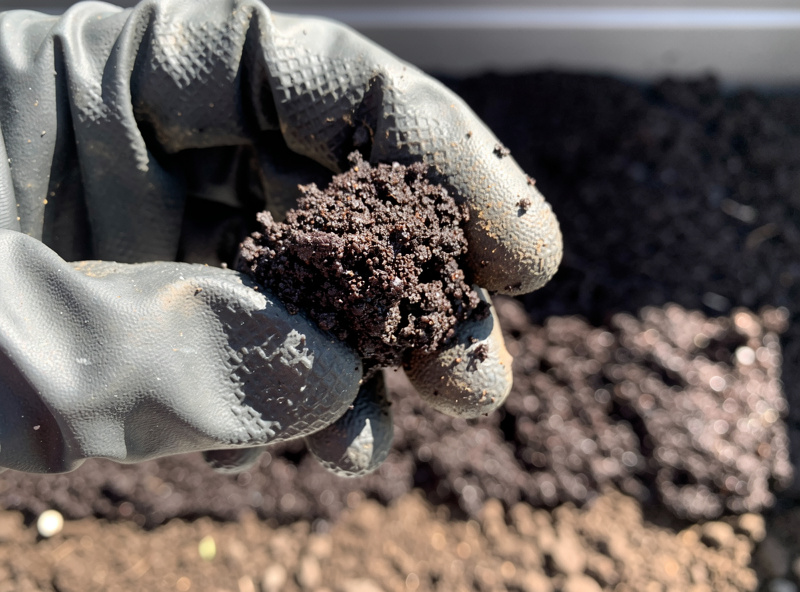
Fresh castings are at their most alive in the first few weeks, then microbial activity slowly settles. For most uses, fresher is better — the living biology is half the point. To keep them active: store in a sealed container with a few air holes (fully airtight kills the microbes), keep them cool and dark, and hold a wrung-sponge moisture (bone-dry preserves nutrients but loses the biology — rehydrate before use). Use within about six months for the full microbial benefit; older castings still feed plants but with less life in them.
This is exactly why I bother with a bin at all: commercial bagged castings are often pasteurized for shelf stability, so they keep their nutrients but lose most of the live microbiology. Fresh home-made castings win on that count every time — and mine are free.
Worm Castings vs Regular Compost
| Factor | Worm Castings | Hot/Cold Compost |
|---|---|---|
| Plant-available N | 5–11x source material | 1–2x source material |
| Microbial activity | Very high (live) | High (live, broader range) |
| Texture | Fine, uniform | Coarse to medium |
| Application rate | 1–2 Tbsp per 6-inch pot | 1–2 inches per garden bed |
| Best for | Containers, transplants, foliar tea | Garden beds, mulch, bulk soil amendment |
| Cycle time | 3–4 months | 8–12 weeks (hot) or 9–12 months (cold) |
They’re complements, not rivals. Castings shine in small, high-impact doses — starting seeds, boosting transplants, feeding houseplants, brewing tea. Bulk compost is for filling raised beds and mulching at scale. I run both: the worm bin indoors for the concentrated stuff, a compost system for volume.
Where castings really earn their keep for me is indoor growing — a little mixed into the houseplant mix or the potting soil I start seeds in makes a visible difference through the winter.
Worm castings are the reason I run a worm bin at all — they outperform every bagged amendment I have ever tested on my container garden. A single pound of castings goes further than you expect: a tablespoon per houseplant, a handful per transplant hole, half an inch top-dressed on the balcony beds twice a season. Start with a worm bin, let it run for three months without touching it, and the first harvest will convince you the same way it convinced me.
Related Reading
- Home Composting: The Complete Beginner Guide — the pillar guide covering all five methods
- Vermicomposting for Beginners — the worm bin setup that produces castings
- How to Make Compost Tea — castings make an exceptional tea base
- Best Potting Soil for Indoor Plants — the base mix castings amend, where they shine indoors
Worm Castings Through a Nordic Winter
The worm bin in the utility room is the only active soil-building system running from November through March, when the outdoor pile is frozen solid. A pound of red wigglers processes roughly half a pound of kitchen scraps per day at room temperature, and the castings that accumulate over winter are the first amendment that goes into the container soil in April. They come out dark and crumbly and smelling like a forest floor after rain — the single best soil amendment I use.
Worm castings are not a fertiliser in the conventional sense — the raw NPK numbers are low — but they improve soil structure, water retention, and microbial activity in ways bottled synthetics cannot replicate. A handful per 5-gallon pot at transplant time, plus a second handful as a mid-season side-dressing, is the only amendment I use beyond compost. The results have been consistent enough that I stopped experimenting with commercial organic fertilisers a couple of seasons ago.
Winter does change how I run the bin. The worms eat a little slower in a cool corner, so I feed less and bury scraps under extra bedding to keep the surface from staying wet in the low light and dry indoor heat. I also stop harvesting aggressively from about December, letting the bin build up a reserve so there is a full flush of finished castings waiting the moment I start sowing in late winter. By the time the balcony thaws, the bin has done a season’s quiet work while everything outside was frozen — which is the whole reason an indoor worm bin is the one composting system worth running through a Nordic winter.
Frequently Asked Questions
How are worm castings different from compost?
Worm castings pass through worm digestion, breaking nutrients into more plant-available forms. They contain 5 to 11 times more plant-available NPK than the source material and a higher density of beneficial microbes. Regular compost is broken down by microbes alone and has a coarser texture and lower nutrient concentration.
Can you use too many worm castings?
Yes. Castings are concentrated – over 25 to 30% of pot volume can burn delicate roots, especially seedlings. The standard rate of 1 to 2 tablespoons per 6-inch pot or 20% in seed-starting mix avoids burn risk while delivering measurable benefits.
How long do worm castings last in the soil?
Nutrient release continues for 4 to 6 months because castings are slow-release. Microbial activity persists 6 to 12 months in well-watered soil before populations settle to background levels. Reapply every 3 months for houseplants and twice per growing season for outdoor beds.
Are worm castings better than synthetic fertilizer?
For long-term soil health, yes – castings improve soil structure, microbiology, and water retention while feeding plants. For rapid nutrient delivery, synthetic fertilizers act faster. Many gardeners use castings as the foundation and supplement with synthetic feeds during peak growth.
Do worm castings smell?
No. Properly cured castings smell faintly earthy, like a forest floor after rain – never sour, ammonia, or rotten. A bad smell means they were harvested too early; cure questionable castings 2 to 4 more weeks in a covered bucket before use.
Can I make worm castings without a worm bin?
No. Worm castings specifically require red wiggler worm digestion. Hot and cold composting produce regular compost instead – useful but not the same. To make your own castings you need a worm bin, which works indoors year-round even in a cold climate.
What is the difference between worm castings and worm tea?
Castings are the solid product harvested from the bin. Worm tea is a liquid extract – castings steeped in dechlorinated water for 12 to 24 hours, sometimes with molasses and aeration. Tea is sprayed or poured as a feed; castings are mixed into soil. Both are biologically active with overlapping uses.