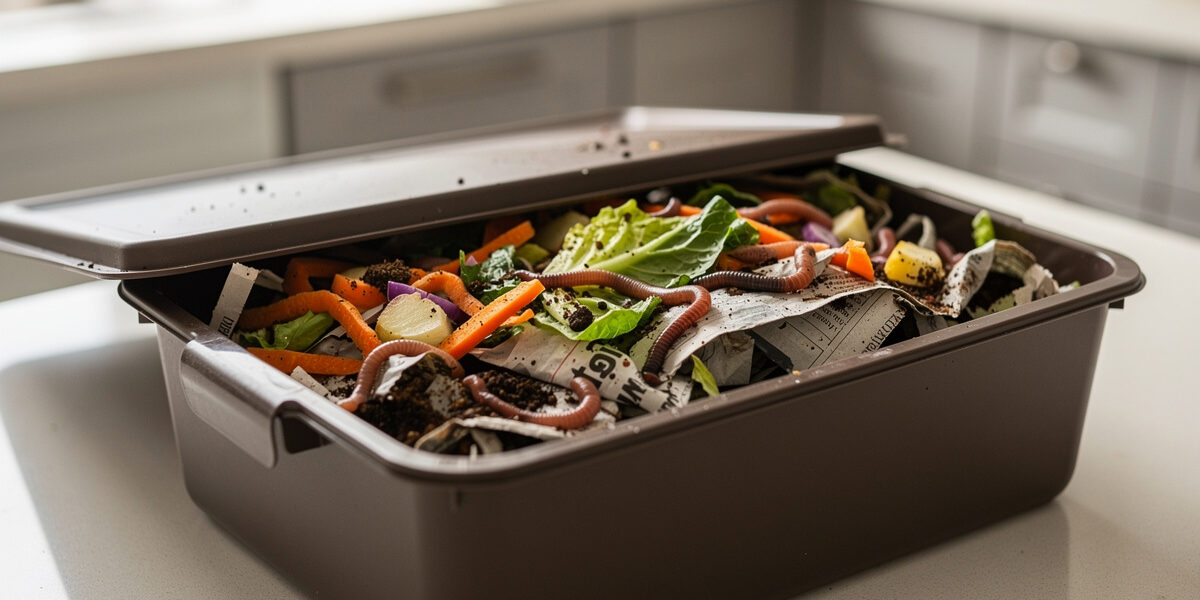
Vermicomposting for beginners starts with one pound of red wigglers in a 2-square-foot bin — about 1,000 worms that eat half their body weight in kitchen scraps every day. My worm bin lives under the kitchen counter and produces 4 to 6 quarts of finished castings every 3 to 4 months, for a setup that costs under 70 dollars. The castings from that one bin feed every houseplant and container on my balcony, year-round. The secret is getting the first month right — everything after that is easy.
Worm composting is the single best fit for apartment dwellers, renters, and anyone without yard space. Unlike a backyard pile that needs a 3×3×3 minimum to heat up, a worm bin works at room temperature with no turning, no smell, and no neighbors complaining. The trade-off: worms eat slower than thermophilic microbes, so output is lower per cubic foot, and the bin cannot handle large amounts of yard waste.
As an Amazon Associate I earn from qualifying purchases.
Why a Worm Bin Beats Other Indoor Methods
Worm castings are strikingly nutrient-dense — New Mexico State University Extension notes home-garden castings often contain 5 to 11 times more nitrogen, phosphorus, and potassium than the surrounding soil. The microbial community in worm castings includes plant-growth-promoting bacteria that survive the worm’s gut and arrive on the soil pre-inoculated. That is why extension guides keep seed-starting blends to around 20% castings — it is enough to visibly speed up seedling growth without the salt load that pure castings can carry.
The other indoor option, bokashi, ferments instead of composting and produces a pre-compost that still needs to be buried in soil for 2 to 4 weeks. Worm bins skip the burial step — the output is finished, cured, and immediately usable. For a renter who cannot dig in any soil, that matters.
Setup is the most intimidating part for beginners, but the actual care is minimal: feed once a week, harvest once a quarter, replace bedding twice a year. The bin is genuinely set-and-forget once it is established.
I started with a 14-gallon DIY plastic tote in 2019 — drilled the holes myself, bought a pound of red wigglers from a supplier in Oregon, and immediately made every mistake in the list below. Overfed the first week and had a fruit-fly hatch that took a month to clear. Learned to bury food deeper, keep the bedding drier than I thought, and trust the worms to self-regulate. That same 14-gallon bin is still running today, and the castings it produces are the single best soil amendment I have ever used — better than anything in a bag.
Choosing Your First Worm Bin
Three bin styles cover 95% of beginner setups, each with a clear trade-off:
DIY plastic tote (10–14 gallons). Cheapest at 8 to 15 dollars for the tote plus 10 dollars in materials. Drill 30 to 40 quarter-inch holes in the lid and upper sides for airflow, plus 20 holes in the bottom for drainage (sit the bin in a drip tray). Works well but requires manual harvesting — separate worms from castings by hand or with the migration method.
Stacked tray system (Worm Factory, Hungry Bin, Urbalive). 60 to 150 dollars. I upgraded to a Worm Factory 360 after the first year with my DIY tote — the self-harvesting feature alone is worth the upgrade, cutting harvest time from an hour of pyramid-sorting to ten minutes of tray-swapping. Worms migrate up to fresh food in the top tray, leaving finished castings in the bottom tray. Self-harvesting saves 30 minutes per harvest cycle. Best for most apartment users.
Continuous-flow bin (Hungry Bin, Worm Inn). 200 to 350 dollars. Worms feed at the top, finished castings drop out the bottom on a schedule. Highest throughput at 1 to 2 pounds of food per day. Best for households of 4 or more, or small commercial use.
For a single person or couple just starting out, the DIY tote is fine for the first 6 months while you learn. Upgrade to a stacked tray system once you know you will keep at it.
Buying Red Wigglers
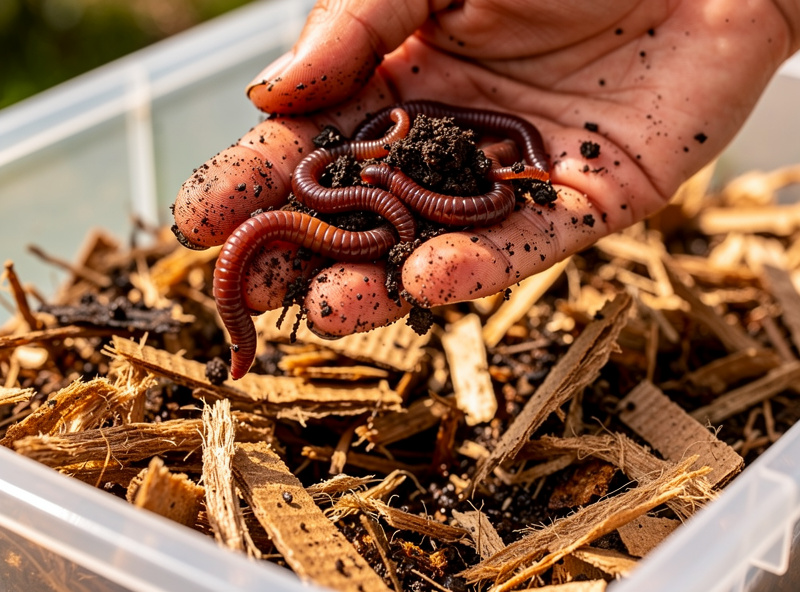
Red wigglers (Eisenia fetida) are the only worm species suited to bin composting. Common earthworms (nightcrawlers, garden worms) burrow deep and die in shallow bins. Red wigglers stay near the surface, tolerate temperatures from 55 to 77°F, and can eat half their body weight in food scraps per day.
One pound of red wigglers — roughly 1,000 worms — costs 25 to 45 dollars from a worm farm or online supplier. The pound I ordered arrived in a breathable mesh bag inside a priority mailer, every worm alive and wriggling — do not open the bag in the kitchen over a white counter unless you want to chase escapees for 20 minutes. Avoid bait-shop worms; they are usually European nightcrawlers and behave differently. Reputable suppliers ship in breathable mesh bags with peat moss; the worms arrive alive and active in 2 to 3 days.
One pound is enough to start a 2-square-foot bin processing 0.5 pounds of food scraps per day. The population doubles roughly every 90 days under good conditions, so within a year a single starter pound becomes 4 to 8 pounds — enough to handle a family of four’s kitchen scraps.
Bedding and Feeding the Bin
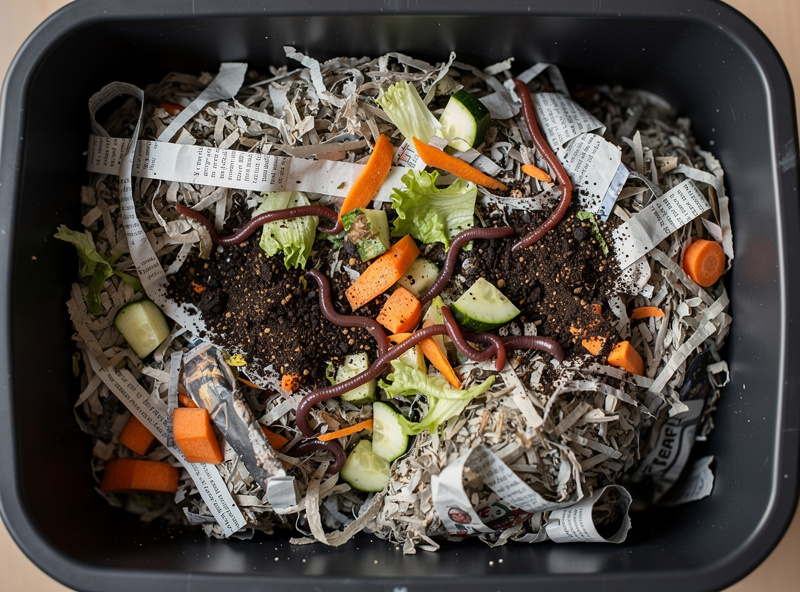
Bedding makes up 60 to 70% of bin volume and serves three jobs: it absorbs excess moisture, gives worms a place to retreat from food scraps, and provides carbon to balance the high nitrogen of food waste. Bedding should be moist as a wrung-out sponge — drier and worms dehydrate, wetter and the bin goes anaerobic.
Best bedding materials:
- Shredded newspaper or office paper (avoid glossy or colored print)
- Shredded corrugated cardboard (worms love the corrugation glue)
- Coconut coir (purchased as a brick, expanded with water)
- Aged leaf litter from outside (freeze for 48 hours first to kill mites and ant eggs)
- Aged horse or rabbit manure (only if pesticide-free)
In my bin, I use a 50/50 mix of shredded cardboard and coconut coir. The coir holds water better than paper alone, and the corrugation in the cardboard gives the worms somewhere to congregate between feedings. I mist the mix until a handful drips a few drops, then let it sit overnight.
Build the bedding 4 to 6 inches deep, mist with water until uniformly damp, and let it sit 24 hours before adding worms. This lets the carbon absorb water and gives the worms a habitat to land in.
What worms eat: all vegetable and fruit scraps, coffee grounds with filters, tea bags (remove staples), eggshells (crushed), small amounts of bread or pasta. Cut large scraps into 1-inch pieces — worms eat surface area, not volume, so smaller pieces process 3 times faster.
What worms do not eat in a bin: meat, dairy, oils, citrus peels in quantity (acid burns them), onions and garlic in quantity, pet waste, salty foods. The same exclusion list applies to most home composting methods covered in the complete home composting guide.
Feed in small amounts (4 to 8 ounces at a time) buried under 2 inches of bedding. The first month, feed once a week — overfeeding is the most common beginner mistake and creates fruit-fly outbreaks. Once the bin is established, scale up to feeding every 3 to 4 days.
Harvesting Castings
The bin is ready to harvest when 80% of the bedding is converted to dark, crumbly castings — typically 3 to 4 months after starting. Three harvest methods, each with a different trade-off:
Migration method (free, takes 2 weeks): Push all finished castings to one side of the bin. Add fresh bedding and food to the empty side. Worms migrate to the new food over 10 to 14 days. Scoop out the casting side, leaving worms behind.
Pyramid sort (free, takes 1 hour): Dump the bin contents on a tarp under bright light. Build small pyramids of castings. Worms dive to the bottom to escape the light. Scrape off the top of each pyramid every 5 minutes until only worms remain at the base.
Stacked-tray self-harvest (built into the system): Stop feeding the bottom tray. Worms migrate up through the mesh to the new food in the top tray over 2 to 3 weeks. Lift the bottom tray out — finished castings, no worms.
Sieve harvested castings through quarter-inch hardware cloth before use. Coarse pieces go back in the bin to keep decomposing.
Common Beginner Problems
Five problems account for almost all worm-bin failures. Each has a same-day fix.
Fruit flies. Cause: exposed food scraps. Fix: bury all food under 2 inches of bedding. Add a layer of dry shredded paper on top. Cover the bin with a damp cloth for a week to break the fly life cycle.
Bad smell. Cause: overfeeding or excess moisture. Fix: stop feeding for 2 weeks, add 2 cups of dry bedding, mix gently. The smell clears within 48 hours. A healthy bin smells faintly earthy, not sour or rotten.
Worms escaping. Cause: bin too acidic, too wet, or new worms acclimating. Fix: leave a light on above the bin for 3 nights — worms hate light and stay put. Add a handful of crushed eggshells to neutralize acidity. Verify drainage holes are clear.
Worms dying. Cause: temperature out of range (below 55°F or above 85°F), bin gone anaerobic, or pesticide contamination from food scraps. Fix: move the bin to a stable indoor location 60 to 75°F, switch to organic-only food inputs, add coarse bedding to restore airflow.
White mites. Cause: bin too acidic and too wet — a sign of overfeeding citrus or letting moisture build up. Fix: stop adding citrus, add dry bedding, leave the lid open for 2 hours daily for a week. Mites are not harmful to worms but indicate imbalance.

Using Worm Castings
Worm castings are the most concentrated organic fertilizer most home gardeners ever produce. Application rates are smaller than for hot compost — a little goes far.
- Houseplants: 1 to 2 tablespoons mixed into the top inch of soil per 6-inch pot, every 3 months.
- Seed starting: 20% castings to 80% potting mix. Higher rates burn delicate seedlings.
- Garden beds: ½ inch top-dressed twice per growing season. Earthworms work it into the soil.
- Worm tea: Steep 1 cup of castings in 1 gallon of dechlorinated water for 12 to 24 hours. Strain, dilute 1:4, apply as a foliar feed or root drench.
- Transplant booster: Mix 2 tablespoons into the planting hole when transplanting tomatoes, peppers, or other heavy feeders.
Castings have a long shelf life — a sealed bag stays viable for 6 to 12 months in a cool dark place. The microbial activity slows as the castings dry out but resumes when rehydrated.
If I could give one piece of advice to someone starting their first worm bin today: buy the red wigglers from a reputable supplier, not a bait shop, and spend the first month feeding half of what you think you should. Underfeeding is recoverable — overfeeding and a fruit-fly outbreak in your kitchen is not. The bin under my counter has been running for years now, quietly converting kitchen scraps into the best soil amendment I have ever used. It is the lowest-effort, highest-return project in my entire apartment garden.
Related Reading
- Home Composting: The Complete Beginner Guide — pillar guide covering all five composting methods
- Worm Castings Benefits — what to do with the output of your worm bin
- Apartment Composting: 4 Indoor Methods — when vermicomposting fits a renter setup
- Compost Bin for Small Space — bin sizing for tight footprints
- Best Soil for Houseplants — where worm castings shine as an amendment
- Soil and Compost: Complete Guide for Gardeners — broader soil context
- Urban Gardening Beginners Guide — the wider CityRooted starting point
Frequently Asked Questions
How many worms do I need to start a worm bin?
Start with one pound — about 1,000 red wigglers — for a 2-square-foot bin processing half a pound of food scraps per day. The population doubles roughly every 90 days under good conditions, so a starter pound grows into 4 to 8 pounds within a year.
Where should I keep my worm bin?
A stable indoor location between 60 and 75 degrees Fahrenheit. Under-sink cabinets, basements, garages in mild climates, and laundry rooms all work. Keep the bin out of direct sunlight and away from temperature swings. Below 55 degrees worms slow down. Above 85 degrees they die.
Will my worm bin smell bad?
A properly fed bin smells faintly earthy, like a forest floor, with no detectable odor at arm’s length. Bad smells signal overfeeding, excess moisture, or the wrong food. Stop feeding for two weeks and add dry bedding to fix it. The smell clears within 48 hours.
Can I leave my worm bin while on vacation?
Yes. Worms can go 3 to 4 weeks without feeding because they live off the bedding and existing food in the bin. Before leaving for longer than a week, add a generous feeding buried in bedding and ensure moisture is at the wrung-sponge level. Skip feeding during the trip.
Do worm bins attract pests?
Properly maintained worm bins do not attract rodents because they contain no meat, dairy, or oils. Fruit flies are the only common pest, caused by exposed food scraps. Burying food under 2 inches of bedding and covering the bin with a tight lid prevents fly outbreaks entirely.
How long until I can harvest castings?
First harvest typically happens 3 to 4 months after starting a new bin. By that point, 80% of the original bedding is converted to dark crumbly castings. Subsequent harvests every 2 to 3 months are normal once the worm population stabilizes around 2 pounds.
Can worms eat citrus and onions?
In small amounts, yes. In quantity, no — citric acid lowers bin pH and burns worms, while onions and garlic contain compounds worms avoid. Limit citrus and alliums to under 10% of weekly feedings, balanced with neutral inputs like vegetable scraps and coffee grounds.