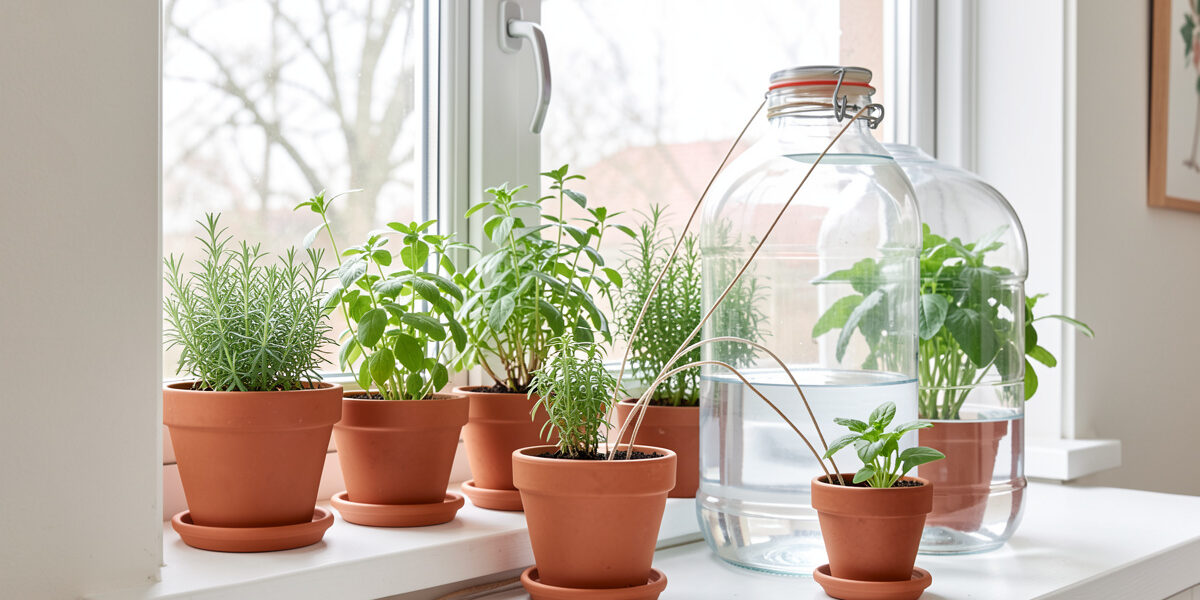
DIY wick watering is the cheapest self-watering method that genuinely holds a plant for a week or more, and the whole rig is a length of absorbent cord running from a water jar into the pot. The one decision that makes or breaks it is the cord: natural fibres like cotton wick beautifully but rot within a season, while nylon and acrylic wick a touch slower and last for years without turning to slime in the jar.
I run wicks on anything indoors that is too big for a capillary mat but not worth plumbing a pump to, and they have never once flooded a floor or died on a dead battery, because there is nothing to fail. Where a globe empties on a fixed schedule, a wick keeps drawing as long as there is water in the jar and the cord has not rotted. Here is what to use, what will let you down, and how to set one up so it actually draws.
How Wick Watering Works
A wick is a cord that carries water from a reservoir into the soil by capillary action, the same force that pulls water up a paper towel. One end sits in a jar of water, the other is buried in the root zone, and the dry soil draws water along the cord as fast as it needs it. It is self-regulating: a thirsty pot pulls harder, a moist one barely pulls at all, so the plant gets a steady supply rather than a flood-then-drought cycle.
This is the same principle as capillary matting, just concentrated into a single cord for one pot instead of a flat sheet under many. It also has the same core requirement: the water has to be able to travel, which means the wick must stay continuously wet and the reservoir must sit low enough that the cord is not fighting gravity. Break the wet path anywhere and the whole thing stops, which is the failure mode to design against.
Cotton, Nylon, or Acrylic: What Won’t Rot
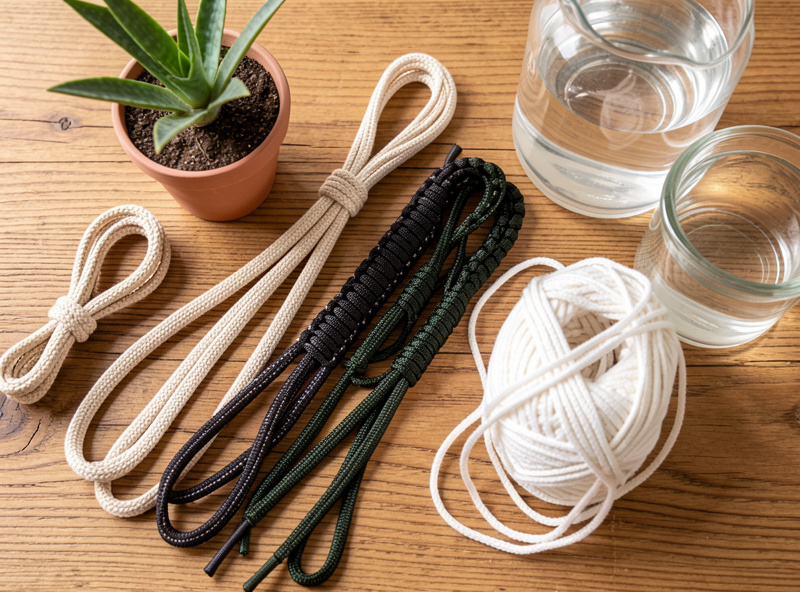
The wick material is the whole game. Cotton and other natural fibres wick the fastest and are what most people grab first, but they rot in standing water and can quit mid-trip as they break down; synthetic cords like nylon rope, acrylic yarn, and polyester wick nearly as well and last for years. For anything longer than a few days, I use synthetic every time.
I learned this the tedious way, with a cotton shoelace that wicked brilliantly for the first week and had gone soft and slimy by the third, at which point it stopped drawing and the plant dried out. Acrylic yarn is my default now: cheap, widely available, wicks strongly, and does not rot. Nylon rope and paracord (with the inner strands pulled out to expose more surface) work well for bigger pots that need more flow. Microfibre cut into strips is another synthetic option that wicks fast. The rule is simply: natural for a quick job you will dismantle, synthetic for anything you want to leave running. A spool of acrylic wicking cord costs almost nothing and lasts through years of trips.
As an Amazon Associate I earn from qualifying purchases.
Wick Materials Compared
Here is how the common cord options stack up for a self-watering wick. “Lifespan” is how long the cord keeps drawing before it rots or degrades in the reservoir, which is the spec that matters most for an away trip.
| Material | Wicking speed | Lifespan in water | Best for | Watch out for |
|---|---|---|---|---|
| Cotton rope / string | Fast | Weeks (rots) | Short one-off trips | Rots, goes slimy, then stops |
| Acrylic yarn | Fast | Years | Everyday default | Use several strands for big pots |
| Nylon rope / paracord | Medium-fast | Years | Larger pots, high flow | Pull out inner strands to expose fibre |
| Polyester / microfibre strip | Fast | Years | Wide flat wick contact | Cut generous width |
| Jute / natural twine | Medium | Days-weeks (rots) | Avoid for long trips | Breaks down fastest of all |
How to Set Up a Wick That Actually Draws
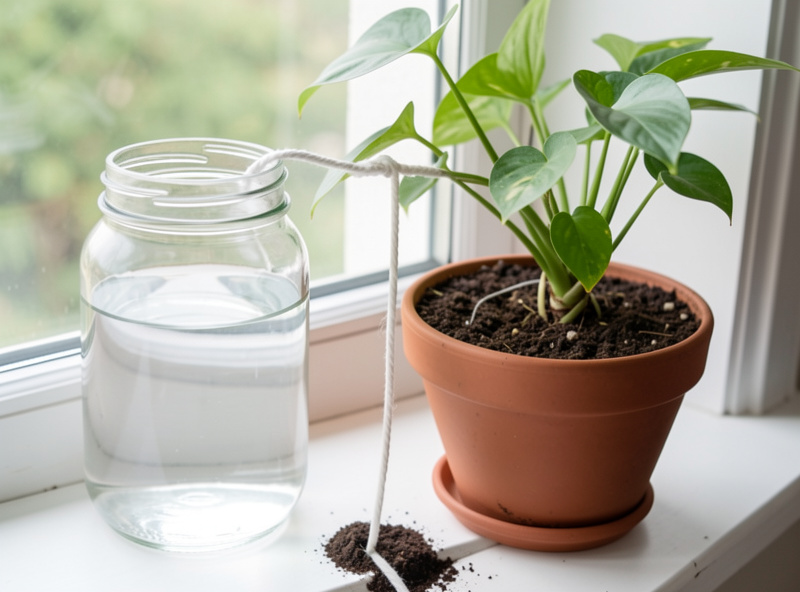
A wick only works if you wet it first, bury it deep, and keep the reservoir at the right height. Soak the cord thoroughly before installing so it starts drawing rather than sitting dry, bury one end 5 to 8 cm into the root zone with good soil contact, and set the jar at or just below soil level. Then test it for a day before you leave.
The pre-wetting step is the one that catches everyone: a dry wick can sit in a jar for days without ever starting to draw, because capillary action needs a continuous wet path to get going. Run the cord under the tap, squeeze it, and make sure water beads along its whole length before you install it. Bury the pot end properly rather than laying it on the surface, so it feeds the roots and not just the top crust of soil, and for a larger pot use two or three wicks spaced across the root zone rather than trusting one to wet everything. Keep the reservoir low, because a wick lifting water uphill draws far more slowly than one running level or slightly downhill. As with every passive method, the full-day home test is non-negotiable: watch the reservoir drop and check the soil is damp, because a wick that has not started or has slipped out of the soil looks exactly like one that is working until the plant wilts. It is the same discipline I apply to globes and every method in the away-watering guide.
Sizing the Reservoir and the Wick Count
How long a wick rig lasts is set by reservoir size and how many wicks feed the pot. More wicks move more water but drain the jar faster, so match both to the plant’s draw and the length of your trip. A small herb on one acrylic wick from a half-litre jar can coast for a week or more; a bigger pot with three wicks empties a jar far quicker and needs a larger reservoir.
My rough approach is to use the fewest wicks that keep the soil evenly damp, then size the jar for the trip. For a week away I want a reservoir I am confident will not run dry, so I err large: a 1 to 2 litre jar or bottle for a medium pot, more if the plant is thirsty. Because a wick self-regulates, an oversized reservoir costs nothing except space, whereas an undersized one ends the trip early. If you find one wick cannot keep a pot damp no matter the jar size, that pot is simply too big or thirsty for wicking, and it is time to move up to a drip kit or an indoor timer instead.
The Bottom-Wick Reservoir Method
There is a tidier version of wicking that hides the cord entirely: stand the pot on top of a reservoir tub and run the wick up through the drainage hole into the soil, so the whole rig looks like a normal pot sitting on a box. This is essentially a homemade self-watering planter, and it is the neatest way to wick a pot you do not want a jar sitting next to.
To build one, take a tub or bucket a little wider than the pot, fill it with water, rest the pot on top or on a support so its base sits just above the water line, and thread one or two synthetic wicks from deep in the pot’s soil down through the drainage holes into the reservoir. The soil draws water up the wick exactly as before, but now the reservoir is concealed and protected from evaporation, which makes it last longer than an open jar. It is the same idea as the 3D-printed inserts I use in my self-watering planter build, just done with a cord and a tub instead of a printed part. For a week away it is my favourite wick variant because there is nothing on show to knock over and the closed reservoir holds its level well.
Where Wicking Beats Everything Else
Wicking is the best-value method for small-to-medium indoor pots over a week or more, full stop. It costs almost nothing, has no battery or moving parts, self-regulates to the plant’s needs, and keeps drawing far longer than any fixed-reservoir globe or bottle. For an apartment grower leaving a shelf of herbs and houseplants for a week, it is hard to beat.
Its limits are the same as matting’s: it cannot move enough water for a large deep pot or a fruiting plant in summer, and it is an indoor tool because outdoor wind dries the pot faster than the cord can wick. But within its lane it is the method I trust most for a week-plus, precisely because there is nothing to fail. It is also the natural next step up from a globe when a fixed reservoir keeps running dry, and it pairs perfectly with the shade-and-group prep that starts every trip.
Frequently Asked Questions
What is the best material for a plant watering wick?
Acrylic yarn or nylon rope. Both wick strongly and last for years in water without rotting. Cotton wicks faster but breaks down within a season and can stop drawing mid-trip, so keep it only for short one-off jobs.
How long can wick watering keep a plant alive?
A week to two weeks for a small-to-medium indoor pot, as long as the reservoir holds out and the wick has not rotted. Because a wick self-regulates, it keeps drawing far longer than a fixed-reservoir globe or bottle.
Why is my wick not drawing water?
Almost always because it was installed dry. Capillary action needs a continuous wet path, so soak the cord fully before use. Also check the pot end is buried in the soil and the reservoir sits at or just below soil level, not above it.
How many wicks do I need per pot?
One acrylic wick suits a small herb pot. Use two or three spaced across the root zone for a medium or larger pot so the whole soil mass stays damp rather than just the spot around a single cord.
Does cotton rope rot when used as a wick?
Yes. Cotton and other natural fibres rot in standing water, going soft and slimy within a few weeks and eventually stopping the flow. For any trip longer than a few days, use synthetic acrylic or nylon cord instead.
Can I use wick watering outdoors on a balcony?
It works poorly outdoors because wind dries the pot from the top faster than the wick can supply. Wicking is really an indoor method; for a balcony use a drip kit on a tap timer or an olla instead.
Keep Building
- How to Water Plants While Away: A Small-Space Survival Guide
- Capillary Matting: The Quiet Away-Watering Trick I Rely On
- Best Self-Watering Globes: Which Ones Actually Hold a Week
- Indoor Automatic Watering Timers: Setting One Up for a Plant Shelf
- DIY Self-Watering Planter: 3D-Printed Reservoir Inserts