Microgreens are the one crop that genuinely thrives under a cheap light, but “cheap” and “useless” sit a lot closer together than the listings admit. After running my microgreen shelf under everything from a $20 blurple panel to the full-spectrum LED bar I keep over the seedling rack, the pattern is clear: for the four to six days a tray actually sees light, what matters is even coverage and the right distance, not a big wattage number on the box. This is the part of the microgreen process where Nordic growers like me have an edge, because by the time you are running trays indoors in November you have already learned what four usable daylight hours does to a windowsill crop.
If you are new to the whole process, start with my complete microgreens setup guide for trays, soil, and timing, then come back here to sort out the light.
Do Microgreens Even Need a Grow Light?
For most of the year, in most apartments, yes. Microgreens spend their first three to four days in the dark under a blackout dome anyway, so light only enters the picture once they have germinated and you pull the cover. From that point they need roughly four to six days of bright light to green up, stand upright, and build the colour and flavour that make them worth growing.
A south-facing windowsill in summer can just about carry a tray. The trouble is leggy, pale growth: low light makes the stems stretch toward the window and flop, and you get a thin, sad harvest instead of a dense, sturdy mat. Through a Swedish winter the windowsill is a non-starter — the trays I have tried to finish on glass in January come out stretched and weak every time. A modest grow light removes the variable entirely. You stop gambling on the weather and start getting the same sturdy tray in December that you get in June.
Why PPFD and Spectrum Beat Wattage
The marketing on grow lights is built around two numbers that barely matter — wattage and lumens — and quietly omits the two that do. Wattage tells you how much electricity the unit draws, not how much usable light reaches your tray. Lumens measure brightness as a human eye perceives it, which is weighted toward green-yellow light plants use least. A panel can be bright, power-hungry, and still feed your microgreens poorly.
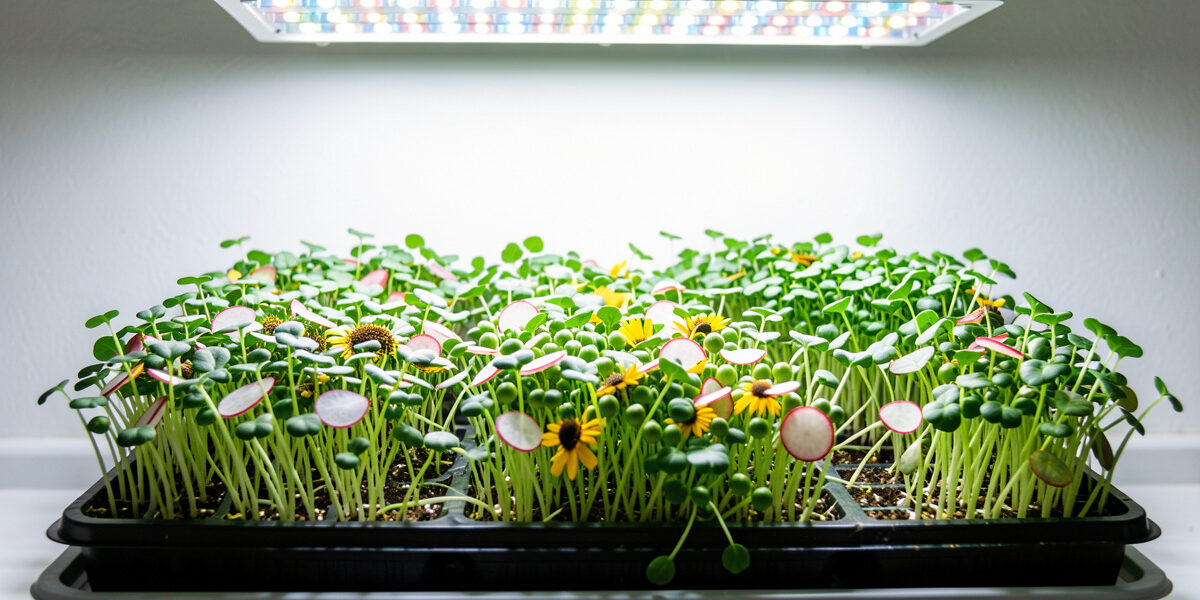
The number that actually counts is PPFD — photosynthetic photon flux density, the count of usable light particles landing on a given patch of tray each second. It falls off fast with distance, which is why a light that looks blinding from across the room can be feeble at canopy height. The second is spectrum: microgreens want a full-spectrum white output (you will see it sold as 3000K–6500K), which delivers the blue light that keeps growth compact along with everything else the plant uses. The cheap “blurple” panels that throw only red and blue light will grow a tray, but I have always gotten denser, better-coloured greens under a full-spectrum white bar — and you can actually see what you are doing, which the purple light makes impossible.
The practical takeaway: ignore the wattage hero number. Buy a full-spectrum white fixture rated for the area you need to cover, and control intensity with distance, which is free and adjustable, rather than chasing a bigger spec.
The Light Types I’ve Run Side by Side
Microgreens are forgiving enough that several categories work. Here is how the common options actually compare once they are sitting over a real tray, not in a product photo.
| Light type | Coverage per fixture | Spectrum | Best for | The catch |
|---|---|---|---|---|
| Full-spectrum LED bar/strip | 1–2 trays | White, full | Most home setups | Slightly pricier upfront |
| LED shop light (4 ft) | 2–4 trays | White, full | Multi-tray racks, cheapest per tray | Bulky, needs a shelf |
| “Blurple” red/blue panel | 1 tray | Red + blue only | Tight budgets | Hard to inspect crop; often weaker than rated |
| Clip-on gooseneck LED | Part of 1 tray | Varies | A single small tray | Uneven coverage; edges stretch |
| Standard household LED bulb | Negligible | White | Not really suitable | Too little intensity at canopy |
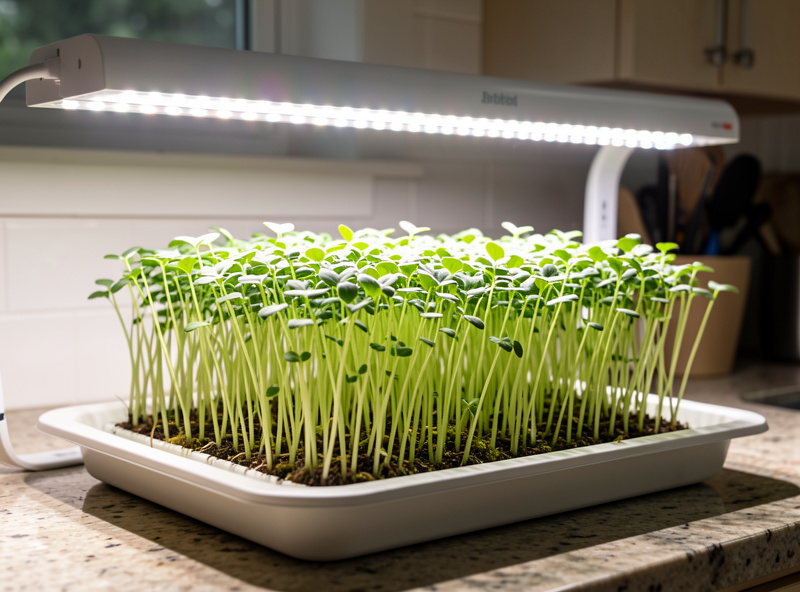
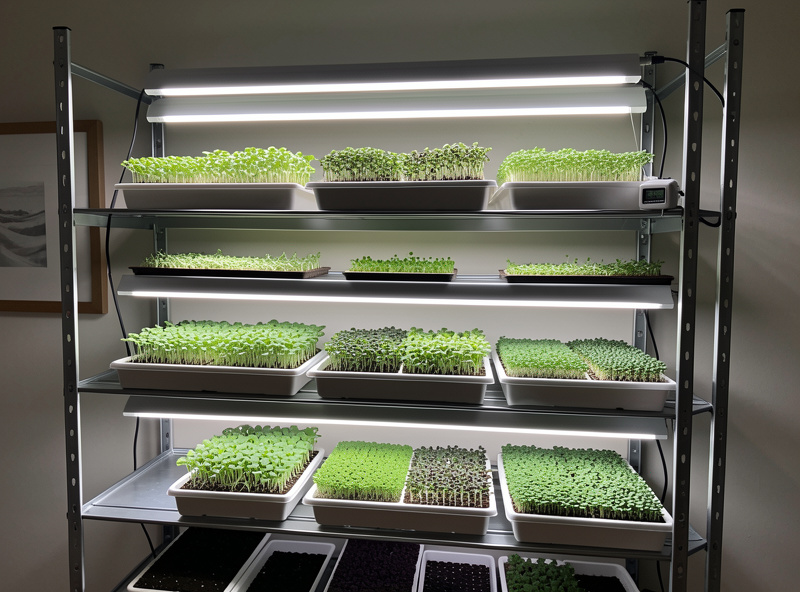
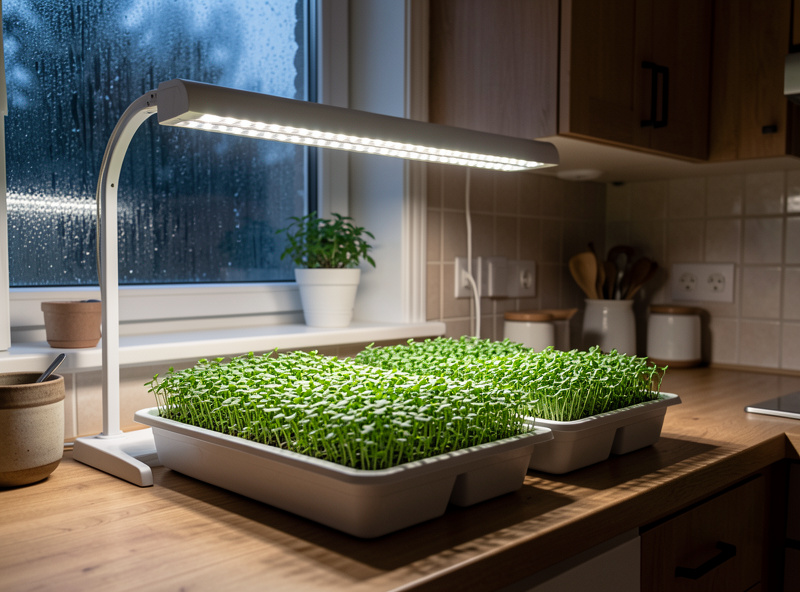
If I were kitting out a single tray on a counter, I would run a full-spectrum LED grow light bar on a small frame above it. For a multi-tray rack — which is where most people end up once they catch the bug — a plain 4-foot LED shop light hung over each shelf is the cheapest honest light per tray you can buy. Both are full-spectrum white, both let you see the crop, and neither asks you to trust a wattage claim.
Disclosure: CityRooted is reader-supported. As an Amazon Associate I earn from qualifying purchases made through links in this article, at no extra cost to you. I only point to gear I actually run on my own microgreen shelf or would buy again.
Hang Height and Run Time
This is where most trays are won or lost, and it costs nothing to get right. Once the dome comes off, I run the light close — a few inches above the canopy for an LED bar or strip, a bit higher for a stronger shop light. Close and even beats far and bright every time, because intensity drops off so steeply with distance that raising the light a hand’s width can halve what reaches the leaves. Watch the crop for the first day: if the greens look bleached or the tips curl, you are too close; if they start leaning or stretching, you are too far. They tell you quickly.
For run time I give microgreens a long photoperiod — somewhere around 12 to 16 hours a day on a cheap plug-in timer. They are not flowering plants fussy about day length; they just want plenty of light over their short finishing window. A timer means you set it once and the trays get the same exposure whether you are home or not, which is the whole point of moving off the windowsill. Because the light only runs for the four-to-six-day finishing stretch per tray, the run-cost is trivial — a full-spectrum bar over a single tray costs pennies a week to run, which is the figure the wattage panic on the listings never puts in context.
Even Coverage Is the Whole Game
The single biggest mistake I see is a point-source light — a clip-on lamp or a single bulb — over a flat 10×20 tray. You get a bright spot in the middle and stretched, leaning seedlings around the edges, all in the same tray. A microgreen tray is a flat plane of hundreds of seedlings that all deserve the same light, so the fixture should be roughly as long as the tray and centred over it. That is exactly why a bar or a shop light beats a spotlight here: the goal is a wash of even light across the whole surface, not a hotspot.
If your light is shorter than the tray, rotate the tray 180 degrees once a day so both ends get equal time near the centre. It is a small habit that evens out a marginal light considerably. Better still, line a shelf or the inside of a cabinet with anything reflective and white — even a sheet of white card down the sides bounces escaping light back onto the edge rows and tightens up the whole tray.
The Nordic Angle: Light Is Non-Negotiable Up North
This is where standard US microgreen advice quietly breaks. A lot of it assumes a bright windowsill does most of the work and the grow light is a nice-to-have. From October to February in southern Sweden you simply do not have that windowsill — the sun is low, weak, and gone by mid-afternoon, and the trays finishing on glass come out leggy and pale no matter how south-facing the window. For half the year here, the grow light is the light. The flip side is that microgreens are the most light-efficient indoor crop you can grow: a single modest fixture over one or two trays gives you fresh, dense greens through the darkest months for a few pennies of electricity, which is exactly why this is the crop I never stop running.
Once you have the light dialled in, the next variables are the tray and the medium underneath those greens. My guides on choosing microgreens trays and the easiest microgreens to grow cover where to go next, and if you are weighing soil against a hydro mat, the vegetable grow-light guide goes deeper on PPFD and spectrum for larger plants. Once you are producing reliably, the selling microgreens as a business guide covers pricing, farmers market logistics, and restaurant accounts.
Frequently Asked Questions
Do microgreens need a grow light?
For most of the year, yes. Microgreens spend their first few days in the dark, then need four to six days of bright, even light to green up and grow sturdy. A south-facing windowsill can work in summer but produces leggy, pale growth in low light. In a dark-winter climate a grow light is essential for a dense, upright tray.
What kind of grow light is best for microgreens?
A full-spectrum white LED bar or 4-foot LED shop light is the best choice. Both give even coverage across a flat tray, deliver the blue light that keeps growth compact, and let you see the crop. Cheap red-and-blue blurple panels will grow a tray but make the greens hard to inspect and are often weaker than rated.
How close should the light be to microgreens?
Run an LED bar or strip a few inches above the canopy and a stronger shop light a little higher. Close and even beats far and bright, because intensity drops off steeply with distance. Watch the crop: bleached or curled tips mean too close; leaning or stretching means too far.
How many hours of light do microgreens need?
Give microgreens roughly 12 to 16 hours of light a day during their four-to-six-day finishing stage, easiest to set with a cheap plug-in timer. They are not day-length sensitive like flowering plants; they just want plenty of even light over their short window above the soil.
Can microgreens grow under a normal LED bulb?
Not well. A standard household LED bulb is a point source with too little intensity at tray height, so you get a bright spot in the middle and stretched seedlings around the edges. Use a full-spectrum bar or shop light roughly as long as the tray so the whole flat plane of seedlings gets even light.