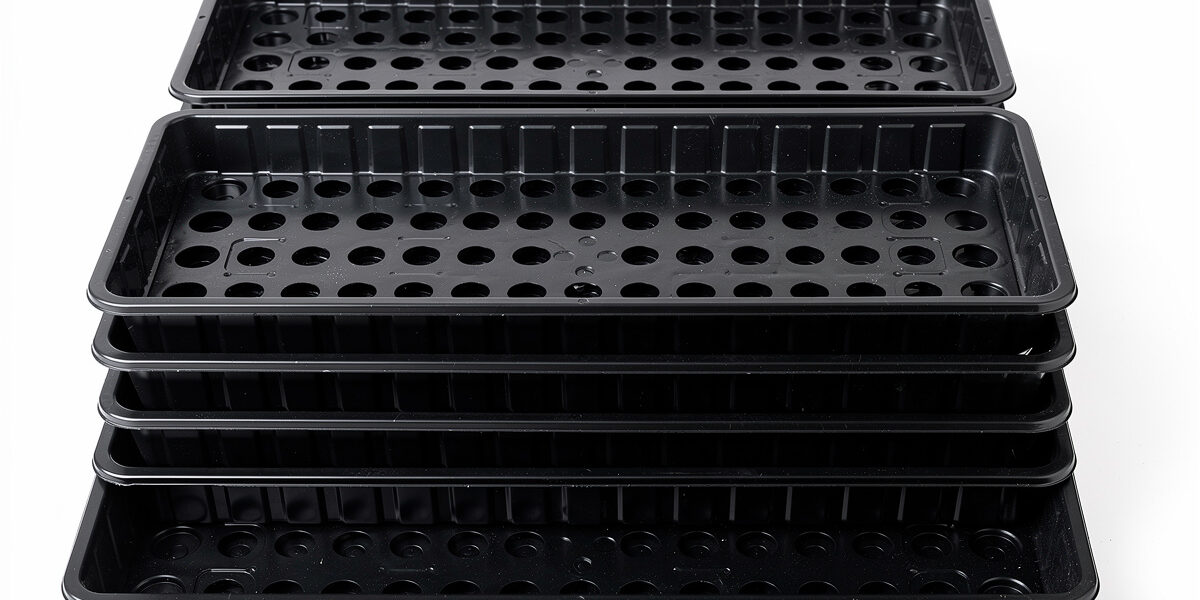
The 10-inch by 20-inch tray (1020) is the universal standard for home microgreens, and the right tray choice controls more of your grow-cycle success than any other equipment decision. On my shelf I run Bootstrap Farmer heavy-duty 1020s — three grow trays with drainage holes nested in three solid bottom trays — and after cycling through cheap nursery flats that cracked mid-grow, the extra $3 per tray bought peace of mind.
This guide covers tray types, materials, brands, drainage setups, humidity domes, cleaning protocols, and the exact tray configurations that work at every scale from a single kitchen-counter tray to a 16-tray production rack. As an Amazon Associate I earn from qualifying purchases.
Quick Answer: What Tray Should You Buy?
For a single-tray home setup, buy two heavy-duty 1020 plastic trays per slot — the heavy-duty 10×20 trays with drainage I keep in rotation cost $4 to $8 each and have survived two winters of weekly use without a single crack — one with 36+ drainage holes (the grow tray), one solid (the watering reservoir). Bootstrap Farmer 1020s ($4 to $8 each) last 5+ years. Cheap nursery flats from Lowe’s or Home Depot ($1 to $2 each) crack within 6 to 12 cycles. The $4 difference per tray is the best return on investment in your entire microgreens setup.
The 1020 Standard: Why This Size?
The “1020” label means 10 inches wide by 20 inches long, the trade-standard tray size used by commercial nursery operations since the 1970s. Domes, racks, heat mats, and grow-light fixtures are all sized to this footprint. Walking away from the 1020 standard means buying custom-fit accessories at premium prices.
A 1020 tray holds approximately 7 to 9 cups of growing medium at 1.5-inch depth — enough for one full microgreen cycle of any species. Yield per tray ranges from 8 ounces (cilantro, basil) to 16+ ounces (sunflower, pea shoots). Choosing the right growing medium affects both drainage and yield — see the best soil for microgreens guide for a full peat, coco coir, and hemp mat comparison.
For the broader equipment setup, see the Growing Microgreens complete setup guide — trays are one of six core pieces.
Drainage Holes vs Solid Trays
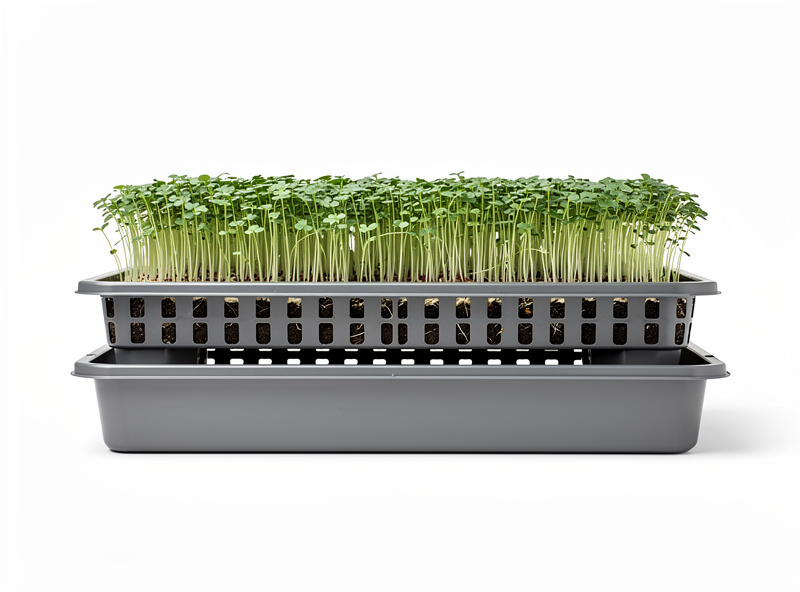
Every microgreen setup needs both. The grow tray (with drainage holes) sits inside the solid tray (no holes). Water poured into the bottom solid tray wicks up through the holes, hydrating the medium without sitting on the leaf surface — bottom-watering, the technique that prevents the majority of mold problems.
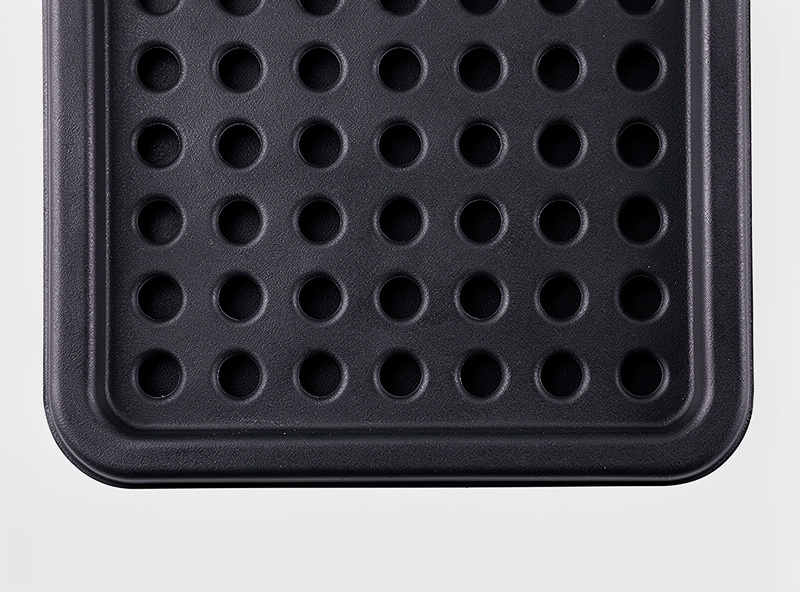
The number of drainage holes matters. Trays with fewer than 20 holes drain unevenly and create wet spots that breed Pythium — I learned this the hard way with a flat of broccoli microgreens where the corner without drainage stayed soggy and molded within 48 hours. Trays with 36 to 50 holes (typical of high-quality microgreen-specific trays) drain uniformly and the bottom-watering distributes moisture evenly across the entire root zone. The Bootstrap Farmer 1020 microgreen tray has 36 large drainage holes and is engineered specifically for this use case.
| Tray Type | Drainage Holes | Best For |
|---|---|---|
| 1020 grow tray (microgreens-specific) | 30-50 large holes | Daily working tray for any microgreen |
| 1020 nursery flat (standard) | 20-30 small holes | OK for small seeds, drains slowly |
| 1020 mesh tray | Mesh bottom | Hemp mat or hydroponic pad use |
| 1020 solid tray | None | Bottom reservoir for watering |
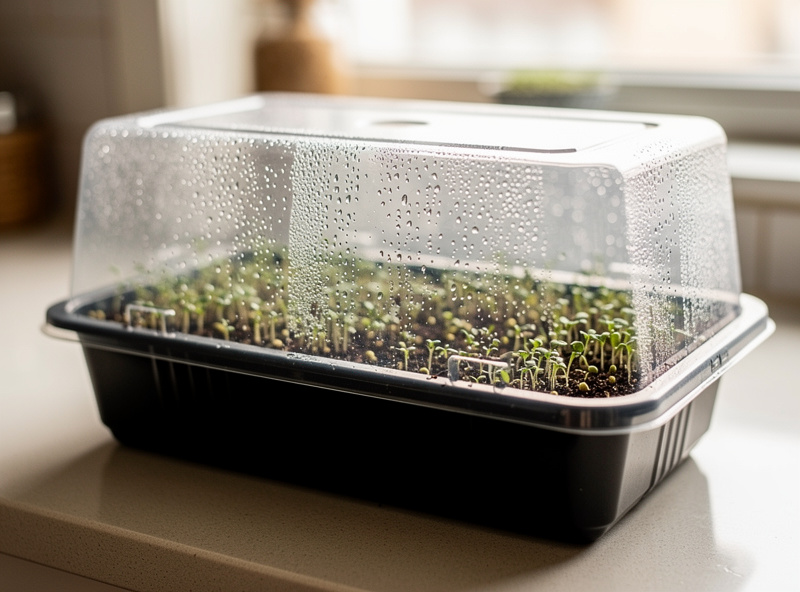
| 1020 dome (humidity) | None — clear plastic top | Days 0-4 germination cover |
Tray Materials: Plastic vs BPA-Free vs Steel
Plastic dominates the home market because it is light, inexpensive, and stackable. The two material choices that matter for food-contact use are HDPE (high-density polyethylene) and PP (polypropylene), both of which are BPA-free, food-safe, and structurally rigid enough for repeated use.
Avoid PVC trays (some 99-cent options at dollar stores) — PVC leaches chemicals when wet and degrades under UV from grow lights. Avoid recycled-plastic trays of unknown origin for the same reason.
Steel trays exist (used by some commercial operations) but cost $25 to $60 each and have no functional advantage at home scale. Skip them.
Hemp grow mats and jute mats are not trays — they are growing media that sit inside a 1020 tray. Use mesh-bottom 1020 trays with hemp mats so water drains through.
Heavy-Duty vs Cheap Trays: The Real Cost
A cheap nursery flat costs $1 to $2 and lasts 6 to 12 cycles before cracking, warping, or developing leaks at the corners. Over a year of weekly use, that’s 4 to 8 trays purchased and discarded — total spend $8 to $16 plus the cost of mid-cycle failures (flooded counters, dropped harvest yields).
A heavy-duty 1020 microgreen tray (Bootstrap Farmer, Greenhouse Megastore, MicroVeggy) costs $4 to $8 and lasts 5+ years with weekly use. Same year of use: one tray, no failures, $4 to $8 total.
| Tray Brand / Type | Price Each | Cycles to First Failure | Year-1 Total Cost |
|---|---|---|---|
| Generic nursery flat (Home Depot) | $1.20 | 6-10 | $6-$10 |
| Mid-tier hardware tray | $2.50 | 12-20 | $3-$5 |
| Bootstrap Farmer 1020 (HD) | $5.95 | 250+ | $5.95 |
| Greenhouse Megastore (HD) | $4.50 | 200+ | $4.50 |
| MicroVeggy Pro | $7.50 | 300+ | $7.50 |
The mid-tier ($2.50 hardware-store option) is the false economy — I fell for it and bought four of them my first month growing microgreens. Three of the four developed hairline corner cracks by cycle 10, and one split completely while carrying a full tray of sunflower shoots across the kitchen. The mess took an hour to clean up and the tray cost me more in lost harvest than I saved on the purchase price.
Recommended Tray Setup by Production Scale
Single Tray (Beginner)
Buy 2 grow trays + 2 solid trays + 1 humidity dome = 5 pieces, $20 to $40 total. The second grow tray lets you start a new cycle the day you harvest the first.
Weekly Production (4 Trays)
Buy 8 grow trays + 8 solid trays + 4 humidity domes = 20 pieces, $80 to $160 total. Stack on a 4-tier rack with timed grow lights. This is the sweet spot for most households eating 8 to 16 ounces of microgreens per week.
Daily Production (16+ Trays)
At this scale, costs drop because grow trays bought in 50-packs run $3 to $4 each. Bulk buying on Bootstrap Farmer or directly from suppliers is essential. Rack systems become custom — usually a 4-shelf metal rack with 4 trays per shelf and 80-watt LED bars.
Tray Cleaning Between Cycles
Every grow tray needs cleaning between cycles to prevent disease carryover. The protocol:
- Compost or discard the spent root mat with growing medium
- Knock soil debris loose with a stiff brush or rag
- Soak in a 10 percent bleach solution OR 1:8 hydrogen peroxide solution for 5 to 10 minutes
- Rinse thoroughly with clean water
- Air dry in sun if possible — UV is a free sterilizer
This process follows standard extension-recommended sanitation protocols for seed-starting equipment (Purdue Extension sanitation for seed-starting).
Heavy-duty trays survive bleach and peroxide for 200+ cycles — my Bootstrap Farmer trays look nearly new after 50+ cycles and the only visible wear is slight surface scuffing from the stiff brush, which does not affect performance. Cheap nursery flats start to degrade visually after 20 to 30 bleach soaks.
If a tray hosts a damping-off (Pythium) outbreak, do NOT reuse it for microgreens. Repurpose for non-edible seedlings or discard — the pathogens persist in soil particles clinging to trays and can survive routine cleaning (UC IPM damping-off management). For broader pest issues see the Fungus Gnats in Houseplants guide.
Humidity Domes: The Often-Forgotten Piece
A humidity dome is a clear plastic cover that fits over the 1020 tray during days 0 to 4 (germination). It maintains 80 to 95 percent humidity, which most seeds need to germinate uniformly.
Standard domes come in two heights: 2 inches (low — for sprouts and very short microgreens) and 7 inches (tall — for sunflower, pea shoots, and any species growing past 3 inches). Get the 7-inch height — it works for everything and costs only a dollar more.
Many home growers skip the dome and use a second 1020 tray inverted as a cover. I did this for six months before buying a set of clear 7-inch humidity domes and the difference was immediate — being able to check germination progress without lifting the cover means seedlings do not dry out during inspection. This works for the first 2 days but doesn’t allow visual checking, so seedlings sometimes leg-out before you notice. Dedicated clear domes are worth the $5.
Stacking Trays for Space Efficiency
1020 trays stack vertically when not in use, saving major shelf space. On my shelf I keep four solid-bottom trays nested against the wall and four grow trays stacked separately — the whole set takes up less than 3 inches of shelf depth when not in active rotation. A 4-tier rack with 4 trays per tier holds 16 active trays at any given time. Rotation: each shelf has 4 trays at staggered cycle days (day 2, 6, 10, 14) so you harvest one tray per day, every day.
This staggered system is also called “succession planting” in conventional gardening terms. For tabletop space layout in apartments, see the Grow Lettuce Inside guide — the same physical space supports microgreens plus 4 to 6 lettuce plants in a tight kitchen corner.
Specialty Trays: When to Use Them
Mesh-Bottom 1020s
Used with hemp or jute grow mats. Water flows freely through the mesh. Good for hydroponic-style growing without soil. Cost: $5 to $9. If you want to go fully soil-free, the hydroponic microgreens guide covers the complete mat-and-wicking-tray workflow.
1010 (Half-Size)
10 inches by 10 inches — half the standard. Good for testing varieties or small kitchens. Same accessories scale down. Cost: $2 to $4.
Microgreen-Specific Channeled Trays
Trays with built-in V-channels for harvesting cleanly. Premium ($10 to $20 each) and only worth it for high-volume sales operations.
Common Tray Mistakes
Skipping the bottom solid tray. Without a solid bottom tray, water just drains onto your shelf and growing medium dries unevenly. Always run grow tray + solid tray as a pair.
Buying trays without checking dome compatibility. Some “1020” trays are 0.5 inches off-spec and don’t seal with standard domes. Stick to brands explicitly designed for microgreens (Bootstrap Farmer, MicroVeggy, Greenhouse Megastore).
Reusing damping-off trays. If a cycle suffered Pythium-induced flop-and-die, that tray should not host another microgreen cycle. Spores persist.
Stacking trays during active grow. Stacked trays create dark, humid pockets that mold loves. Stack only when storing empty.
Frequently Asked Questions
Do microgreens need drainage holes in the tray?
Yes. The grow tray must have drainage holes (30 to 50 large holes is ideal) so excess water can leave the medium. Sit it inside a solid bottom tray that captures the water for bottom-watering. Without drainage, roots sit in standing water and rot within 5 to 7 days.
What size tray is best for microgreens?
The 1020 standard (10 inches by 20 inches) is the universal size used by virtually all home and commercial microgreen growers. Domes, racks, heat mats, and accessories are all sized to fit. Half-size 1010 trays work for testing varieties in small kitchens.
Are cheap microgreen trays worth buying?
Generally no. Cheap nursery flats ($1-2) crack within 6-12 cycles. Heavy-duty trays from Bootstrap Farmer or similar ($4-8) last 5+ years. The break-even is one season — after that the heavy-duty tray is essentially free.
Can I grow microgreens without a tray?
Yes, but tray-based growing is far easier. Alternatives include shallow ceramic dishes, glass baking pans, or repurposed takeout containers with poked drainage holes. The downside is no standardized accessory ecosystem (domes, racks, heat mats won’t fit).
How do you clean microgreen trays?
Compost the old root mat, brush off loose soil, soak 5-10 minutes in either 10 percent bleach solution or 1:8 hydrogen peroxide, then rinse thoroughly and air dry. Heavy-duty trays handle 200+ cleaning cycles before showing wear.
What is the difference between a 1020 tray and a nursery flat?
They share the 10×20 inch footprint, but microgreen-specific 1020 trays have more drainage holes (30-50 vs 20-30), thicker walls (1.5-2mm vs 0.8-1mm), and stronger corner reinforcement. Nursery flats work for short-term but flex when full.