Growing vegetables indoors without adequate light produces pale, weak plants that never reach harvest — I learned that the hard way with my first winter shelf of leggy lettuce. Grow lights fix it by delivering the intensity and spectrum vegetables demand, far beyond what a typical Nordic window provides for most of the year. Whether you are starting seedlings for spring transplant or running a year-round indoor kitchen garden, the right grow light setup decides whether you get actual food or just decorative greenery.
Why Vegetables Need More Light Than Houseplants
Most houseplants evolved under forest canopies and thrive in low light (50–100 PPFD). Vegetables evolved in open fields under full sun (1,500–2,000 PPFD). While you do not need to match full sunlight intensity indoors, vegetables need significantly more light than the average indoor plant to produce leaves, flowers, and fruit.
The minimum threshold for productive vegetable growing is around 150 PPFD for 14+ hours daily (DLI of about 8 mol/m²/day). For fruiting crops like tomatoes and peppers, you need 300+ PPFD to trigger flowering and fruit set. Purdue Extension’s greenhouse guide is the clearest walkthrough of how DLI is measured and why it predicts vegetable growth better than raw wattage (Measuring Daily Light Integral in a Greenhouse).
Light Requirements by Vegetable Type
| Vegetable | Light Category | Min PPFD | Target DLI | Hours/Day |
|---|---|---|---|---|
| Lettuce, spinach, arugula | Low-medium | 150 | 10–14 | 12–16 |
| Kale, chard, bok choy | Medium | 200 | 12–16 | 14–16 |
| Herbs (basil, cilantro, parsley) | Medium | 150 | 8–12 | 12–14 |
| Radishes, green onions | Medium | 200 | 12–16 | 14–16 |
| Bush beans, peas | Medium-high | 250 | 16–20 | 14–16 |
| Tomatoes (cherry/dwarf) | High | 350 | 20–30 | 14–16 |
| Peppers (hot/sweet) — see my pepper grow light guide for stage-specific PPFD | High | 300 | 20–28 | 14–16 |
| Cucumbers | High | 300 | 20–30 | 14–16 |
| Strawberries | High | 300 | 18–25 | 14–16 |
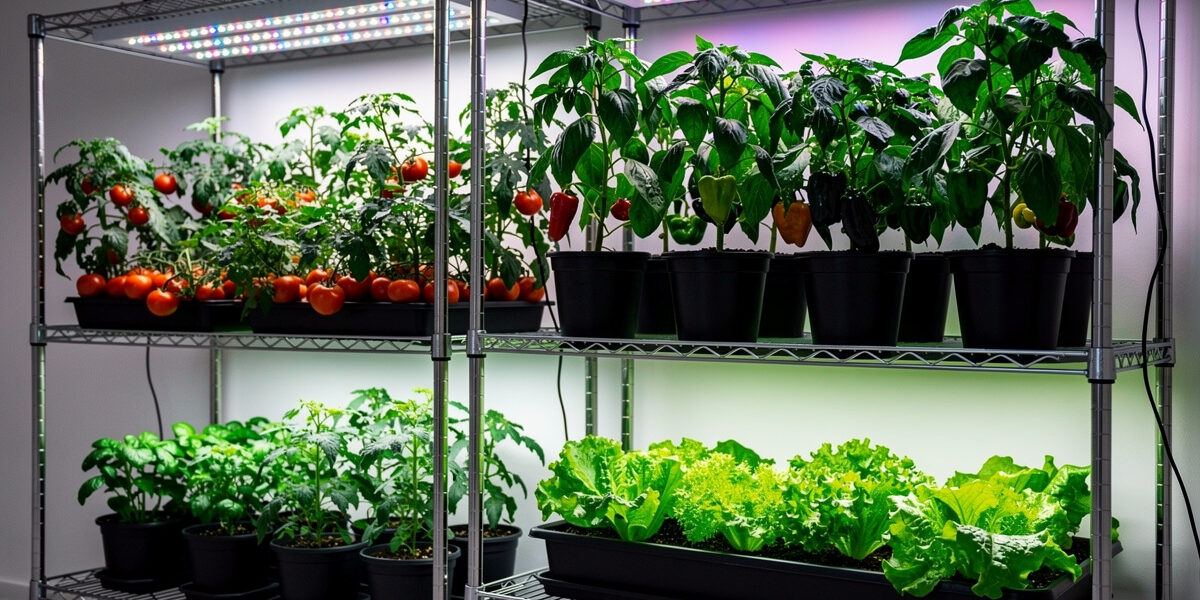
Indoor Growing Environments for Vegetables
Where you place your grow lights determines everything about your setup, costs, and results. Different indoor environments require different approaches.
Dedicated Grow Rooms
A spare room, closet, or basement corner converted entirely to growing. This gives you complete control over light, temperature, and humidity. Best for serious indoor growers who want maximum production. You can run lights 14-16 hours without disturbing household activities. A 4×4 foot grow tent with a 300W LED panel produces enough vegetables for a family of two.
Window Shelves with Supplemental Lighting
Shelves mounted on south-facing windows with grow lights above each shelf. The window provides 4-6 hours of natural light, and grow lights supplement during cloudy days and early mornings. Most cost-effective approach for apartment dwellers. A single 40W LED strip per shelf is sufficient when combined with window light.
Basement or Windowless Rooms
Complete artificial lighting with no natural light. Requires the most powerful lights but offers total control over growing conditions. Ideal for year-round production regardless of season. You’ll need full-spectrum LED panels at 30-40 watts per square foot of growing area.
Kitchen Countertop Gardens
Small countertop grow light systems for herbs and microgreens. Perfect for beginners who want fresh ingredients within arm’s reach. Most commercial countertop systems include built-in LED lights and self-watering reservoirs. Limited to leafy greens and herbs—fruiting vegetables need more space and light intensity.
Best Grow Light Types for Vegetables
Full Spectrum LED Panels
Full spectrum LED panels are the most practical choice for vegetable growers. A single 150–200 watt panel covers a 2×4 foot growing area with enough intensity for leafy greens and most herbs. For fruiting vegetables, you need either a more powerful panel (200–300W) or two standard panels side by side.
Look for panels with Samsung LM301B or LM301H diodes and a driver efficiency rating above 2.5 µmol/J. These specifications separate functional grow lights from cheap imports that look bright but deliver poor photosynthetic output. My LED grow lights guide covers the technology in detail.
LED Bar Systems
Multi-bar systems with 4–6 parallel LED bars distribute light more evenly than a single panel. This eliminates the hot-center-weak-edges problem common with panel lights. Bar systems are also easier to adjust in height as plants grow. They cost more upfront ($100–200 for a 4-bar system) but produce noticeably more uniform growth across the entire canopy.
Quantum Board LEDs
Quantum boards are flat circuit boards densely packed with small LED diodes. They produce exceptional light uniformity and efficiency. Many serious indoor vegetable growers prefer quantum boards because they deliver the highest PPFD per watt of any consumer lighting technology. Expect to pay $80–150 for a quality 100–150W quantum board.
Grow Lamps (Plug-and-Play Option)
For small-scale growing, dedicated grow lamps offer a plug-and-play alternative to mounted panels. These include clip-on gooseneck lamps ($12-20), floor standing lamps ($50-120), ring lights ($25-45), and tabletop panel lamps ($40-100). A 40W+ grow lamp positioned 8-12 inches above plants can grow herbs and leafy greens effectively without any mounting hardware. For larger production, panel systems provide better coverage and intensity. The choice depends on your space, budget, and production goals.
Grow Light Setup for Common Vegetables
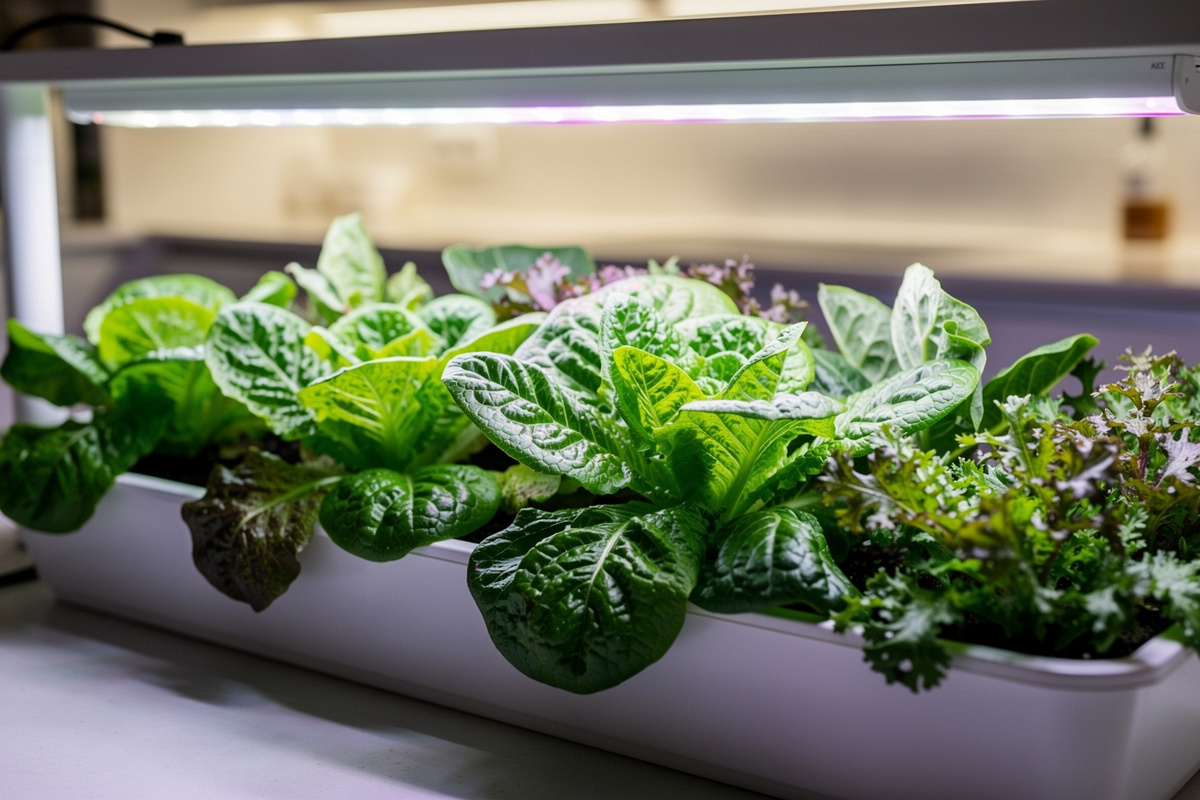
Leafy Greens (Lettuce, Spinach, Kale)
Leafy greens are the easiest vegetables to grow under lights. They need moderate intensity (150–250 PPFD), tolerate slightly lower DLI, and grow fast enough to harvest within 30–45 days from seed. A 100-watt LED panel at 12–14 inches above the canopy provides ideal coverage for a 2×2 foot area of lettuce or mixed greens.
Setup: 100W panel, 12–14 inch height, 14 hours on / 10 hours off, temperature 60–70°F.
Herbs (Basil, Cilantro, Parsley, Mint)
Herbs are slightly less demanding than leafy greens and respond well to moderate LED light. Basil is the most light-hungry common herb — it needs 200+ PPFD and long days to prevent premature bolting. Cilantro and parsley tolerate lower intensity but still need 12+ hours of light daily.
Setup: 40–80W panel or 2× LED bars, 12–16 inch height, 12–14 hours on, temperature 65–75°F.
Fruiting Vegetables (Tomatoes, Peppers, Cucumbers)
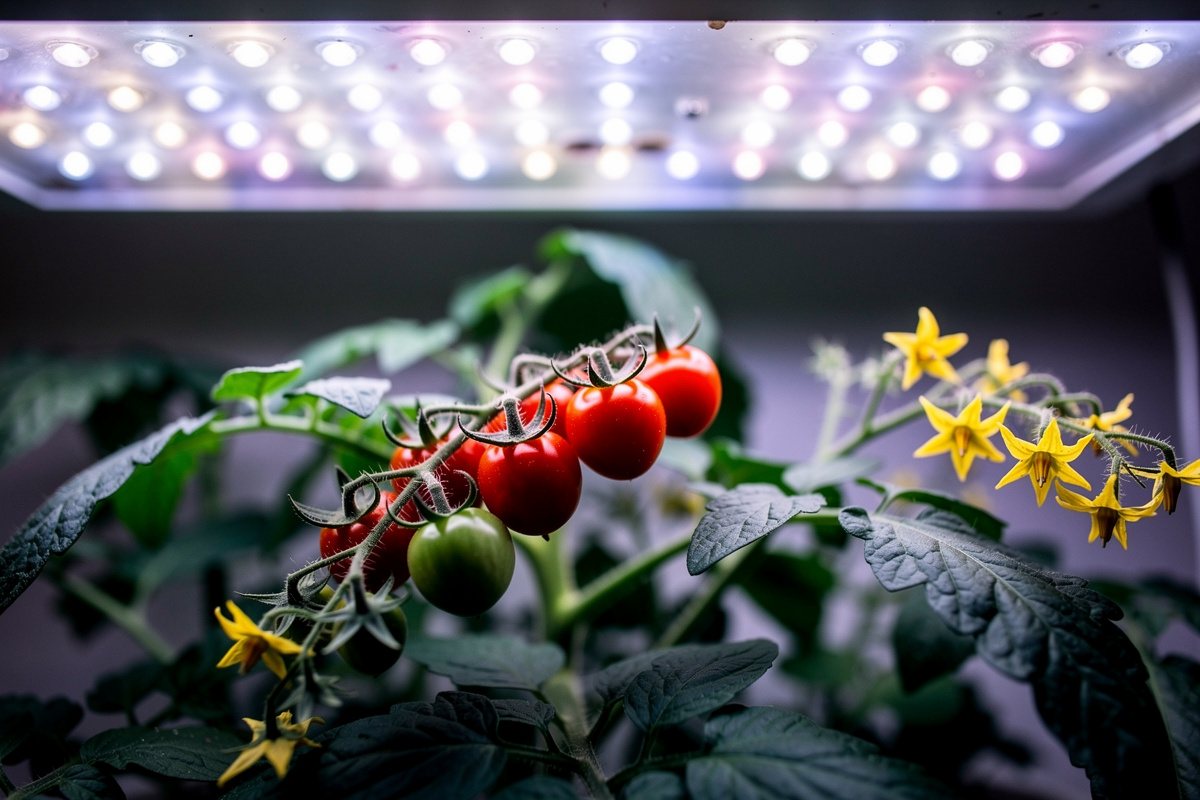
Fruiting crops are the most demanding indoor vegetables. They need high-intensity light (300–600 PPFD) for extended periods (14–16 hours) to produce flowers and develop fruit. Underpowered lights result in plenty of vegetative growth but no actual harvest. Dwarf and compact varieties like ‘Tiny Tim’ tomatoes or ‘Basket of Fire’ peppers perform better under lights than full-size varieties because they need less total light energy to mature.
Setup: 200W+ panel or dual 100W panels, 10–14 inch height, 14–16 hours on, temperature 70–80°F. See my detailed tomato lighting guide and pepper lighting guide for specific recommendations.
Root Vegetables (Radishes, Green Onions, Carrots)
Root vegetables are surprisingly viable under grow lights if you use deep enough containers. Radishes are the best beginner root crop — they mature in 25–35 days under 200 PPFD lighting and need containers only 6 inches deep. Green onions (scallions) regrow from kitchen scraps under moderate light and provide continuous harvests.
Setup: 80–120W panel, 14–16 inch height, 14 hours on, temperature 55–65°F (cooler is better for roots).
Light Height Cheat Sheet by Vegetable Type
Getting the distance right between your grow light and plants is critical. Too close burns leaves; too far causes leggy growth.
| Vegetable Type | Seedling Stage | Vegetative Stage | Flowering/Fruiting |
|---|---|---|---|
| Leafy Greens | 6-8 inches | 8-12 inches | 10-14 inches |
| Herbs | 6-8 inches | 8-12 inches | 10-14 inches |
| Tomatoes | 4-6 inches | 6-12 inches | 12-18 inches |
| Peppers | 4-6 inches | 6-12 inches | 12-18 inches |
| Cucumbers | 4-6 inches | 8-14 inches | 12-20 inches |
Wattage Guide for Vegetable Growing
How much LED wattage do you need per square foot of growing area?
| Vegetable Type | Watts per Sq Ft | 2×2 ft Area | 2×4 ft Area | 4×4 ft Area |
|---|---|---|---|---|
| Leafy greens | 25–30W | 100–120W | 200–240W | 400–480W |
| Herbs | 20–25W | 80–100W | 160–200W | 320–400W |
| Fruiting vegetables | 35–50W | 140–200W | 280–400W | 560–800W |
| Seedlings/starts | 15–20W | 60–80W | 120–160W | 240–320W |
These are guidelines for quality LED panels with modern diodes. Cheap panels with older LED technology may need 30–50% more wattage to achieve equivalent output.
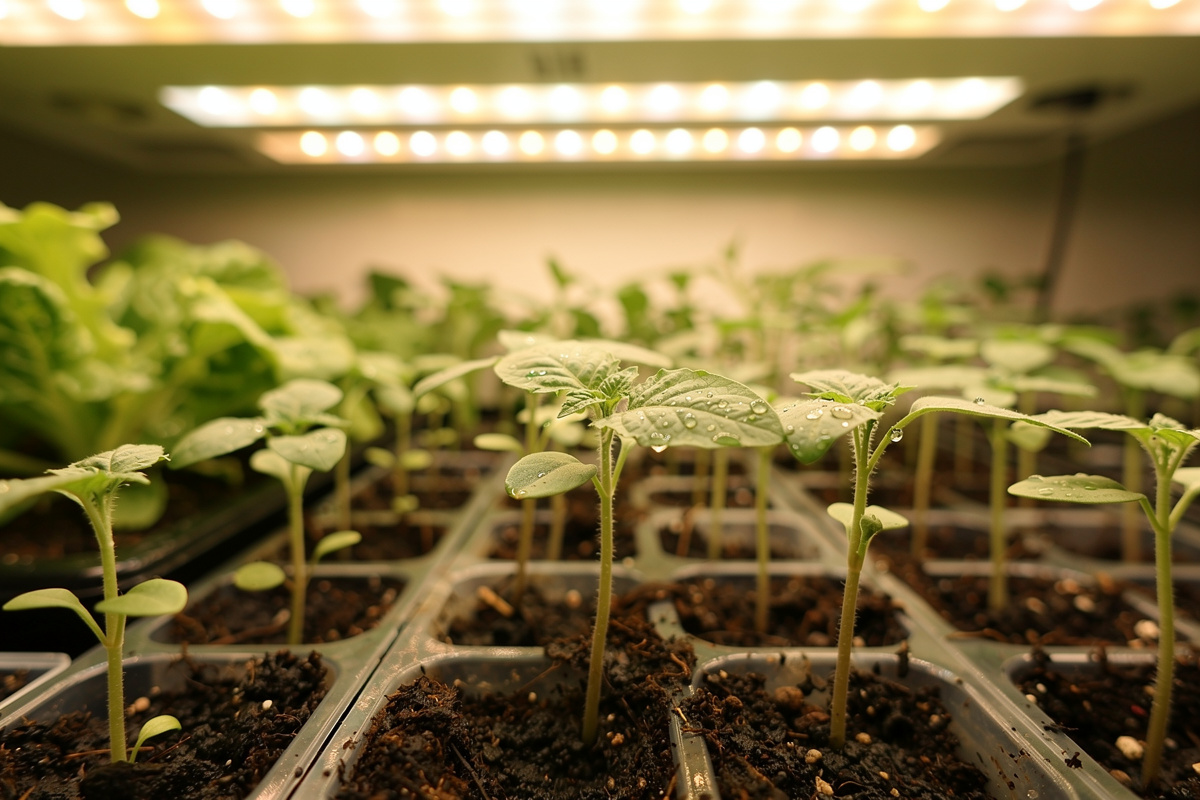
Seed Starting Under Grow Lights
Starting vegetable seeds indoors under grow lights gives you a 6–8 week head start on the growing season. Seeds need less intensity than mature plants — 100–200 PPFD is enough for germination and early seedling growth. An e-gro bulletin on managing DLI for vegetable transplants shows why seedlings run on a lower light target than fruiting plants (Managing DLI for transplant quality). Keep lights running 14–16 hours daily and position them close (4–6 inches) to prevent legginess.
Once seedlings develop their first true leaves, gradually increase the light intensity by lowering the panel or increasing the brightness over 5–7 days. This hardens the seedlings and prepares them for either outdoor transplant or continued indoor growing. My seed starting guide covers the full process from sowing to transplant.
Cost Analysis: Is Indoor Vegetable Growing Worth It?
Understanding the true costs helps you make informed decisions about your indoor vegetable growing investment.
Startup Costs
A basic indoor vegetable setup costs $100-300: LED grow light panel ($50-150), shelving or grow tent ($30-80), containers and soil ($20-40), seeds and nutrients ($10-30). A more serious production setup runs $300-600 with higher-wattage panels, ventilation fans, and automated watering.
Monthly Operating Costs
Electricity is the biggest ongoing cost. A 200W LED panel running 14 hours daily uses 2.8 kWh per day, or about 84 kWh per month. At the US average of $0.15/kWh, that’s $12.60/month. A more powerful 400W setup costs about $25/month in electricity. Seeds, nutrients, and water add another $5-10/month.
Return on Investment
A well-managed indoor vegetable garden produces $30-80 worth of fresh produce monthly. Leafy greens and herbs give the fastest return—lettuce costs $3-4 per head at the store but costs about $0.50 to grow. Herbs like basil and cilantro cost $2-3 per bunch at stores but $0.20 to grow. Fruiting vegetables like tomatoes and peppers take longer but produce more value per plant. Most setups pay for themselves within 3-6 months.
Record Keeping and Optimization
Indoor growing under lights is more controllable than outdoor gardening, but that control is only valuable if you track what works. Keep a simple log noting:
- Light height and duration — Record changes and plant response over the following week
- Watering frequency — How often each container needs water (this changes with plant size and light intensity)
- Feeding schedule — What fertilizer, concentration, and frequency produces the best growth
- Seed-to-harvest time — Track actual days from planting to first harvest for each crop
- Yield — Weigh or count harvests to compare performance between seasons or setup changes
A simple spreadsheet or notebook lets you replicate successful grows and identify what went wrong when results disappoint. After 2-3 growing cycles, you will have dialed in the exact settings that work for your specific space, lights, and preferred crops.
Common Mistakes Growing Vegetables Under Lights
| Mistake | What Happens | Solution |
|---|---|---|
| Using a desk lamp for tomatoes | Leggy plants, no fruit | Upgrade to 150W+ panel at 12 inches |
| Same light height for all stages | Burned seedlings or stretched mature plants | Adjust height as plants grow |
| No timer | Inconsistent growth, stressed plants | Use mechanical or digital timer |
| Running lights 24/7 | Exhausted plants, reduced yield | Maintain 8–10 hours darkness |
| Ignoring temperature | Slow growth despite good light | Most vegetables need 65–80°F |
| Too many plants under one light | Competition, shading, poor yields | Match plant count to light coverage area |
| Only focusing on light | Deficiencies despite good lighting | Ensure proper watering, nutrition, airflow |
Seasonal Strategies
Winter Growing (November–February)
This is when grow lights earn their investment. Natural light drops to 8–9 hours at high latitudes, and cloudy days reduce intensity further. Run grow lights for the full 14–16 hours and consider adding a second light if your plants show signs of stretching. Winter is ideal for growing cold-tolerant crops like lettuce, spinach, and kale under lights.
Spring Seed Starting (February–April)
Start seeds 6–8 weeks before your last frost date. Use lower-intensity settings (150 PPFD) and position lights close to prevent legginess. Gradually harden seedlings by moving them closer to a window for increasing periods before outdoor transplant.
Summer Supplementing (June–August)
If your growing area gets partial natural light, you may be able to turn off grow lights during summer months or run them for shorter periods. Monitor your plants — if growth remains strong with just window light, save the electricity.
Fall Extension (September–November)
As outdoor gardens wind down, move compact vegetable plants indoors under lights. Bush peppers, cherry tomatoes, and herbs transition well from outdoor containers to indoor growing stations.
Energy-Saving Tips for Indoor Vegetable Growing
Reduce electricity costs without sacrificing production using these proven strategies.
Use Timers: Never leave grow lights on manually. A digital timer ($10) ensures lights run only during scheduled hours. Set it and forget it—no wasted electricity from forgotten lights.
Reflective Surfaces: Line walls with Mylar, white paint, or aluminum foil to reflect light back onto plants. This increases effective light intensity by 20-30% without using more electricity.
LED Over Fluorescent: LED panels use 40-60% less electricity than fluorescent tubes while producing more usable light. The higher upfront cost pays back within 6-12 months through reduced electricity bills.
Group Plants by Light Needs: Place high-light vegetables (tomatoes, peppers) directly under lights and lower-light crops (lettuce, herbs) on the edges. This maximizes the useful area of each light panel.
Clean Light Panels Monthly: Dust on LED panels reduces output by 10-15%. Wipe panels with a damp cloth monthly to maintain full light output.
Light Scheduling for Indoor Vegetables
Getting the photoperiod right is as important as choosing the right light. Vegetables have specific light/dark cycle requirements that differ from houseplants.
| Vegetable Category | Light Hours | Dark Hours | Schedule Notes |
|---|---|---|---|
| Leafy greens | 14-16 | 8-10 | Longer days speed growth; no flowering trigger needed |
| Herbs | 12-14 | 10-12 | Basil needs long days; cilantro bolts in too much light |
| Fruiting (tomatoes) | 14-16 | 8-10 | Consistent long days needed for fruit production |
| Fruiting (peppers) | 14-16 | 8-10 | Similar to tomatoes; ensure dark period for fruiting hormones |
| Root vegetables | 12-14 | 10-12 | Cooler temperatures more important than extreme light |
| Microgreens | 12-16 | 8-12 | Flexible; even 12 hours produces good results |
| Seedlings | 16 | 8 | Maximum daylight for strong, stocky growth |
The dark period is not wasted time. Plants use darkness to respire, transport nutrients, and produce growth hormones. Continuous 24-hour lighting actually reduces vegetable yield in most crops because plants never recover from the photosynthetic workload.
Every grow light should run on a timer. A $5 mechanical timer with 15-minute increment pins is the cheapest reliable solution. Set pins for 5 AM-7 PM (14 hours) and your plants get perfect consistency. Smart plugs ($10-15) add phone control and scheduling flexibility.
Supplemental Lighting vs Full Replacement
Not every vegetable grower needs a full artificial lighting setup. If you have a south-facing or east-facing window, supplemental lighting can fill the gap between what your window provides and what your vegetables need. This hybrid approach costs less to run and uses smaller lights.
When Supplemental Lighting Works
Supplemental lighting makes sense when your window provides at least 4 hours of direct sunlight. In this scenario, a modest 40-60W LED panel running for 6-8 hours in the morning and evening extends the total photoperiod to 14-16 hours without paying for full-intensity artificial light all day. Position the grow light on the opposite side of the plants from the window to balance light exposure and prevent one-sided leaning.
When Full Replacement Is Necessary
If your growing space gets less than 2 hours of direct sun, or if you are growing in a basement, closet, or north-facing room, artificial light must supply 100% of your vegetables’ needs. In this case, panel selection and intensity become critical — you cannot compensate for a weak light by running it longer hours, because vegetables still need their dark rest period.
Air Circulation and Grow Lights
Grow lights create a microclimate around your plants that differs from the rest of the room. The air directly under the light panel is typically 3-8°F warmer than ambient, and still air in this zone promotes fungal problems and weakens stems. Every vegetable grow light setup should include air movement.
A small clip-on fan or USB desk fan positioned to gently rustle the leaves is sufficient for shelf setups. The airflow serves three purposes: it prevents heat stratification under the light, strengthens plant stems through mechanical stress (thigmomorphogenesis), and reduces humidity pockets that encourage powdery mildew and damping off in seedlings.
For enclosed spaces like grow tents, an inline exhaust fan paired with passive intake vents maintains a steady flow of fresh air. This also replenishes CO2 levels around the plant canopy — in a sealed tent without ventilation, plants can deplete the available CO2 within hours, which limits photosynthesis regardless of how much light you provide.
Pollination Under Indoor Grow Lights
Indoor vegetables face the same pollination challenges as indoor tomatoes—no wind or insects means you must pollinate manually.
Self-Pollinating vs Cross-Pollinating
Most edible vegetables are self-pollinating: tomatoes, peppers, eggplants, and beans pollinate themselves with gentle vibration. Cucumbers, squash, and melons have separate male and female flowers and need pollen transferred between them. Leafy greens and herbs don’t need pollination since you harvest before flowering.
Indoor Pollination Methods
Electric Toothbrush Method: Touch a vibrating electric toothbrush to flower stems for 2-3 seconds. Most effective for tomatoes and peppers. Do every 2-3 days during flowering.
Small Paintbrush: Gently swirl inside each flower to transfer pollen. Essential for cucumbers and squash where you need to move pollen from male to female flowers.
Oscillating Fan: A small fan on low setting creates airflow that mimics outdoor wind. Set to run 2-4 hours daily during flowering. Works well for self-pollinating crops.
Nutrients Under Artificial Light
Vegetables growing under artificial light have slightly different nutritional needs than those growing outdoors. Higher light intensity drives faster photosynthesis, which increases the plant’s demand for nitrogen, potassium, and micronutrients like iron and magnesium. A balanced liquid fertilizer (such as a 10-10-10 or a vegetable-specific formula) applied at half strength every 7-10 days keeps indoor vegetables productive.
Watch for pale lower leaves (nitrogen deficiency), purple-tinged stems (phosphorus deficiency), and brown leaf edges (potassium deficiency). These symptoms appear faster under strong artificial light because the accelerated growth rate depletes soil nutrients more quickly than outdoor growing in garden soil. Container growing basics apply here — indoor vegetable containers need more frequent feeding than raised beds.
DIY Grow Light Solutions
You don’t need expensive commercial systems to grow vegetables indoors. These DIY approaches work well for budget-conscious growers.
PVC Pipe Shelving with LED Strips
Build a 3-4 tier shelving unit from PVC pipes ($20-30) and attach LED grow light strips ($15-25 per shelf). Total cost: $65-130 for a four-shelf system. Each shelf holds 4-6 containers. LED strips provide adequate light for leafy greens and herbs. Add a timer for automation.
Repurposed Shop Lights
Standard LED shop lights ($15-25 each) work surprisingly well for seed starting and leafy greens. While not full-spectrum like dedicated grow lights, they provide enough light for early-stage growth. Mount them on chains for adjustable height. Best for seedlings that will later move outdoors.
Window Shelf Extension
Mount floating shelves on south-facing windows and attach clamp-on grow lights above each shelf. The window provides natural light during the day, and grow lights extend the photoperiod to 12-14 hours. Cost: $30-50 per shelf including light.
What wattage grow light do I need for vegetables?
For leafy greens and herbs, plan for 25–30 watts of quality LED light per square foot of growing area. Fruiting vegetables like tomatoes and peppers need 35–50 watts per square foot. A 2×2 foot shelf of lettuce needs about 100 watts, while a tomato setup needs 150–200 watts for the same area.
Can you grow vegetables indoors with just grow lights and no sunlight?
Yes. Many indoor growers produce vegetables in basements, closets, and windowless rooms using only artificial light. The key is providing sufficient intensity (150–400 PPFD depending on the crop) for 14–16 hours daily.
How far should grow lights be from vegetable seedlings?
Position LED grow lights 4–6 inches above vegetable seedlings during germination and early growth. As seedlings develop true leaves, gradually raise the light to 10–14 inches. Watch for bleaching or curling, which indicates the light is too close.
What are the easiest vegetables to grow under grow lights?
Lettuce, spinach, and herbs are the easiest vegetables to grow under lights. They need moderate intensity, grow fast (30–45 days to harvest), and tolerate the limited space of indoor setups. Radishes and green onions are also beginner-friendly.
Is it worth using grow lights for a small vegetable garden?
A small indoor vegetable setup with a $60–80 LED panel produces enough lettuce and herbs to offset the equipment cost within 3–4 months. Monthly electricity for a 100-watt panel is about $7. The real value is year-round access to fresh greens regardless of season.
Related Articles
- LED Lights for Growing Plants Indoors: Complete Guide
- Best Light for Growing Plants Indoors: From Windowsill to LED
- Grow Lights for Tomatoes: Indoor Growing Guide
- Growing Tomatoes Inside — full indoor tomato guide from seedling to harvest
- Growing Peppers Indoors: Container Guide — light and care for indoor pepper plants