Harvesting microgreens correctly extends shelf life from 3 days to 10 days and keeps every tray tasting as sharp as the moment it was cut. The technique boils down to four rules: cut high, cut sharp, cut dry, store cold. On my shelf, I harvest Sunday mornings after the lights have been on for an hour, when the leaves and stems are at their driest and the flavor is at its peak. This guide covers the exact cut height per species, the right tools, the wash-or-don’t-wash debate, and the storage protocol that keeps radish microgreens crisp and green for 7 to 10 days at 36 to 40°F.
Quick Answer: How to Harvest Microgreens
Stop watering 8 to 12 hours before harvest. Cut at the soil line with sharp scissors or a chef’s knife held parallel to the medium, taking the stem and cotyledons but leaving the roots in the tray. Skip washing if seeds were clean and the tray was kept dry — washing cuts shelf life in half. Store in a sealed container with a paper towel at the bottom at 36 to 40°F. Properly harvested radish or broccoli microgreens keep 7 to 10 days. Sunflower and pea shoots keep 5 to 7 days.
The Harvest Signal: When to Cut
The universal signal is the appearance of the first true leaf between the two seed leaves (cotyledons). Cotyledons are the round, simple leaves that emerge first. True leaves have the species’ adult shape — serrated for arugula, lobed for radish, three-part for cilantro.
For most species, cut when the first true leaf is just emerging — about 1 mm to 5 mm long. Waiting longer changes the flavor noticeably — the plant pulls energy from the cotyledons into the new leaf, and the result is more bitter and less sweet than cutting at the right moment.
Exceptions: sunflower and pea shoots are usually harvested before true leaves appear, at 3 to 4 inch height. Wheatgrass is cut at 6 to 8 inches.
| Species | Cut Height | Harvest Signal |
|---|---|---|
| Radish | 1.5 to 2.5 inches | First true leaf 1-3 mm |
| Broccoli | 1.5 to 2.5 inches | First true leaf 1-3 mm |
| Sunflower | 3 to 4 inches | Cotyledons fully open, hulls dropped |
| Pea shoots | 3 to 5 inches | 2-3 sets of leaves on vine |
| Mustard | 1.5 to 2 inches | First true leaf 1-3 mm |
| Cilantro | 2 to 3 inches | First true leaf clearly visible |
| Basil | 2 to 3 inches | First true leaf clearly visible |
| Wheatgrass | 6 to 8 inches | Light green to dark green |
For the full grow-cycle context that leads up to harvest, see the Growing Microgreens complete setup guide.
The 8-12 Hour Pre-Harvest Dry Period
This is the single most important shelf-life technique most beginners skip. Stop bottom-watering 8 to 12 hours before you plan to cut. The leaf surface should be completely dry at harvest time.
Why it matters: bacteria and mold thrive on wet leaves. A dry-harvested tray cuts post-harvest microbe load by an estimated 70 to 80 percent. The trade-off is minor — slightly less crisp at first bite, but vastly better storage.
For trays that absolutely cannot dry out (hot kitchen, low humidity, fast-transpiring sunflower or pea), spritz the dry leaves lightly with cool water 30 minutes before harvest, then air-dry on a paper towel before bagging.
Cutting Tools
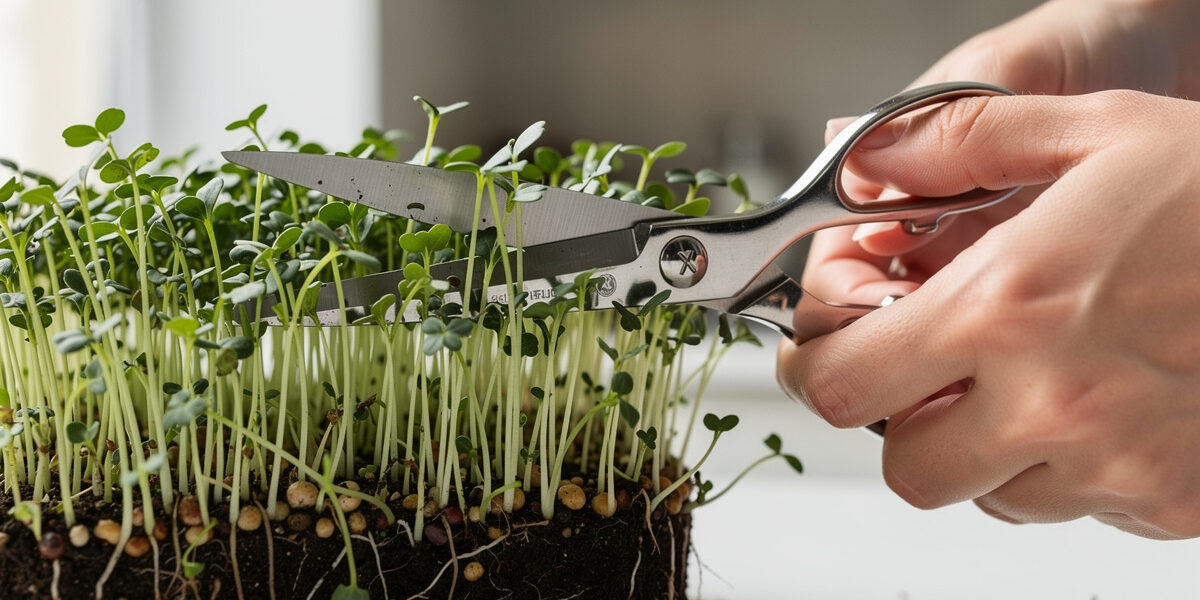
Kitchen Scissors
The default tool for home harvest. Sharp household scissors held parallel to the soil work for any species. Pros: cheap, sterilizable, precise control. Cons: slower for large batches, fatiguing on the hand after 4+ trays.
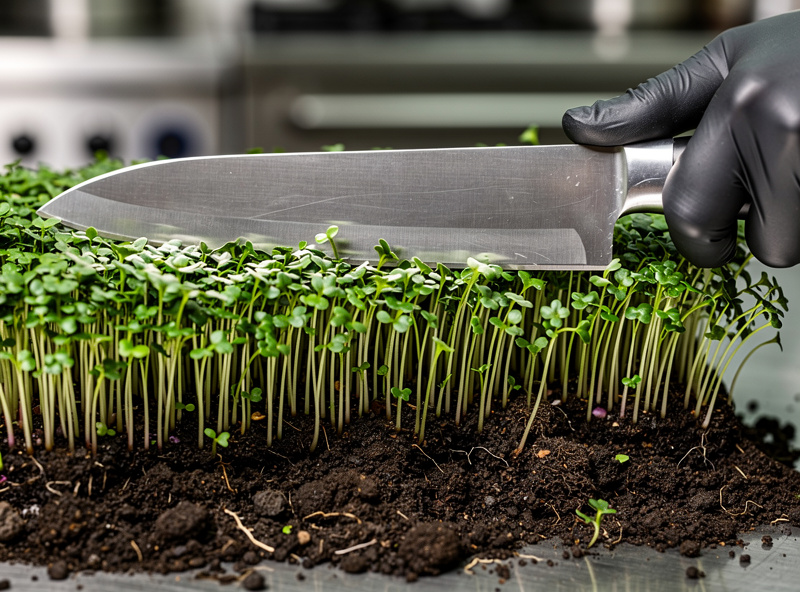
Chef’s Knife
Faster than scissors for full-tray harvest. Lay the blade flat against the soil surface and slice across in one smooth motion. Pros: full-tray harvest in 30 to 60 seconds. Cons: takes practice to keep blade flat without scalping the medium.
Electric Trimmer
A powered hair-trimmer style cutter (commercial growers use them). Cuts a 1020 tray in 15 to 20 seconds. Pros: fast and consistent. Cons: $80 to $300, overkill for home growers under 10 trays per week.
Tools to Avoid
Standard garden shears (too thick), serrated bread knives (tear stems), kitchen herb scissors (multi-blade types crush the cotyledons).
Whatever tool you use, keep it sharp. A dull edge crushes the stem and accelerates wilting — I learned this when a pair of blunt kitchen scissors turned a tray of broccoli microgreens into a limp, bruised mess within 2 hours of cutting. Sterilize between batches with 70 percent isopropyl alcohol or a hot-water rinse. As an Amazon Associate I earn from qualifying purchases. For anyone harvesting weekly, a pair of stainless steel harvest scissors with a 6-inch blade cuts a full tray in one smooth pass and holds its edge through months of weekly use.
Cutting Technique: The Mechanics
- Confirm the tray is dry (no water in the bottom solid tray, leaf surface dry).
- Position the tray on a counter at waist height for ergonomic cutting.
- Hold the blade or scissors parallel to the soil surface — angled even 10 degrees off introduces soil into your harvest.
- Cut just above the soil line — leave 1/4 inch of stem on the medium. This leaves the roots intact and prevents soil contamination.
- Work systematically from one corner to the opposite corner. Do not cut, drop scissors, eat, then resume — minimize handling.
- Place cut microgreens directly into a clean, dry container or onto a clean towel for sorting.
Avoid grabbing handfuls and yanking — this pulls roots and soil into your harvest. Cut, don’t pull.
To Wash or Not to Wash
The home microgreen washing debate has two camps with valid points.
Don’t wash: I never wash my microgreens because the seeds are food-grade, the coir is from a sealed brick, and the trays are kept dry through the full cycle. If your seeds were clean (untreated, food-grade), your medium was sterile (peat or coco coir from a sealed bag), and your tray was kept dry, microgreens are essentially ready to eat. Washing introduces moisture that cuts shelf life by 50 percent. Most commercial microgreen growers selling to chefs do not wash.
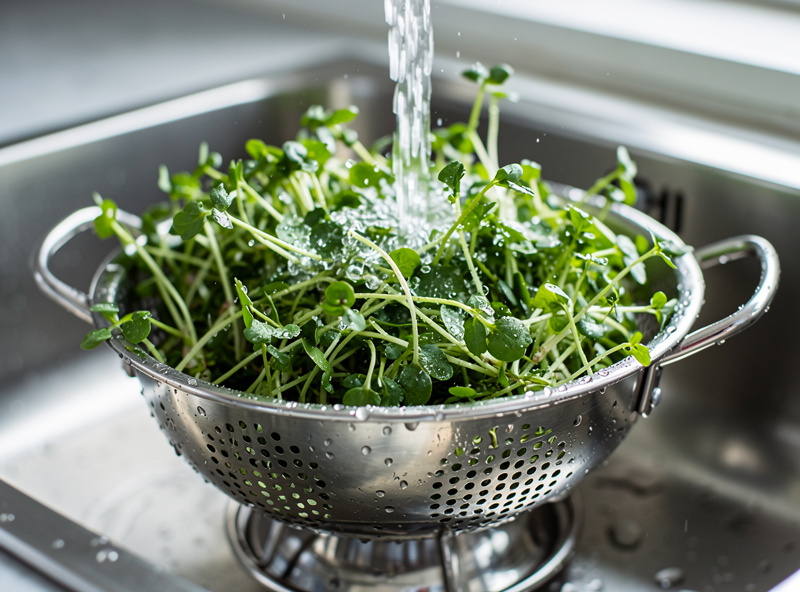
Wash: If you grew with reused medium, suspect any pet or pest exposure, or notice visible soil specks, a quick rinse is sensible. Use cool tap water and the gentlest possible flow — high-pressure water bruises cotyledons.
If you do wash, the protocol:
- Place cut greens in a colander.
- Rinse 30 seconds under cool running water.
- Spin in a salad spinner — 30 seconds, two cycles.
- Lay on a paper towel for 5 minutes to finish drying.
For pest concerns that might prompt washing, see the Fungus Gnats in Houseplants guide.
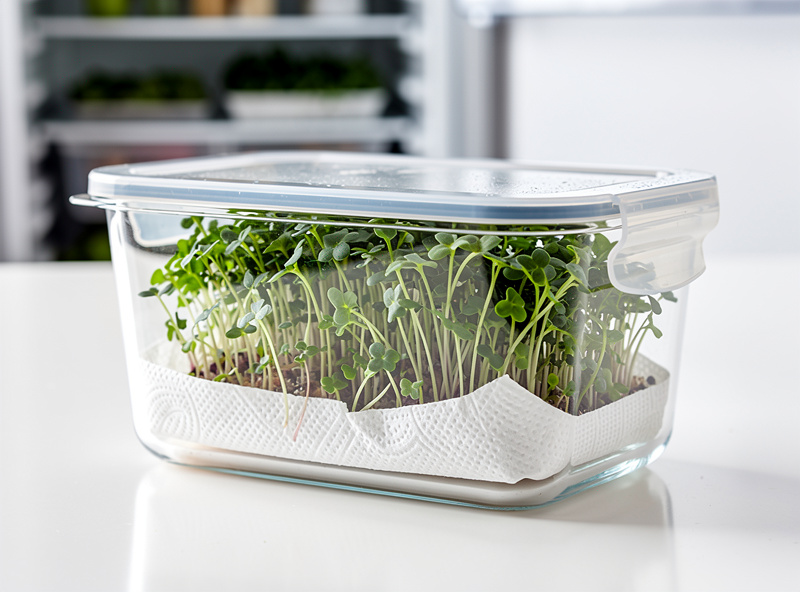
Storage Containers
The right container is sealed, rigid, and lined with paper towel. The paper towel absorbs the trace moisture released by the leaves, which is the single biggest factor in microgreen storage life.
| Container Type | Pros | Cons | Shelf Life Impact |
|---|---|---|---|
| Glass food container with snap lid + paper towel | Reusable, clear visibility, cleans well | Heavier, breakable | 7-10 days (radish, broccoli) |
| Plastic clamshell + paper towel | Light, stackable, restaurant-style | Single-use plastic | 7-10 days |
| Vacuum-sealed bag | Longest storage | Crushes cotyledons | 10-14 days but bruised |
| Open bowl with cling film | Quick | Poor seal | 3-5 days |
| Plastic bag (zip-top) | Cheap | Trapped moisture | 3-5 days |
Storage Temperature
The ideal range is 36 to 40°F (2 to 4°C) — the cold zone of a household refrigerator, typically the meat or crisper drawer. Standard fridge shelves run 38 to 42°F, also acceptable. Controlled trials confirm that lower storage temperatures meaningfully extend microgreen shelf life and preserve sensory quality (Kou et al., storage-temperature study on microgreens).
Below 36°F microgreens may suffer cold damage (cotyledons turn translucent and wilt). Above 45°F shelf life drops 50 percent per 5°F increase.
Never freeze fresh microgreens. Cell walls rupture and texture is destroyed — I tried freezing a batch of radish microgreens once for a soup project and the result was a translucent, watery mess that worked for pesto but was useless for anything fresh. The frozen leaves can be used for soup or pesto where texture doesn’t matter, but expect a completely different product from fresh.
Shelf Life by Species
| Species | Shelf Life (Dry Harvest, Properly Stored) | Shelf Life (Wet Harvest) |
|---|---|---|
| Radish | 7-10 days | 3-5 days |
| Broccoli | 7-10 days | 3-5 days |
| Sunflower | 5-7 days | 2-4 days |
| Pea shoots | 5-7 days | 2-4 days |
| Mustard | 7-10 days | 3-5 days |
| Cilantro | 4-6 days | 2-3 days |
| Basil | 3-5 days (very sensitive) | 1-2 days |
Cilantro and basil are the shortest-lived because of their high water content and tender cell walls. Radish, broccoli, and mustard last longest because of more rigid cuticles.
Reviving Slightly Wilted Microgreens
If a batch starts to limp at day 5 or 6, soak in ice-cold water for 5 to 10 minutes, then spin dry. Cell turgor partially restores and another 1 to 2 days of usable life recovers. This won’t help microgreens that have yellowed or developed slime — those are gone.
Common Harvest Mistakes
Cutting too low. If the blade dips below the soil line, even briefly, dirt and root debris contaminate the harvest. Always cut at or just above 1/4 inch above the soil.
Wet harvest. Cuts shelf life in half. Always pre-dry 8 to 12 hours before cutting, and never cut leaves with visible droplets.
Storing in plastic bag. Trapped moisture is the #1 cause of slime within 3 days. Use a rigid sealed container with paper towel lining.
Storing at room temperature for “later.” Microgreens at 70°F lose 30 to 50 percent quality within 4 hours. Refrigerate within 30 minutes of cutting.
Mixing species too early. Different species have different shelf lives. Sunflower limp by day 6 contaminates a salad mix that radish would have kept fresh through day 9.
For broader storage techniques on indoor crops, see the Grow Lettuce Inside guide — many of the same cold-storage principles apply to baby leaf crops.
Selling Harvested Microgreens
If you’re scaling up to sell, restaurants and farmers markets pay $20 to $40 per pound wholesale, $30 to $60 retail in clamshells. Food-safety rules vary by state — check cottage food laws and food handler permits before selling.
Sale-ready microgreens are typically harvested same-day or one day before sale, packed in 4-ounce or 8-ounce clamshells, and labeled with species, harvest date, and grower contact. A 4-ounce clamshell of radish microgreens sells at farmers markets for $4 to $7.
Frequently Asked Questions
How do you harvest microgreens?
Stop watering 8 to 12 hours before harvest. Cut at the soil line with sharp scissors or a chef’s knife held parallel to the medium, taking the stem and cotyledons but leaving roots in the tray. Most species cut at 1.5 to 3 inches; sunflower and pea shoots at 3 to 4 inches.
Should I wash microgreens before eating?
Not always. If your seeds were clean and the tray was kept dry, microgreens grown in fresh soil are ready to eat. Washing cuts shelf life by 50 percent. If you do wash, rinse 30 seconds in cool water, spin-dry twice, and air-dry on a paper towel.
How long do microgreens last after harvesting?
Properly dried and refrigerated, radish and broccoli microgreens last 7 to 10 days. Sunflower and pea shoots last 5 to 7 days. Basil and cilantro are shortest at 3 to 6 days. Wet-harvested microgreens last roughly half as long.
What is the best way to store microgreens?
Place cut greens in a sealed glass or plastic container with a paper towel at the bottom (absorbs condensation). Store at 36 to 40°F — the cold zone of a refrigerator or the crisper drawer. Never freeze fresh microgreens.
Can microgreens regrow after harvest?
No. Most microgreens are harvested at the first true leaf stage and lack the leaf surface to regrow. Pea shoots are the only common exception — they may produce a smaller second flush 7 to 10 days after cutting at 2 inches, with yield dropping 50 to 70 percent.
What tool is best for cutting microgreens?
Sharp kitchen scissors for small batches and precise control. A chef’s knife held parallel to the soil for full-tray harvest in 30 to 60 seconds. Avoid serrated bread knives, garden shears, and multi-blade herb scissors — they crush stems.