How Sand Barriers Prevent Fungus Gnat Infestations
For a complete guide to eliminating fungus gnats, see the step-by-step fungus gnat elimination guide.
For a complete overview of all fungus gnat identification and treatment methods, see the complete fungus gnat guide.
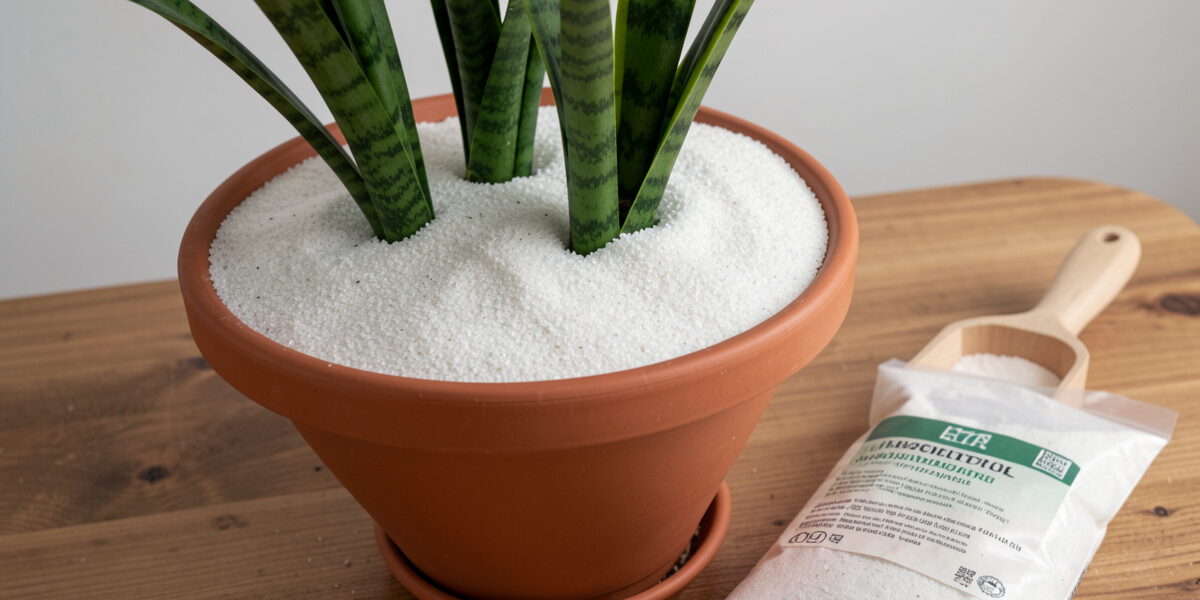
Applying sand on soil for gnats is one of the simplest, most effective, and completely non-toxic methods for preventing and managing fungus gnat infestations in houseplants. This physical barrier method exploits the biological needs of fungus gnats, creating an environment where these pests cannot successfully reproduce while remaining completely safe for plants, pets, and humans. Unlike chemical treatments that may raise health concerns or biological controls requiring specific conditions, sand barriers provide immediate, reliable protection with zero environmental impact.
As an Amazon Associate I earn from qualifying purchases.
The principle behind sand barriers is straightforward: fungus gnat adults require access to moist soil to lay their eggs, and their larvae need the organic-rich, humid environment of potting soil to develop. By covering the soil surface with a layer of coarse sand, you create a physical barrier that adult females cannot penetrate to deposit eggs, while simultaneously creating an inhospitable environment for any larvae that might already be present. This simple intervention breaks the gnat life cycle at its most vulnerable point.
Understanding Why Sand Works
The Biology of Gnat Reproduction
Fungus gnat females seek out moist, organic-rich soil to lay their eggs, typically depositing 100-300 eggs in the top layer of suitable substrate. These eggs require humidity to hatch and the organic matter in soil to feed the resulting larvae. Without access to appropriate laying sites and larval food sources, the life cycle cannot continue, and populations collapse.
Sand barriers work by denying gnats both requirements. The coarse texture prevents females from reaching the soil to lay eggs, while the inorganic, free-draining nature of sand provides no food for larvae and dries too quickly to support the humid conditions they need. Even if eggs were laid in sand, hatched larvae would find no sustenance and would die before maturing.
Physical Barrier Mechanism
The physical structure of coarse sand creates an impassable barrier for gnat adults. The abrasive, shifting particles make it difficult for the soft-bodied females to navigate and deposit eggs effectively. Unlike soil, which they can easily penetrate, sand provides no purchase for their delicate bodies and no protected crevices for egg deposition.
The barrier effect is immediate upon application. As soon as sand covers the soil surface, adult gnats lose access to their breeding site. This instant interruption of the reproduction cycle makes sand barriers particularly valuable for stopping active infestations and preventing new ones from establishing.
Environmental Modification
Beyond the physical barrier, sand modifies the microenvironment at the soil surface. Sand drains rapidly and dries quickly, creating arid surface conditions that contrast sharply with the humid environment gnats prefer. This desiccation effect extends below the surface layer, creating a zone too dry for gnat survival even if they could somehow access it.
The rapid drainage of sand also prevents the surface waterlogging that promotes fungal growth, which feeds gnat larvae. By eliminating fungi through improved drainage and faster drying, sand barriers remove the food source that sustains larval populations, attacking the problem from multiple angles simultaneously.
Choosing the Right Sand
Sand works best when combined with other methods. Try hydrogen peroxide soil drench to kill existing larvae before adding the sand barrier.
Sand Type and Particle Size
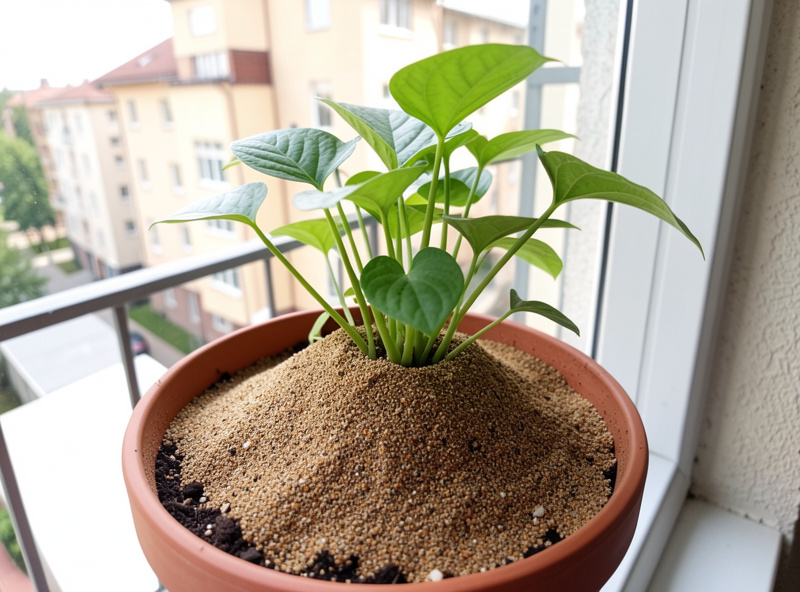
The effectiveness of sand barriers depends heavily on selecting appropriate material. Play sand, construction sand, or horticultural sand all work, but particle size is critical. The sand must be coarse enough to create a shifting, abrasive surface that gnats cannot navigate, typically with particles between 1-3 millimeters in diameter.
Very fine sand or mason sand is less effective because particles pack together, potentially creating a surface that hardens and allows gnat penetration. Additionally, fine sand retains more moisture than coarse grades, reducing the desiccation effect. On my own gnat-prone pots I just buy a bag of coarse horticultural sand rather than digging through a construction pile — look for sand labeled “coarse,” “builder,” or “horticultural” rather than “play” or “mason” sand for best results.
Avoid beach sand, which may contain salt harmful to plants, or sand with visible organic matter or clay contamination that could support gnat populations. Clean, washed sand free of dust and fines works best. Horticultural supply stores specifically stock sand suitable for this application.
Alternative Materials
While sand is the traditional and most effective barrier material, several alternatives provide similar benefits. Coarse perlite, with its angular white particles, creates an effective barrier while adding aesthetic appeal that contrasts with dark soil. Horticultural grit or fine gravel (1/8-1/4 inch) also works well, though larger particles may allow some gnat penetration between stones.
Diatomaceous earth (DE) provides both a physical barrier and chemical desiccation through microscopic sharp edges that damage insect exoskeletons. However, DE loses effectiveness when wet, requiring reapplication after watering. For more information on DE, see my guide on complementary control methods in how to get rid of fungus gnats.
Some gardeners use decorative glass beads, marbles, or aquarium gravel for aesthetic appeal combined with barrier function. These materials work well but may be more expensive than sand while providing no functional advantage.
Sterilization Before Use
Always sterilize sand before application to ensure it does not introduce new pests, diseases, or weed seeds to your plants. Sterilization is particularly important for sand sourced from outdoor environments like construction sites or garden centers. Several sterilization methods work effectively:
Oven method: Spread sand in a thin layer on baking sheets and heat at 200°F (93°C) for 30 minutes. This kills any eggs, larvae, or pathogens present without altering the sand structure.
Solar method: Place sand in sealed black plastic bags in direct sunlight for several days. The heat generated inside the bags sterilizes contents effectively in warm weather.
Boiling method: Submerge sand in boiling water for 10 minutes, then drain and dry completely before use. This method is time-consuming for large quantities but highly effective.
Application Techniques
Preparing the Soil Surface
Before applying sand, prepare the soil surface to maximize barrier effectiveness. Remove any existing gnat larvae from the top inch of soil by scraping it away and discarding in sealed trash. This eliminates existing populations before sealing them beneath the barrier. Allow the soil surface to dry slightly, creating conditions where any remaining larvae will be stressed and less active.
Level the soil surface, removing any large debris, plant tags, or decorative stones that would create gaps in the barrier. Smooth, even soil allows uniform sand coverage without thin spots where gnats might penetrate. Ensure the soil surface is at least 1 inch below the pot rim to accommodate the sand layer without overflow.
Applying the Sand Layer
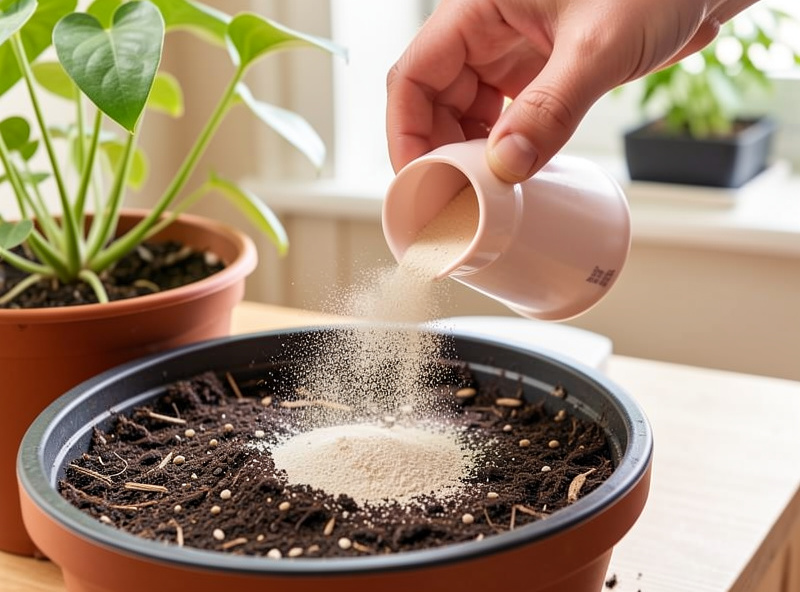
Apply a uniform layer of coarse sand approximately 1 inch thick across the entire soil surface. This depth provides complete coverage while remaining manageable for watering and plant maintenance. Distribute sand evenly, ensuring no bare soil patches remain exposed where gnats could access the soil.
Work carefully around plant stems, maintaining the sand barrier close to but not touching the stem to prevent rot. For plants with multiple stems or dense foliage, use a small brush or spoon to maneuver sand into tight spaces. Complete coverage is essential; even small gaps provide access points for determined females.
Gently firm the sand layer to settle it and prevent loose particles from spilling, but do not compact heavily, which might create a surface hard enough for gnat navigation. The goal is a stable but not solid layer that remains abrasive and shifting.
Watering Through Sand Barriers
Watering through sand requires slight technique modification. Water slowly, allowing liquid to percolate through the sand layer rather than flooding, which might displace the barrier. The sand will initially repel water slightly until saturated, then allow normal drainage. This initial repulsion is normal and actually helps maintain the dry surface conditions that deter gnats.
Consider bottom watering for plants with sand barriers, placing pots in water to absorb from drainage holes up. This keeps the sand surface completely dry while hydrating roots effectively. If top watering, apply water slowly near plant stems where sand is naturally thinner, allowing it to spread outward.
Over time, organic matter and mineral deposits may bind sand particles, reducing effectiveness. Refresh the sand layer every 3-6 months by removing the top 1/2 inch and replacing with fresh sterilized sand. This maintenance ensures continued barrier function.
Combining Sand with Other Controls
If you prefer organic solutions, neem oil soil drench is another effective option that targets larvae without chemicals.
Sand and Biological Controls
Sand barriers integrate beautifully with biological control methods like beneficial nematodes and Bacillus thuringiensis (Bti) — I dissolve BTI mosquito bits into my watering can whenever a pot looks reinfested. Apply biological controls first as a soil drench, allowing them to penetrate and establish in the soil. Once the soil surface has dried slightly (2-4 hours), apply the sand barrier. The biological agents work in the soil below while the sand prevents new gnat access from above.
This combination provides immediate protection through the barrier while biological controls eliminate any larvae already present. The sand also maintains drier surface conditions that support beneficial organism survival by preventing the waterlogging that can harm soil biology.
Sand with Chemical Treatments
For severe infestations requiring chemical intervention, apply insecticides as soil drenches according to label directions, then apply sand once the chemical has penetrated and the surface has dried. The sand prevents reinfestation while the chemical eliminates existing populations. This combination extends the effectiveness of chemical treatments by preventing new egg-laying.
Systemic insecticides applied to soil work particularly well with sand barriers, as the chemicals are absorbed by roots while the sand prevents external reinfestation. The plant becomes toxic to feeding larvae while the sand blocks new adults from accessing soil.
Sand and Yellow Sticky Traps
Combine sand barriers with yellow sticky traps — the ones I keep pinned in every pot through a Swedish winter — for comprehensive control. The sand prevents new egg-laying while traps capture existing adults, preventing them from finding alternative laying sites. This combination is highly effective because it addresses both future reproduction (through the barrier) and current population (through trapping).
Position yellow sticky traps horizontally just above the sand surface where adult gnats naturally congregate when prevented from accessing soil. The traps capture gnats as they attempt to land, maximizing capture rates of the population frustrated by the barrier.
For detailed trapping strategies, see my guide on DIY fungus gnat traps.
Integration with Cultural Controls
Sand barriers should always accompany proper watering practices. No barrier succeeds long-term if soil remains constantly saturated. Clemson Cooperative Extension notes that for most houseplants, letting the soil dry between waterings kills fungus gnat larvae outright — so the sand on top and the dry-down underneath make doubly inhospitable conditions for gnat survival.
Improve overall plant culture: ensure adequate drainage, avoid oversized pots with excess wet soil, and maintain good air circulation. These practices support plant health while making the environment less favorable for pests. Sand barriers are one component of comprehensive prevention, not a standalone solution.
Special Applications and Situations
Seedling Protection
Seedlings are particularly vulnerable to gnat damage due to their small root systems. Apply sand barriers immediately after seeds germinate and emerge. The barrier protects tender young plants during their most vulnerable stage without interfering with seedling growth. Use fine-grade sand or even vermiculite for very small seedlings, graduating to coarser material as plants mature.
For seed starting trays, consider applying sand only after germination to avoid impeding seedling emergence. Alternatively, use coarse vermiculite as a top dressing that allows seedling penetration while providing barrier function.
Large Plant Collections
Managing sand barriers across extensive plant collections requires systematic approach. Prepare bulk quantities of sterilized sand stored in sealed containers for easy access. Establish a routine schedule for barrier application and maintenance, treating all susceptible plants simultaneously to prevent cross-infestation.
Consider varying sand types by plant aesthetic: white perlite for plants with dark foliage, tan horticultural sand for natural looks, or colored aquarium gravel for decorative specimens. Consistent application across all plants prevents any single plant from serving as a reservoir reinfecting the collection.
Quarantine Applications
Apply sand barriers immediately to any new plants entering your collection as part of standard quarantine procedures. Even if new plants show no visible gnat activity, the barrier prevents any hidden eggs from developing and spreading to established plants. This proactive approach is far more effective than reactive treatment after infestation spreads.
Quarantine new plants with sand barriers for 2-3 weeks while monitoring for gnat activity. If no adults appear during this period, the plant is likely safe to integrate with your main collection. If gnats do appear, the barrier prevents egg-laying while you implement additional controls.
Outdoor Container Applications
Sand barriers work equally well for outdoor container plants prone to gnat infestations. However, outdoor applications require more frequent maintenance due to rain, wind, and general weathering that can displace or degrade the barrier. Refresh sand after heavy rains or monthly during active growing seasons.
Outdoor applications may also benefit from thicker sand layers (1.5-2 inches) to withstand weather disturbances while maintaining effective barriers. Choose larger particle sizes (2-3mm) that resist washing away in rain while remaining effective against gnats.
Maintenance and Troubleshooting
For monitoring your progress, DIY sticky traps help you track whether the adult population is declining.
Regular Inspection
Inspect sand barriers weekly, particularly after watering. Look for disturbances that might create gaps, washout from overwatering, or settling that exposes bare soil. Any exposed soil provides potential access points for gnat females. Maintain complete coverage by adding fresh sand to thin areas immediately.
Watch for mold or algae growth on the sand surface, which might indicate excessive moisture retention or indicate that the sand layer is too fine. If biological growth appears, remove the top sand layer, allow soil to dry, and replace with coarser, fresh sand.
Refreshing Sand Layers
Plan to refresh sand barriers every 3-6 months for optimal effectiveness. Over time, organic matter falls from plants, mineral deposits accumulate from water, and sand particles may bind together, reducing barrier function. Removal of the top 1/2-1 inch and replacement with fresh sterilized sand restores full protection.
When refreshing, take the opportunity to inspect the soil beneath for any larval activity or moisture problems. Address any issues found before applying new sand. This maintenance schedule prevents gradual degradation of barrier effectiveness that might allow reinfestation.
Problem Solving
If gnat activity persists despite sand barriers, first verify barrier completeness. Check for exposed soil at pot edges, around plant stems, or where sand has settled unevenly. Ensure the sand layer is thick enough (minimum 1 inch) and coarse enough to be effective.
Verify that the gnats are actually fungus gnats and not fruit flies or shore flies requiring different management. See my guide on fungus gnats vs fruit flies for proper identification.
Check whether plants are being overwatered despite the barrier, creating humid conditions below the sand that support gnat survival. The barrier prevents surface access but cannot overcome constantly saturated soil that supports larvae throughout the root zone.
Advantages and Limitations
Benefits of Sand Barriers
Sand barriers offer numerous advantages: completely non-toxic and safe for all environments; immediately effective upon application; low cost compared to chemical or biological controls; long-lasting with minimal maintenance; aesthetically pleasing in many applications; compatible with all other control methods; and require no special equipment or training to apply.
Unlike treatments that require precise timing, specific environmental conditions, or repeated applications, sand barriers provide continuous protection 24/7 with no additional effort after initial application. This “set it and forget it” convenience makes sand ideal for busy gardeners or those managing large plant collections.
Limitations to Consider
Sand barriers are preventive measures, not treatments for heavy existing infestations. If substantial larval populations are already established in soil, sand alone will not eliminate them. Combine sand with soil drenches or biological controls to address existing populations, then maintain sand for ongoing prevention.
Sand barriers can be aesthetically inappropriate for some plants or settings. The layer may look out of place on decorative specimens or formal displays. In these cases, alternative barriers like decorative gravel or glass beads may provide similar function with improved appearance.
Very heavy, established infestations may require more aggressive intervention before sand barriers become effective. Severe cases might benefit from initial treatment with hydrogen peroxide or insecticides to reduce populations, followed by sand application for prevention.
Related Articles
- How to Get Rid of Fungus Gnats: Complete Elimination Guide
- Hydrogen Peroxide for Fungus Gnats: Treatment Guide
- Neem Oil for Fungus Gnats: Natural Treatment Guide
- DIY Fungus Gnat Traps: Homemade Solutions That Work
- Cinnamon for Fungus Gnats: Natural Fungicide Treatment
Does putting sand on soil really stop fungus gnats?
Yes, a proper sand barrier is highly effective at preventing gnat reproduction. The coarse sand prevents adult females from accessing soil to lay eggs, while the inorganic material provides no food for larvae. It is exceptional at preventing new infestations and stopping active reproduction.
What kind of sand should I use for gnat control?
Use coarse sand with particles 1-3 millimeters in diameter. Horticultural sand, builder sand, or coarse play sand work well. Avoid fine mason sand or beach sand. Sterilize sand before use by baking at 200°F for 30 minutes.
How thick should the sand layer be?
Apply sand 1 inch thick for effective barrier function. Thinner layers may allow gnat penetration, while thicker layers are unnecessary. Ensure complete coverage with no bare soil exposed.
Will sand hurt my plants?
No, sand barriers are completely safe for plants when applied correctly. The sand does not interfere with root function, water penetration, or nutrient availability. Ensure sand does not touch plant stems directly to prevent potential rot.
How do I water plants with sand barriers?
Water slowly to allow penetration through the sand layer without washing it away. Consider bottom watering by placing pots in water to absorb from drainage holes up, keeping the sand surface completely dry.
Do I need to replace the sand regularly?
Refresh sand barriers every 3-6 months by removing the top 1/2-1 inch and replacing with fresh sterilized sand. This maintains effective barrier function as organic matter accumulates over time.
Can I use sand with other gnat treatments?
Absolutely, sand barriers integrate perfectly with all other control methods. Combine with yellow sticky traps for adults, beneficial nematodes or Bti for biological control, and hydrogen peroxide for immediate larval kill.