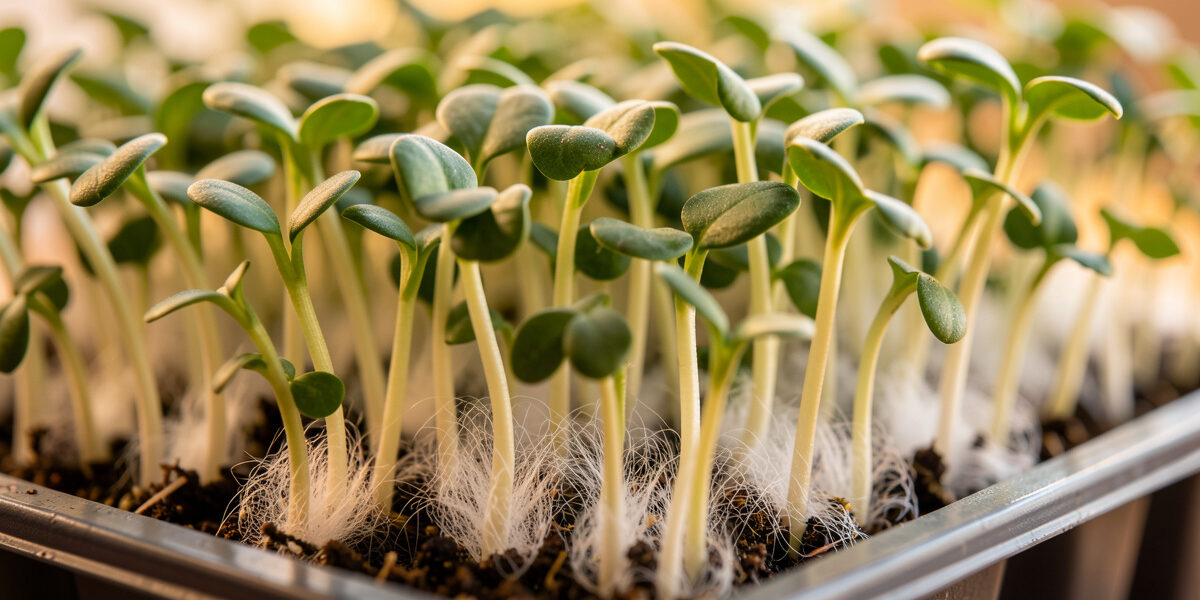
The white fuzz on your microgreens is almost certainly root hairs, not mold. Root hairs form a fine, even halo right at the base of each stem and collapse the instant you mist them. Mold is patchy, spreads across the soil between plants, smells musty, and does not disappear when wet. That single test — mist it and watch — settles nine out of ten panics.
I’ve had this conversation more times than any other in growing, and it always starts the same way: a photo of a tray of daikon radish or broccoli, dense white fluff at the soil line, and the question “do I have to throw this out?” Nearly always, no. But the tenth case is real mold, and telling them apart matters because one is the plant working perfectly and the other means your growing conditions have tipped into something you need to fix before it costs you the tray — or the whole shelf. This is the diagnosis I wish someone had handed me my first winter under the bar.
How Do You Tell Root Hairs From Mold?
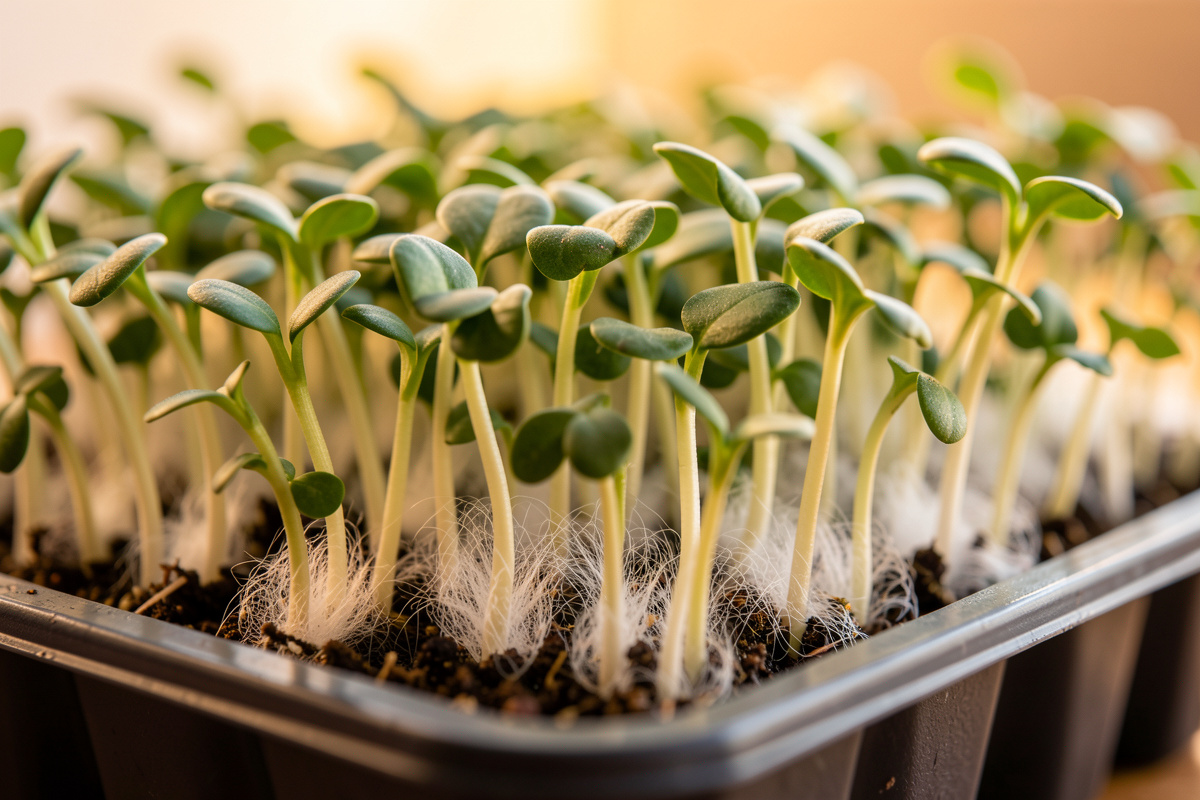
Root hairs and mold live in different places and behave differently under water. Root hairs grow directly out of the stem and root, forming a tight, even, fuzzy halo around each individual plant, and they flatten and vanish when misted. Mold grows on the soil surface between plants in patchy, cobweb-like tufts, it smells of damp cellar, and misting does nothing to it.
The first time I saw a heavy root-hair halo I was sure I’d lost a tray of radish. Beautiful, dense white fuzz wrapping every single stem, thick as spun sugar. I reached for the compost bucket, then decided to mist it first out of curiosity — and the whole cloud collapsed flat against the roots and disappeared into nothing. That’s the tell. Root hairs are the plant reaching for water; they’re structural, attached to the plant, and water makes them lie down. Mold is a separate organism sitting on top of the medium, and a spray bottle just makes it happy.
Four things I check, in order:
- Location. On the plant, hugging each stem = root hairs. On the soil, in the gaps between plants = mold.
- Pattern. Even halo around every stem = root hairs. Random patches, some plants clear, some smothered = mold.
- The mist test. Collapses and vanishes when wet = root hairs. Unchanged = mold.
- Smell. Clean, earthy, green = fine. Musty, damp-basement, sour = mold.
Root hairs show up most on radish, mustard, cress, and other brassicas, and they’re more visible when the tray runs a touch dry — the plant grows more of them hunting for moisture. So if you’ve been a little stingy with water on a radish tray and you see fuzz, that’s the most predictable false alarm in the whole hobby. This whole call is one branch of the broader microgreens troubleshooting guide, and it’s the branch people get wrong most often.
What Does Mold on Microgreens Actually Look Like?
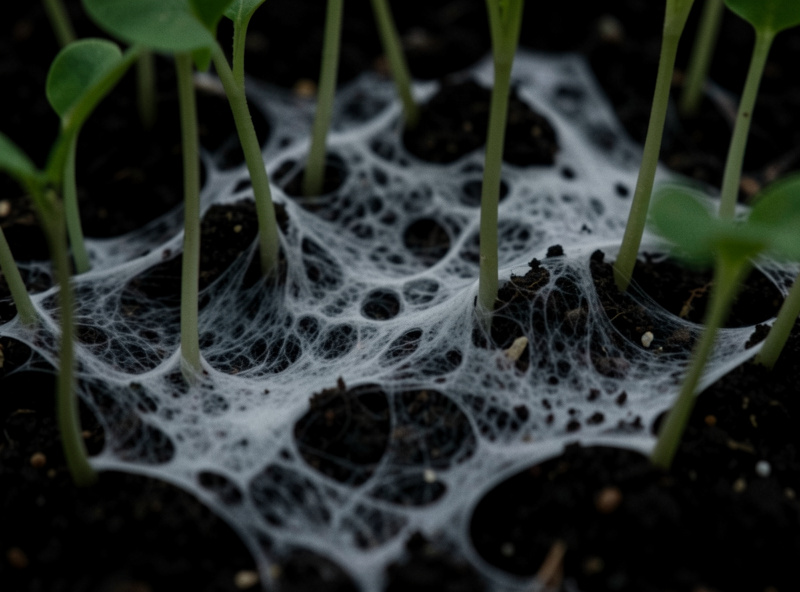
Real mold is patchy and web-like, grey-white or sometimes tinged green or black, and it spreads across the soil surface and up dead seed hulls rather than haloing living stems. It has a distinct musty odor, it does not react to misting, and left alone it expands into a fuzzy mat over a day or two. If you’re squinting trying to decide, the smell usually gives it away before your eyes do.
There’s a spot mold loves that catches beginners: ungerminated seeds and shed hulls. Dead organic matter sitting on warm, wet medium is a perfect substrate, so you’ll often see the first mold bloom on a clump of seeds that didn’t sprout or on the seed coats the microgreens shed as they stand up. That’s a hint about the real cause — it’s not that your plants are diseased, it’s that the surface is too wet and too still for too long. A tray sown too thick, with hulls trapped in a canopy that never dries, is mold waiting to happen.
One color note, because it causes needless alarm: a faint bluish or greenish bloom on the medium is different from the structural white halo, and pinkish or black fuzzy growth is more serious mold you should not mess around with. When in doubt, don’t eat it — I’ll take losing a $2 tray over eating something questionable every time. If the tray is genuinely molded, it goes to the worm bin, not the salad bowl.
Why Does Mold Grow on Microgreens in the First Place?
Mold needs three things microgreen trays readily supply: warmth, moisture, and stagnant air. Kitchen temperatures are ideal for it, a freshly watered canopy is soaking, and a covered or crowded tray has no air movement to dry the surface. Remove any one of those and mold struggles; remove airflow and moisture together and it essentially can’t get started.
I fought mold constantly my first year and couldn’t understand why, because I was doing everything the videos said. The thing the videos skipped was air. My trays sat in a still corner, I misted the tops daily, and I sowed heavy because a packed tray looks impressive. Every one of those was a mistake feeding the same problem. The turnaround came from three cheap changes, none of them a fungicide, and I’ve barely seen mold since.
Overwatering is the thread that runs through it — a canopy that never dries is a canopy that molds. The same logic I lay out in my guide to the signs of overwatering and how to fix it applies straight to trays: roots and surfaces need to breathe between waterings. And humidity domes, which every kit ships with, are a double-edged tool — great for germination, a mold incubator if you leave them on a day too long.
How Do You Stop Mold on Microgreens?
Stop mold with airflow, bottom-watering, and lighter sowing — in that order of impact. A small fan moving air across the trays dries the canopy and denies mold the stagnant humidity it needs. Watering from below keeps the leaf surface dry while feeding the roots. Sowing less densely lets the canopy breathe. Together these three fixes prevent the large majority of mold before it starts.
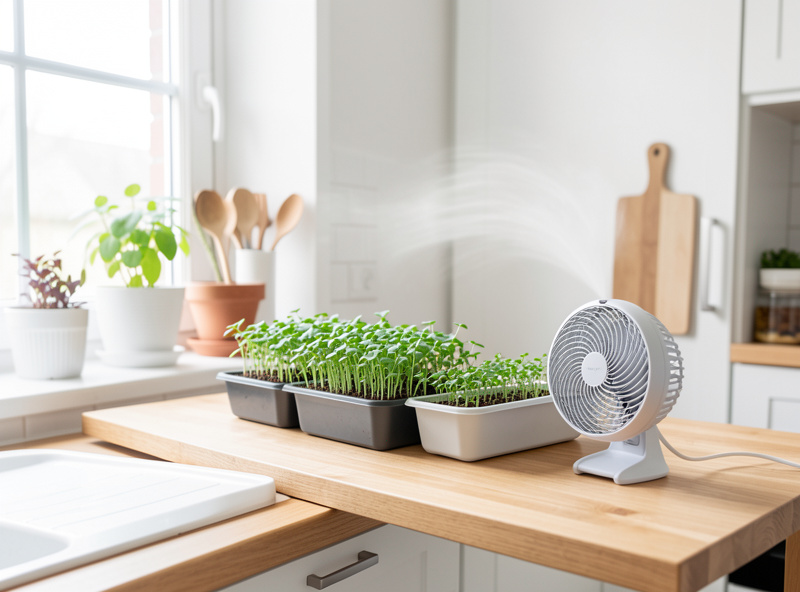
Add a fan. This is the single most effective thing I ever did for microgreens. A cheap clip-on fan on the shelf, run on low so it stirs the air without blasting the plants, keeps the canopy surface dry and breaks up the humid microclimate. It thickens the stems as a bonus — plants that feel air movement grow sturdier, which also helps with leggy stems. If you buy one thing after reading this, buy a small fan; you can find a decent USB clip-on fan for a few dollars.
Water from the bottom. Once the seeds have germinated and stood up, stop misting the tops. Pour water into a solid tray underneath, set the growing tray in it, let the medium wick up moisture for 15–20 minutes, then lift it out and drain. The roots drink, the leaves stay dry, and dry leaves don’t mold. This one change fixes more mold problems than any spray ever will.
Sow lighter and manage the dome. A tray sown wall-to-wall with seed traps humidity in a canopy that never dries. Sow a full, even layer — not seeds piled on seeds. And take the humidity dome off the moment germination is underway; it’s a germination aid, not a growing environment. If you’re using one, wipe the condensation off it daily so it isn’t dripping back onto the tray.
Choosing the right medium helps too. My breakdown of the best soil for microgreens favors mixes that hold moisture without going swampy — a medium that stays saturated at the surface is mold’s best friend. Whatever you sow into, once you’ve had mold, the trays themselves become suspect.
What If the Mold Keeps Coming Back Every Sowing?
Recurring mold, sowing after sowing, almost always means your reused trays are contaminated. Fungal spores and biofilm live in the scratches and corners of plastic trays that only ever get a rinse, and they reinfect each new crop no matter how good your airflow is. The fix is a proper wash-and-sanitise routine between every sowing, plus retiring any tray too scratched to clean.
This trap is maddening because you do everything right on the new tray and still get fuzz. I’ve watched people add a fan, switch to bottom-watering, sow thin — and still fight mold — because the spores were living in the tray the whole time. A rinse under the tap removes visible debris and nothing else. You need to physically scrub off the root mat and biofilm, then hit the tray with a food-safe sanitiser, then dry it completely before storage, because a damp stored tray grows the very thing you’re trying to kill. I keep sturdy, easy-to-clean 1020 trays partly for this reason. The full between-sowings routine — dilutions, contact times, and drying — is in my guide to cleaning and sterilising microgreen trays.
And know the line between mold and its nastier cousin. Surface mold rarely kills the plants; damping off attacks the stems at the soil line and takes the whole tray. If your seedlings aren’t just fuzzy but actually toppling over with pinched, water-soaked stems, you’ve moved past mold into a bin-it situation — that guide covers the distinction in detail.
As an Amazon Associate I earn from qualifying purchases.
For a non-commercial reference on medium and food-safety basics, the University of Minnesota Extension microgreens growing guide is worth a read, and Johnny’s Selected Seeds keeps a practical guide to growing microgreens with crop-specific notes on moisture and airflow.
How can I tell if it is mold or root hairs on my microgreens?
Mist the fuzz and watch. Root hairs form an even halo around each stem and collapse and vanish when wet. Mold sits on the soil between plants in patchy tufts, smells musty, and does not react to misting. Location and the mist test settle it almost every time.
Are microgreens with root hairs safe to eat?
Yes. Root hairs are a normal, healthy part of the plant, most visible on radish and brassicas grown slightly dry. They are not mold and pose no problem. Just rinse the greens at harvest as usual.
Can I save a tray of microgreens that has mold?
If it is genuine mold rather than root hairs, do not eat the affected crop. Small early spots on shed hulls can sometimes be improved with more airflow and bottom-watering, but a tray with spreading mold should be composted and the tray sanitized before reuse.
Does a fan really stop mold on microgreens?
Yes, more than almost anything else. A small fan run on low dries the canopy surface and breaks up the stagnant, humid air mold needs. Combined with bottom-watering and lighter sowing, airflow prevents most mold before it starts.
Why does mold keep coming back on every tray of microgreens?
Recurring mold usually means your reused trays are contaminated with spores and biofilm that a rinse does not remove. Scrub the trays, sanitize them with a food-safe solution, and dry them fully between every sowing to break the cycle.