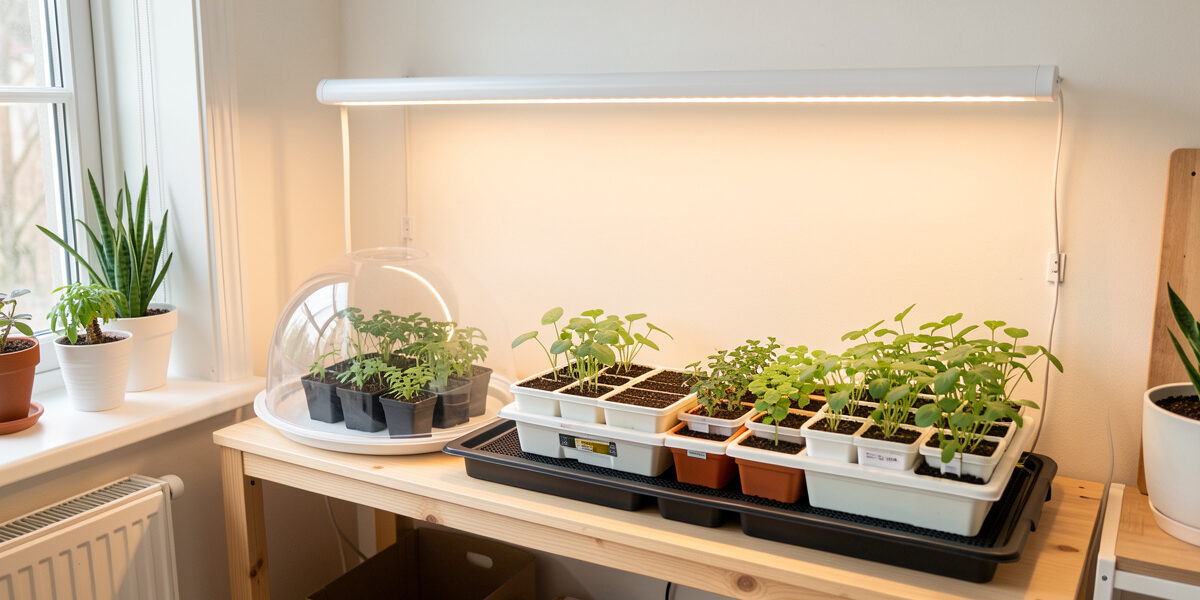
The seed-starting equipment that actually earns shelf space in a Swedish apartment is short: a tray with real drainage, a warm surface held near 24 °C (75 °F), a bright light within 10 cm of the seedlings, and a lid you know when to remove. Everything else is optional, and a lot of it is a waste of a small kitchen.
I have started seeds indoors through more Nordic winters than I can count, and I have bought the wrong gear more than once — the flimsy tray that cracked on its second sowing, the heat mat with no thermostat that cooked a flat of lettuce into dormancy. This is the equipment list I would hand my past self: what each piece does, when it earns its keep, and when the warm windowsill is genuinely enough. Get the temperature and the light right and cheap trays grow the same seedlings the expensive kits do. Get them wrong and the best kit on the market still gives you leggy, damped-off failures.
What Seed-Starting Equipment Do You Actually Need?
You need five things: a container that drains, a fine-textured medium, gentle bottom heat for warm-season crops, strong overhead light, and moisture control while seeds germinate. That is the whole list. In my setup a January sowing of tomatoes and pak choi runs on maybe 400 kronor of reusable kit plus electricity, and everything on the shelf serves one of those five jobs.
The trap is buying by the kit rather than by the job. A boxed “seed-starting kit” bundles a tray, a dome, and pellets, and charges you for the packaging — while quietly skipping the two pieces that decide whether your seeds come up evenly: the heat source and the light. I have watched beginners spend on a pretty greenhouse tray and then wonder why their peppers sulk on a cold windowsill in February. The peppers do not care about the tray. They care that the soil under them is sitting at 15 °C when they want closer to 28 °C.
Here is how I rank the equipment by how much difference it actually makes, and what each piece costs in reusable, buy-once terms rather than per-season consumables.
| Equipment | What it does | Rough cost | When it earns its keep |
|---|---|---|---|
| Grow light (LED bar) | Replaces the 4-hour winter day; stops leggy stretch | 400–900 kr | Every indoor sowing north of roughly 55° latitude — non-negotiable in winter |
| Seedling heat mat | Holds root-zone soil at germination temperature | 150–350 kr | Warm-season crops (tomato, pepper, cucurbit) in a cool room |
| Thermostat controller | Stops the mat overshooting; sets the actual number | 200–350 kr | The moment you own a mat — matters more than the mat itself |
| Cell trays with drainage | One plant per cell, clean root plugs, no transplant shock | 60–150 kr | Every sowing; the one true consumable-that-lasts |
| 1020 bottom tray (no holes) | Holds water for bottom-watering; catches drips | 30–60 kr | Always — bottom-watering beats top-watering for seedlings |
| Humidity dome | Keeps the surface humid until germination | 40–100 kr | Fine seed and slow germinators; a liability if left on too long |
| Fine seed-starting medium | Low-nutrient, fine texture for tiny roots | 50–120 kr / bag | Every sowing; bagged “potting soil” is the wrong tool here |
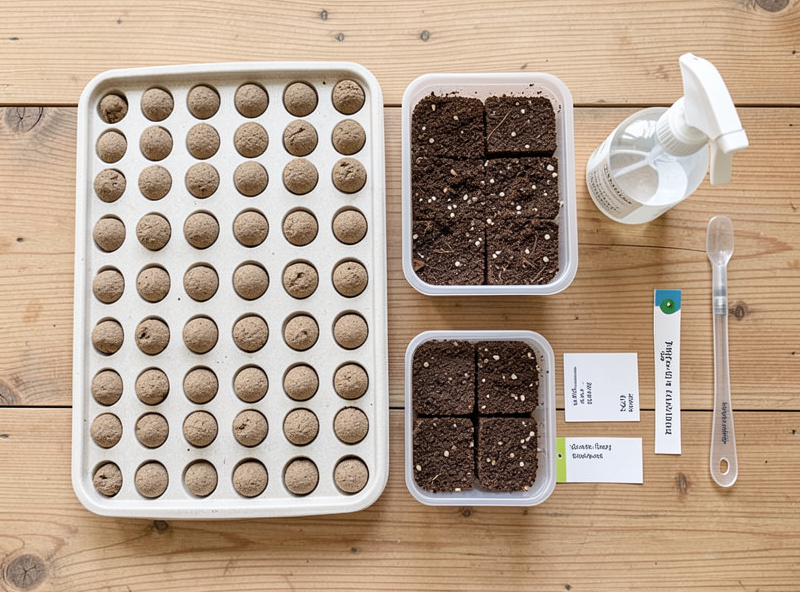
| Peat pellets | All-in-one plug; convenience over control | 2–4 kr each | Occasional — handy, but a recurring cost you can skip |
Read that table top to bottom and the pattern is clear: the two things that decide success — light and temperature — are the two beginners skip, and the two things beginners fixate on — pretty trays and pellets — sit at the bottom. Below I break each one down, with links to the deep-dive guide where I take it apart in detail.
Do Seeds Need a Heat Mat, or Is a Warm Windowsill Enough?
Some do, most do not. Warm-season crops — tomatoes, peppers, aubergine, cucumber, squash — germinate fastest with soil at 24–29 °C, which a cool Swedish room in February simply will not give you. Cool-season greens like lettuce, kale, and pak choi germinate fine at ordinary room temperature and can actually be set back by a mat. So the honest answer is: buy a mat for the heat-lovers, and don’t waste it on the greens.
The mistake I made early on was treating the mat as a general “seedling accelerator” and leaving a flat of leaf lettuce on it. Lettuce goes into thermo-dormancy above roughly 25 °C — the warmth tells the seed it is midsummer and germination stalls. I lost the better part of a sowing that way before I understood it. A mat is a targeted tool, not a shelf-warmer. I dig into exactly when the mat pays off, and when a radiator shelf or the top of the fridge does the same job for free, in do you need a heat mat for seeds.
University extensions in cold-winter regions make the same point: the University of Minnesota Extension’s starting-seeds-indoors guidance lists bottom heat specifically for warm-season vegetables, not as a blanket requirement. If you grow the same low-light-tolerant greens I lean on through winter, you may never need a mat at all.
How Do I Choose a Seedling Heat Mat?
I choose the mat by size and build quality, then spend the real money on the thermostat. A bare mat is a fixed-output heater — it warms the soil to roughly 5–10 °C above ambient and then keeps pushing, which in a warm room can drive the root zone past 32 °C and cook germinating seed. Without a controller you are guessing. With one you set a number and the mat holds it.
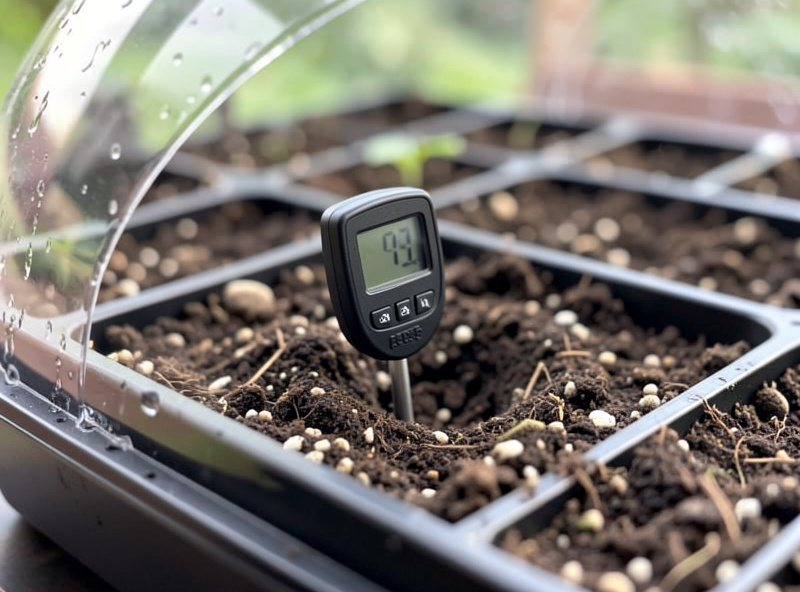
Match the mat footprint to your tray — a standard mat covers one 1020 flat — and check that it is rated for damp environments, because you are running it under trays that get watered. I keep the probe pushed into the soil of a representative cell, not taped to the mat surface, so the number I read is the number the seeds feel. The full breakdown of what separates a good mat from a fire-risk cheapie, and why the thermostat is the part that matters most, is in best seedling heat mat.
What Temperature Should Seeds Germinate At?
There is no single number — germination temperature is crop-specific, and matching it is the single biggest lever on how fast and how evenly seeds come up. Tomatoes want the soil around 24–27 °C; peppers and aubergine closer to 27–29 °C; brassicas are happy at 18–24 °C; and lettuce and spinach germinate best cool, at 15–20 °C, and stall when it gets too warm. The mat’s job is to hit the target, and the thermostat’s job is to hold it.
These are the numbers I actually dial in, crop by crop, and the reason a general “25 °C for everything” setting leaves half your flat sitting on its hands. Set the peppers too cool and they take three weeks instead of one; set the lettuce too warm and it refuses entirely. I lay out my full crop-by-crop table — and how I verify the soil is really at that temperature rather than trusting the dial — in seedling heat mat temperature. If you want the underlying science, the germination-temperature ranges published by university horticulture programs line up closely with what I set on the shelf.
Do You Need a Humidity Dome for Seed Starting?
A dome helps until germination and hurts after it. Its only job is to hold moisture at the soil surface so fine seed does not dry out in the hours it is swelling and cracking — genuinely useful for tiny, slow, or surface-sown seed. The problem is that almost everyone leaves it on too long. Once the seedlings are up, the trapped humidity is an invitation to damping-off, the fungal collapse that fells a whole flat overnight.
The feel I go by: the dome comes off the moment I see the first loops of stem breaking the surface, then I run the trays open with airflow. On my microgreen shelf I skip the dome entirely for fast germinators like radish and pea, because they are up before drying is a risk and the dome only raises the mould odds. When to clamp it on, when to crack the vents, and when to lift it for good is the whole of humidity dome for seed starting.
Which Seed-Starting Trays Should You Buy?
Buy trays that drain, in a cell size that matches how long the plant sits before it goes out. Drainage is the non-negotiable — a tray that pools water at the bottom drowns roots and breeds the same fungal problems the dome does. I run open-bottom cell inserts sitting inside a solid 1020 tray, so I can bottom-water by pouring into the base and letting the medium wick it up. That wicking approach gives even moisture without hammering the delicate surface, and it is the same capillary principle behind the self-watering rigs I use elsewhere.
Cell size is the other decision. Big-seeded, fast crops and anything you will pot up quickly do fine in small 3–4 cm cells; tomatoes and peppers that will sit for weeks want deeper cells or you fight root-bound plugs and stalled growth. I reuse sturdy trays for years — the cheap thin ones crack and become a false economy. My full logic on drainage, cell depth, and how many seasons a tray really lasts is in seed starting trays with drainage, and the same 1020 sizing carries over to my microgreens trays.
Are Peat Pellets Worth It, or Should You Use Blocks or Cells?
Peat pellets are convenient and expensive per plant, and they solve a problem you can solve for free. Each pellet is a compressed disc that swells into a netted plug — genuinely tidy for a handful of seeds, no mixing, no mess. But you pay a few kronor per plant every season, the net can girdle roots if you forget to peel it, and a straight coir or peat pellet holds little nutrition so seedlings need feeding sooner.
Set against soil blocks (a blocker tool and your own mix, zero recurring cost, no net) and plain cell trays (reusable, cheap, full control of the medium), pellets win only on convenience. I keep a sleeve for the odd cucurbit I don’t want to disturb, but the bulk of my sowing goes into cells with my own container mix. The full three-way comparison — pellets vs blocks vs cells, with the case where each one is genuinely the right call — is in are peat pellets worth it.
Should You Buy a Seed-Starting Kit or Build Your Own?
Buy a kit for the discipline of having everything in one box; build your own the moment you know what you actually use. A boxed kit is a reasonable on-ramp — tray, dome, pellets, sometimes a small mat, in one purchase — and for a first winter it removes the paralysis of choosing. But the bundled pieces are usually the cheapest version of each, the pellets are a recurring cost, and the kit almost never includes the light that a Nordic winter actually demands.
My built-from-parts setup costs a little more up front and then costs almost nothing per season: a good tray and cells I reuse for years, a mat and thermostat, my own medium, and the LED bar doing the heavy lifting. That is the version I would build again. Where a kit still makes sense, and exactly which parts to buy separately to out-perform any bundle, is the whole of best seed starting kit. It is the same buy-or-build calculation I ran for my microgreens growing kit.
Why Light Is the Piece Everyone Underestimates Up North
In a Nordic winter, light is not optional equipment — it is the equipment. A Stockholm January gives roughly six hours of weak daylight, and a windowsill delivers a fraction of the intensity a seedling needs. Skip the light and you get leggy, pale, floppy seedlings reaching for a sun that never arrives, no matter how perfect your heat mat and trays are. This is the single hardest part of translating US and UK seed-starting advice to a Swedish apartment, because most of that advice quietly assumes a bright March windowsill I do not have.
I run a full-spectrum LED bar 5–10 cm above the seedlings for 14–16 hours a day, and I judge lights by spectrum and PPFD rather than the wattage on the box. The difference between a proper bar and a cheap “blurple” panel shows up in the first week — sturdy, compact seedlings versus stretched ones. If you are outfitting a winter shelf, start with the best light for growing plants indoors and the height chart in how far a grow light should be from plants, then sanity-check the bill with my grow light electricity cost breakdown. Light is where the winter grower spends the effort the summer grower never has to.
The Medium: Why I Don’t Use Bagged Potting Soil for Seeds
Seeds want a fine, low-nutrient, free-draining medium — and bagged “potting soil” is none of those things. It is too coarse for fine seed to make contact, often too rich (fertiliser salts can burn emerging roots), and it compacts in small cells until it drowns them. A dedicated seed-starting mix, or a homemade blend of sifted coir, fine compost, and perlite, gives the tiny roots the open, airy structure they need to push through cleanly.
My own seed mix leans on coir for water-holding, perlite or pumice for drainage, and only a whisper of worm castings for a gentle early feed — the seed carries its own energy for the first true leaves, so I do not want a hot medium. Once seedlings have their first true leaves and are potting up, they move into my richer container mix. The reasoning on why bagged mixes fail in pots, and what I use instead, is in best potting soil for indoor plants — and it connects straight to the worm bin, since apartment composting is where my castings come from.
How This Equipment Fits a Real Indoor Sowing
Put together, a February tomato sowing on my shelf runs like this: cells filled with fine seed mix, sitting in a solid 1020 tray, two seeds per cell pressed in shallow and misted. The tray goes on the heat mat with the thermostat probe buried in a middle cell, set to about 25 °C. A dome goes on until the first loops break the surface, then straight off. The LED bar comes down to 7 cm and runs 15 hours. I bottom-water by pouring into the base tray and pouring off what isn’t wicked up within the hour.
That is the entire system, and every piece is doing exactly one of the five jobs from the top of this list. When people ask why their seedlings failed, it is almost never the tray — it is the mat with no thermostat, the dome left on for a week, or the missing light. Get those three right and the cheap gear grows the same plants the expensive gear does. For the step-by-step sowing technique that sits on top of this equipment, see my seed starting in small spaces guide and the crop-specific walkthroughs for starting tomato seeds indoors and starting peppers from seed indoors. When it comes to keeping young seedlings alive, how often to water seedlings and my tomato seedlings hardening-off guide pick up where this equipment list ends. For the wider shopping picture, indoor gardening essentials covers the shelf itself.
One last honest note on cost. The instinct is to buy the biggest kit and the most gear. The better move is to buy the two pieces that matter — light and controlled heat — well, and to be cheap about everything else. The Royal Horticultural Society’s indoor seed-sowing guidance makes the same case for simplicity: warmth, light, moisture, and a free-draining medium, and not much more. That is the list. Everything past it is comfort, not necessity.
The Seed-Starting Mistakes That Waste the Most Gear
The most expensive seed-starting mistakes are not about buying the wrong tray — they are about running good gear wrong. Every failed flat I have pulled apart came down to one of four errors, and none of them is fixed by spending more money. They are fixed by understanding what each piece is for.
The first is the unthermostatted mat. A bare mat left on a warm shelf can push the root zone past 32 °C, and germination drops off a cliff above that. I killed a tray of peppers this way years ago — perfect seed, perfect mix, and I had cooked them because I trusted the mat to know when to stop. It does not. The controller is the brain; the mat is only the muscle. If your budget forces a choice, buy the cheaper mat and the better thermostat, never the reverse.
The second is the dome left on. A humidity dome after germination is a petri dish. Damping-off — that thin, water-soaked collapse right at the soil line — takes down seedlings in a night, and the trapped, still, humid air under a dome is exactly the condition it wants. I lift the dome at first emergence and put a small fan on the shelf for gentle airflow. The seedlings that grow up with a breeze stand up straighter and shrug off the fungus that fells the coddled ones.
The third is watering from the top. A watering can pouring onto emerging seedlings compacts the surface, dislodges seed, and keeps the crown wet — again inviting rot. Bottom-watering into the base tray lets the medium wick up exactly what it needs and keeps the surface drier and safer. The fourth, and the one that undoes everything else in a Nordic winter, is skimping on light. You can do the other three perfectly and still get pale, stretched, falling-over seedlings if they are reaching for a January sun that gives four usable hours. The light is not where you save money.
A Short-Season Timeline: When the Equipment Comes Out
In a Swedish season the equipment schedule matters as much as the equipment itself, because the window is short and starting too early is as costly as starting too late. My last-frost date sits in mid-to-late May, and I count backward from there. Slow warm-season crops — peppers and aubergine — go under the mat and bar in late February or early March, eight to ten weeks out. Tomatoes follow in mid-to-late March, six to eight weeks before they can harden off. Fast brassicas and greens I sow in April, and much of the leafy stuff I succession-sow right through the season on the microgreen shelf.
The heat mat comes out for those first warm-season sowings and goes away once the room warms in spring. The LED bar runs the whole time — it is the one piece that never goes back in the cupboard between February and the moment seedlings move out to the balcony. Getting the timing right is why I keep the equipment as a permanent shelf rather than a boxed kit I dig out once a year: the short Nordic season punishes the grower who has to reassemble the setup from scratch every spring, and rewards the one whose mat, bar, and trays are ready to load the day the calendar says go.
What is the minimum seed-starting equipment for a beginner?
A cell tray with drainage sitting in a solid base tray, a fine seed-starting medium, and a bright grow light. Add a heat mat with a thermostat only if you are starting warm-season crops like tomatoes or peppers in a cool room. Everything else is optional.
Do I really need a grow light to start seeds indoors?
In a Nordic winter, yes. A Stockholm January gives only a few hours of weak daylight, and a windowsill delivers a fraction of the intensity seedlings need, so they stretch and go leggy. Farther south with a bright spring windowsill you can sometimes manage without one, but up north the light is the single most important piece.
Is a heat mat necessary for all seeds?
No. Warm-season crops such as tomatoes, peppers, and cucumbers germinate much faster with bottom heat around 24 to 29 degrees Celsius. Cool-season greens like lettuce and kale germinate fine at room temperature and can actually stall if kept too warm, so a mat is a targeted tool, not a general accelerator.
Are seed-starting kits worth buying?
A boxed kit is a fine on-ramp for a first season because it removes decision paralysis, but the bundled parts are usually the cheapest version of each and rarely include a proper light. Once you know what you use, a built-from-parts setup costs less per season and performs better.
What medium should I use to start seeds?
A fine, low-nutrient, free-draining seed-starting mix, or a homemade blend of sifted coir, fine compost, and perlite. Bagged potting soil is too coarse and too rich for fine seed and compacts in small cells, which drowns the tiny roots.
How much does a basic seed-starting setup cost?
A reusable setup of trays, cells, a heat mat with thermostat, a fine medium, and an LED grow bar runs roughly 800 to 1500 kronor to buy once, then only electricity and a little medium each season. The light and the controlled heat are where the money is best spent.
Further Reading
- Do You Need a Heat Mat for Seeds? When It Earns Its Keep
- Best Seedling Heat Mats and Why a Thermostat Matters More
- Seedling Heat Mat Temperatures by Crop
- Humidity Domes for Seed Starting: When to Use One
- Choosing Seed-Starting Trays: Drainage, Cell Size, and Reuse
- Best Seed-Starting Kits: Buy a Bundle or Build Your Own?
- Are Peat Pellets Worth It? Pellets vs Blocks vs Cells