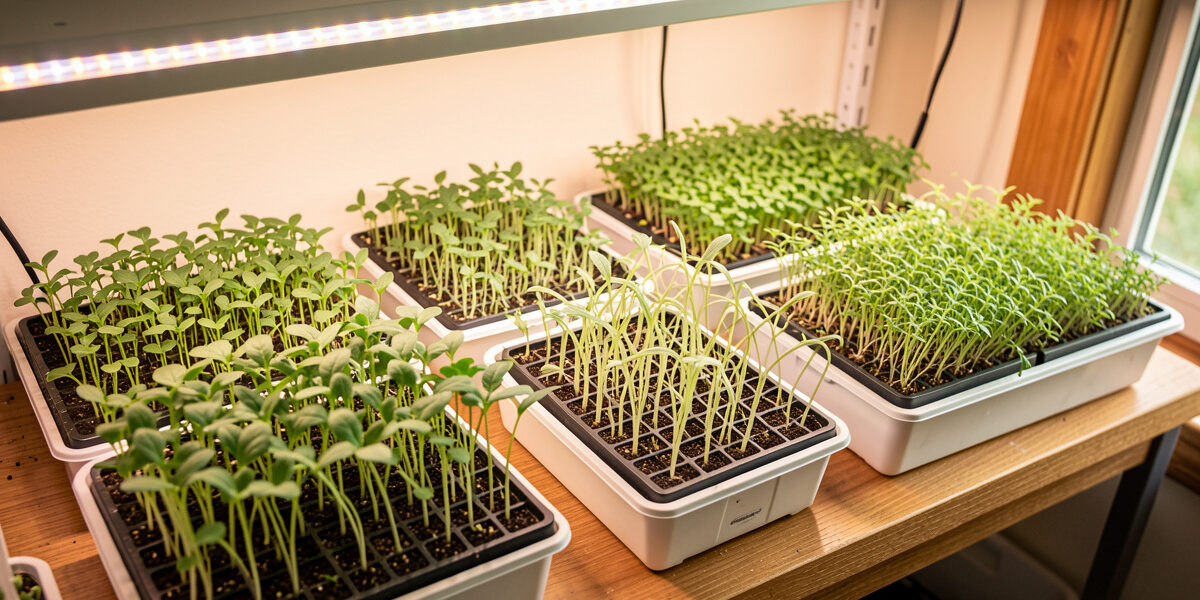
Most microgreen failures trace back to just four things: too little airflow, too much water, too little light, and sowing too thick. Fix those and 90% of the mold, legginess, yellowing, and rot that plagues home trays simply stops happening. Everything below is the diagnosis-and-fix map I built after killing more trays than I’ll admit.
I’ve run 10×20 trays on my microgreen shelf through more Swedish winters than I can count now, soil and hydro-mat side by side, under an LED bar with the blackout timing dialed in. And I still get the occasional tray that goes sideways. The difference between a beginner and someone who’s been at this a while isn’t that the beginner’s trays fail more often — it’s that I can look at a struggling tray for three seconds and know whether to save it or bin it. That three-second read is what this guide teaches.
Here’s the part nobody tells you: microgreens are forgiving of almost everything except moisture mistakes. You can sow the wrong depth, use mediocre seed, run your light a little high, and still pull a decent harvest. But get the water wrong — either direction — and the tray turns on you fast. That’s why this whole cluster keeps circling back to airflow and watering. If you’re just getting started, my complete indoor microgreens setup guide covers the build; this page is for when a tray you already started goes wrong.
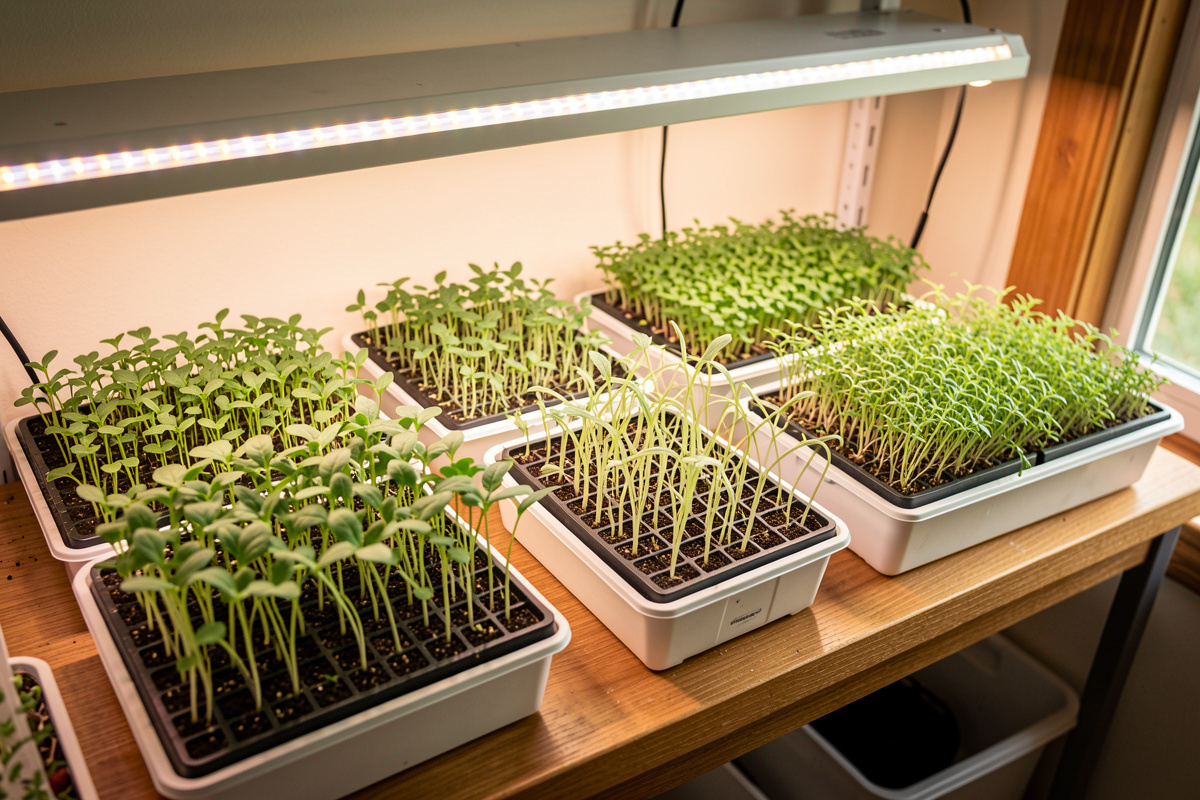
What Are the Most Common Microgreen Problems?
The seven problems that account for nearly every failed tray are: mold, leggy stems, yellowing, uneven germination, wilting after harvest, damping off, and dirty trays that reinfect the next sowing. Each has a distinct visual signature and a specific fix — and most share the same two root causes.
I’ve organised this guide around symptoms, not causes, because that’s how the problem actually reaches you. You don’t walk up to your shelf thinking “I have excess humidity and insufficient air exchange.” You walk up and see fuzz, or floppy stems, or a tray that came up in patches. So we start with what you see. The table below is the fast lane — find your symptom, get the likely cause, then jump to the deep-dive article for that specific problem. Every one of these got its own full write-up because every one has enough nuance to fill 2,000 words, and cramming them together is how you end up with advice that’s technically correct but useless at 7am when your tray smells wrong.
| What You See | Most Likely Cause | First Thing to Try | Bin or Save? |
|---|---|---|---|
| White fuzz on soil surface | Mold from stagnant, humid air (or just root hairs — check first) | More airflow, less surface water | Usually save |
| Tall, pale, floppy stems | Light too weak, too far, or too late; blackout too long | Lower the light, extend blackout correctly | Save (eat them small) |
| Yellow or pale-lime leaves | Not enough light after uncovering, or overwatering | Uncover on time, add light | Save |
| Patchy, uneven emergence | Uneven seeding, dry spots, no pre-soak or weight | Soak and weight next sowing | Harvest what came up |
| Greens collapse after cutting | Cut warm/wet, or overgrown and hollow | Cut cool, dry, and on time | Save with an ice bath |
| Stems pinch and topple at soil line | Damping off — a fungal collapse | Bin the tray, sterilise everything | Bin |
| Recurring mold every sowing | Contaminated trays reinfecting | Deep-clean and sanitise trays | Fix the trays |
Notice the last column. Six of seven problems are recoverable. Only damping off — a true fungal collapse — is a bin-it situation, and I’ll show you how to tell it apart from ordinary mold, because getting that call wrong costs you either a good tray or a whole shelf’s worth of infection.
Is That White Fuzz Mold or Just Root Hairs?
This is the single most common panic on my inbox, and the answer is almost always root hairs, not mold. Root hairs are fine, fuzzy white filaments that halo evenly around the base of each stem and vanish when you mist them. Mold is patchy, spiderweb-like, spreads across the soil between plants, smells musty, and does not disappear when wet.
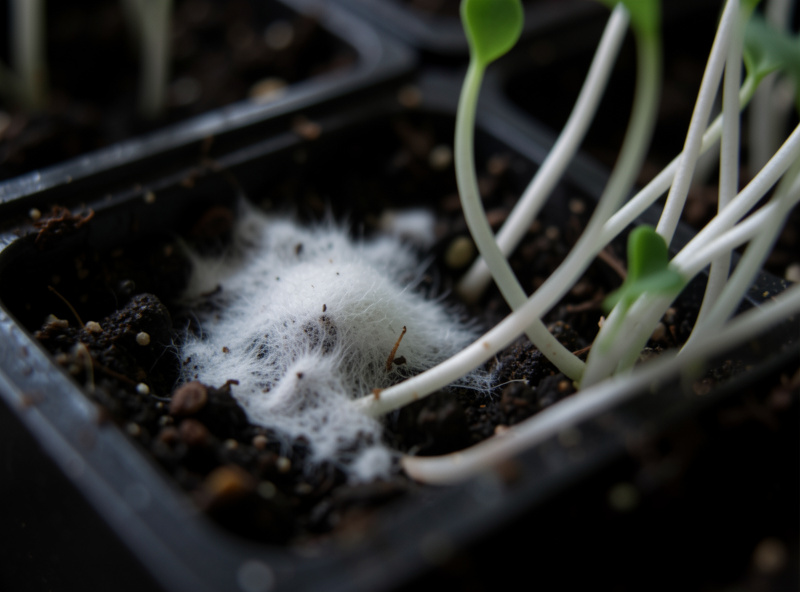
The first time I saw root hairs on a tray of daikon radish I nearly composted the whole thing. Beautiful white fuzz, dense as candy floss around every stem — classic new-grower heart attack. Then I misted it and it collapsed flat against the roots and disappeared. Root hairs. They’re the plant reaching for water, and they show up most on radish, mustard, and brassicas grown a touch dry. Mold doesn’t care about your spray bottle; it sits on the soil, not the plant, and it has that unmistakable damp-cellar smell.
The environment that grows mold is the same one that grows everything else you don’t want: warm, still, and wet. My fix is never a fungicide — it’s a small fan on the shelf, a lighter hand with the watering can, and bottom-watering instead of misting the canopy once the seeds have sprouted. I go through the full identification test, the airflow numbers, and what to do if it’s already spreading in the dedicated guide on telling mold from root hairs and stopping it.
Why Are My Microgreens Tall, Pale, and Falling Over?
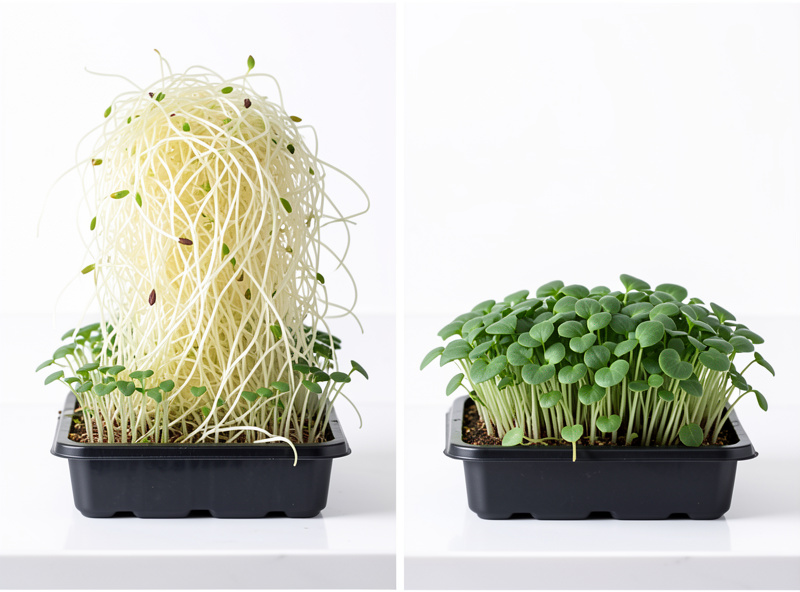
Leggy microgreens are stretching for light. The stems grow long and thin, the color washes out, and the whole tray leans or flops because the plant is spending its energy on height instead of substance. The cause is almost always light that’s too weak, too far away, or switched on too late after the blackout period.
There’s a nuance here that trips people up, though: a short, controlled stretch is normal and even useful. During the blackout period — those first days under a cover or a stacked tray — you want the seedlings to reach, which gives you longer harvestable stems on crops like pea and sunflower. The mistake is leaving them blacked out too long, or uncovering them into weak light. Under the bar I run, I lift the blackout the moment I see a uniform canopy pushing the cover, then the light comes down close and hard.
Getting the light right is where my grow-light obsession pays off. Microgreens don’t need much, but they need it close — the inverse-square law is brutal, and a bar 60cm away delivers a fraction of what the same bar gives at 20cm. I measure this rather than guess; my guide to grow lights for microgreens covers what actually matters (spectrum and PPFD, not the wattage on the box). For the full diagnosis of stretch — including how to rescue a tray that’s already leggy — see why microgreens stretch and how to get sturdy stems.
Why Are My Microgreens Turning Yellow?
Yellow microgreens are usually either light-starved or waterlogged. Pale-lime or yellow leaves after uncovering mean the plants aren’t getting enough light to green up; yellowing lower down with a sour soil smell means the roots are drowning. The two look different once you know what to check, and they need opposite fixes.
There’s one yellow that’s completely intentional, and I want to flag it so you don’t “fix” a good tray: blanched, buttery-yellow shoots are what you get by keeping the crop in the dark longer on purpose. Some people grow yellow “gold” pea shoots or blanched popcorn this way and they’re delicious. If you didn’t mean to do that, though, yellow is a warning. My first move is always to check the light timing — did the tray get uncovered on schedule? — and only then look at moisture.
Overwatering is the sneakier culprit, and it’s the one thread that runs through half of everything on this page. Roots sitting in saturated medium can’t breathe, they rot, and the leaves yellow from the bottom up. If your whole shelf trends soggy, it’s worth reading my broader piece on the signs of overwatering and how to fix it — the principles carry straight over from houseplants to trays. The microgreen-specific breakdown, with the light-versus-water decision tree, lives in microgreens turning yellow: causes and the fix that worked.
Why Won’t My Microgreens Germinate Evenly?
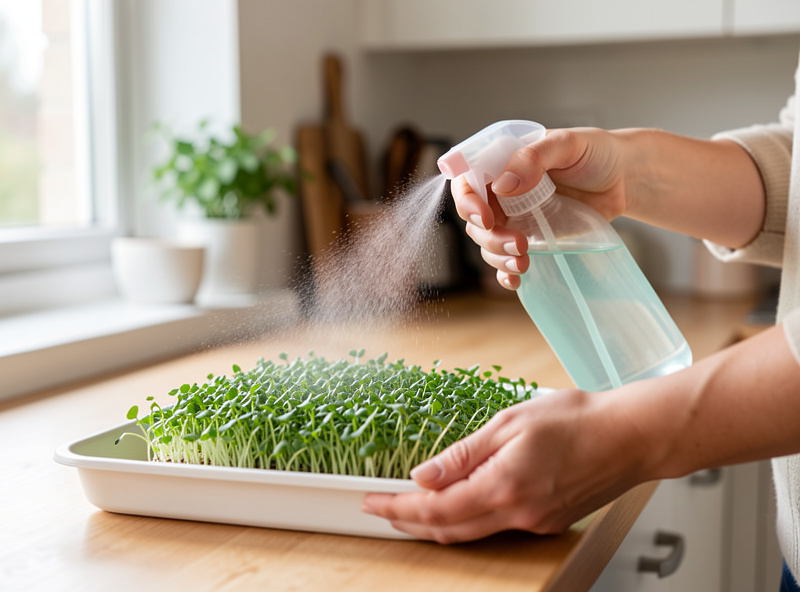
Patchy germination — thick in some spots, bare in others — comes down to uneven seeding, dry pockets in the medium, and skipping the two techniques that fix both: pre-soaking large seeds and weighting the tray during germination. Get even seed contact with consistently moist medium and the whole tray comes up together.
The weight trick is the one beginners skip and pros never do. After sowing, I stack a second tray on top with a brick or a couple of full water bottles in it, and I leave it there through the blackout. The pressure forces every seed into firm contact with the medium and holds moisture at the surface, so instead of a scattered, staggered emergence you get a uniform push that lifts the top tray off in a couple of days. On big seeds — pea, sunflower, beet — I pre-soak first, because a dry sunflower seed sown straight onto the tray germinates on its own lazy schedule.
Seed choice matters too. Old seed, or seed that isn’t rated for sprouting, comes up thin and slow no matter what you do. I stick to reliable, fresh microgreen seed and lean on the crops that just work — my list of the easiest microgreens for beginners is where I’d start if germination keeps letting you down. The full soak-times-by-crop and weighting method is in the soak-and-weight fixes for uneven germination.
Why Do My Microgreens Wilt Right After I Cut Them?
Microgreens wilt after cutting for two reasons: they were harvested warm and wet, or they were overgrown and hollow-stemmed by the time you cut. Crisp, long-lasting greens come from cutting cool, cutting dry, and cutting on time — before the crop passes its window and starts to hollow out.
I learned the timing lesson the hard way with pea shoots. Left a tray two days too long because I was busy, cut it, and watched half of it flop within the hour no matter how I stored it. The stems had gone from tender-crisp to fibrous-then-hollow, and no amount of cold water brought them back. Now I cut at the sweet spot — first true leaves for most crops, a bit later for peas and sunflowers — and I do it in the morning when the shelf is cool and I’ve held off watering for a few hours so the foliage is dry.
An ice-water bath right after cutting is my rescue move for a tray that’s a little floppy: a 10-minute dunk, a good spin-dry, and they crisp back up and store for days. This connects straight to harvest technique, which I cover fully in how to harvest, wash, and store microgreens. The specific post-cut wilting problem — why it happens and the cool-cut method that fixes it — is in why microgreens wilt after cutting and how to keep them crisp.
What Is Damping Off, and How Do I Stop It Before It Spreads?
Damping off is a fungal disease that attacks seedlings at the soil line, pinching the stem until the plant topples over with a thin, water-soaked, threadlike base. Unlike surface mold, it kills, it spreads fast, and once a tray shows it, the right call is almost always to bin the tray and sterilise everything it touched.
This is the one problem on this list I treat as an emergency, because it’s the only one that can jump trays. The telltale sign is the collapse point: healthy seedlings that suddenly fall over with a pinched, translucent stem right at the medium, often in an expanding circular patch. It’s driven by the same warm-wet-stagnant conditions as mold, but where mold sits on top, damping off gets into the vascular tissue and there’s no saving those plants. I’ve lost a full sowing of basil to it — basil is notoriously prone — and the mistake was a too-warm, too-wet propagation setup with no air movement.
Prevention is the whole game: clean medium, clean trays, restrained watering, real airflow, and not sowing so thick that the canopy never dries. Because this one is genuinely destructive and easy to confuse with harmless fuzz, I gave it a full guide — spotting damping off before the whole tray goes — including the side-by-side with ordinary surface mold so you make the bin-or-save call correctly.
How Clean Do My Trays Really Need to Be Between Sowings?
Clean enough that last week’s problem doesn’t become this week’s. Microgreen trays hold fungal spores, biofilm, and dried root mat in every corner, and a rinse alone won’t kill what causes recurring mold and damping off. A proper wash plus a sanitising step between every sowing is the single best insurance against repeat failures.
Here’s the pattern I see constantly: someone fights mold on tray after tray, changes their watering, adds a fan, still gets it — because the spores are living in the scratched-up plastic of a tray they only ever rinse. Reused trays are a reservoir. My routine is a hot wash to physically remove the root mat and biofilm, then a sanitising soak, then a full dry before storage, because damp stored trays grow the very thing you’re trying to kill. I run cheap, sturdy 1020 trays with proper drainage partly because they clean up fast and I don’t cry over retiring one that’s too scratched to sanitise properly.
The choice of sanitiser matters — some are food-safe and rinse clean, some don’t belong near something you’ll eat in a week — and so does drying, which people skip. The complete between-sowings routine, dilutions and all, is in how to clean and sterilise microgreen trays between sowings.
The Four Environmental Fixes That Solve Most Problems
Before you diagnose any single symptom, get four things right and most problems never appear: airflow, watering method, light distance, and sowing density. I’d estimate these four prevent the large majority of the trays people write to me about — the specific diagnoses above are for when something slips through anyway.
Airflow. A small clip fan on the shelf, run gently, is the cheapest disease insurance in growing. Moving air dries the canopy surface, breaks up the humid microclimate mold and damping off need, and thickens stems as a bonus — plants that feel a breeze grow sturdier. I didn’t run a fan for my first year and I fought mold constantly; I’ve barely seen it since I added one.
Watering method. Once seeds have germinated, water from the bottom whenever you can. Pour into the tray beneath, let the medium wick up what it needs for 20 minutes, then drain the excess. Bottom-watering keeps the canopy dry — where dryness prevents disease — while keeping the roots supplied. Top-misting a sprouted tray is how you keep the leaves wet and the mold happy.
Light distance. Close and bright beats far and weak, every time, and it’s the fix for both leggy stems and pale color. Get a real LED source down near the canopy rather than relying on a windowsill that gives you four usable hours in a Nordic January. This is genuinely where the low-winter-light problem bites hardest up here, and it’s why I treat lighting as a measured system rather than a windowsill afterthought.
Sowing density. Thick sowing looks productive and causes trouble — a dense canopy never dries, traps humidity, and invites both mold and damping off. Sow heavy enough for a full tray, not so heavy that seeds pile on seeds. If you’re switching between soil and a hydro-mat, note the density and moisture behave differently; my comparison in the hydroponic microgreens write-up covers that trade-off.
My Troubleshooting Order When a Tray Goes Wrong
When a tray misbehaves, I work through the same short checklist in the same order, because guessing wastes trays. Smell it, look at the stem base, check the light timing, then check the water. Four checks, thirty seconds, and I know what I’m dealing with.
First, smell. A clean tray smells earthy and green. A sour, swampy, or damp-cellar smell means moisture and disease, and it moves the whole diagnosis toward mold, damping off, or overwatering. Second, look at the stem base at the soil line — a pinched, water-soaked, toppling stem is damping off (bin it); fuzz that halos the stem and mists away is harmless root hairs. Third, light: pale and stretched means not enough, too far, or uncovered too late. Fourth, water: soggy medium and bottom-up yellowing means you’re drowning them.
That order isn’t arbitrary. It runs from most-destructive-and-contagious (damping off, which forces an immediate bin-and-sterilise) down to most-recoverable (a light tweak). Catch the contagious problem first and you protect the rest of the shelf; everything below it can wait an hour. This is the same triage logic I use across the kitchen — the worm bin, the ferments, and the trays are all running the same slow microbial chemistry, and the skill everywhere is reading moisture and smell before it goes wrong.
If a tray is truly gone, don’t fight it — the seed is cheap, your shelf space and your next sowing aren’t. Compost the failed medium (my worm bin eats failed trays happily), sterilise the tray, and start clean. A fresh sowing done right is faster and more satisfying than nursing a sick one.
Is the white fuzz on my microgreens mold or root hairs?
Almost always root hairs, especially on radish and brassicas. Root hairs halo evenly around each stem and disappear when you mist them. Mold is patchy, sits on the soil between plants, smells musty, and does not vanish when wet.
Can I eat microgreens that had a little mold?
No. If the tray genuinely has mold, do not eat it. Surface mold means the growing conditions favored fungal growth, and mold can produce compounds you should not ingest. Compost the tray, sanitize the equipment, and start fresh with more airflow and less surface water.
Why do my microgreens keep growing tall and falling over?
They are stretching for light. The fix is stronger light placed closer to the canopy, uncovering the tray from blackout on time, and a small fan to thicken the stems. Weak or distant light is the most common cause of leggy microgreens.
How do I stop mold from coming back every time I grow microgreens?
Add airflow with a small fan, water from the bottom instead of misting the canopy, sow less densely, and sanitize your trays between every sowing. Recurring mold usually means contaminated reused trays are reinfecting each new crop.
What is the difference between damping off and mold on microgreens?
Mold sits on the soil surface and rarely kills the plants. Damping off is a fungal disease that attacks the stem at the soil line, causing seedlings to topple with a pinched, water-soaked base. Damping off spreads and kills, so bin the tray and sterilize everything.
Do I really need to sterilize microgreen trays between sowings?
Yes, if you reuse trays. A rinse leaves fungal spores and biofilm in the plastic that reinfect your next crop. A hot wash plus a food-safe sanitizing soak and a full dry before storage prevents most recurring mold and damping off problems.
External references worth bookmarking: Johnny’s Selected Seeds publishes a practical guide to growing microgreens with crop-by-crop notes, and the University of Minnesota Extension microgreens growing guide is a solid, non-commercial primer on medium, moisture, and food-safety basics.
Keep Building
- Mold on Microgreens vs Root Hairs: How to Tell and How to Stop It
- Leggy Microgreens: Why They Stretch and How to Get Sturdy Stems
- Microgreens Turning Yellow: Causes and the Fix That Worked
- Damping Off in Microgreens: Spotting It Before the Whole Tray Goes
- How to Clean and Sterilize Microgreen Trays Between Sowings