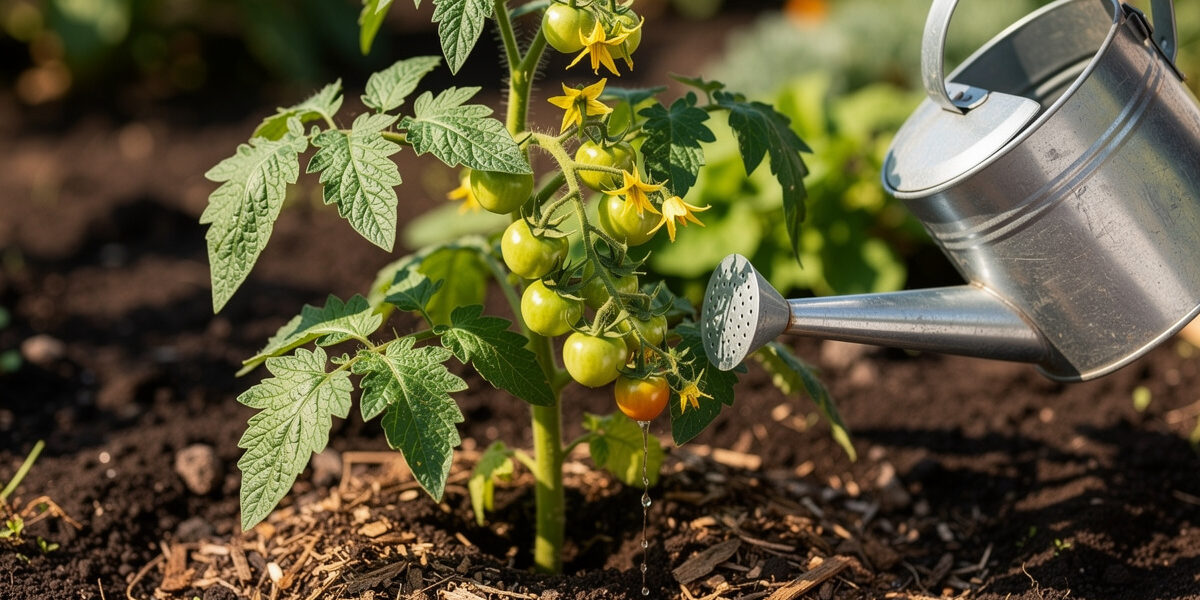
The most common tomato-feeding mistake is treating the plant like a houseplant — the same all-purpose feed every couple of weeks all season. Tomatoes don’t work that way. They want genuinely different things at four distinct stages, and getting the ratio wrong at any one of them quietly costs you fruit: too much nitrogen at flowering gives you a magnificent leafy bush with three sad tomatoes; too little potassium at fruit set caps the harvest no matter how hard the plant flowers. I learned the rhythm growing tomatoes in a short Nordic season — where there’s no time to waste a month on the wrong feed — and this is the stage-by-stage schedule I follow, for both in-ground and container plants.
As an Amazon Associate I earn from qualifying purchases.
The Four Tomato Growth Stages and What They Need
The plant’s nutrient demand shifts dramatically across the season. The four stages and their priorities:
| Stage | When | What plant is doing | NPK ratio target | Key amendments |
|---|---|---|---|---|
| Transplant | Day 0 (in the planting hole) | Root development | Low N, high P, low K | Bone meal, eggshell, compost |
| Vegetative | Weeks 1–5 after transplant | Leaf and stem growth | Balanced (e.g., 5-5-5) | Fish emulsion, compost tea |
| Flowering | Weeks 5–7 | Flower formation, early fruit set | Lower N, balanced P, higher K | Bloom-booster blends (3-7-7) |
| Fruiting | Weeks 7 to frost | Fruit sizing and ripening | Low N, moderate P, high K | Tomato-specific blends (3-4-6 or similar) |
Stage 1: Transplant Day Amendments
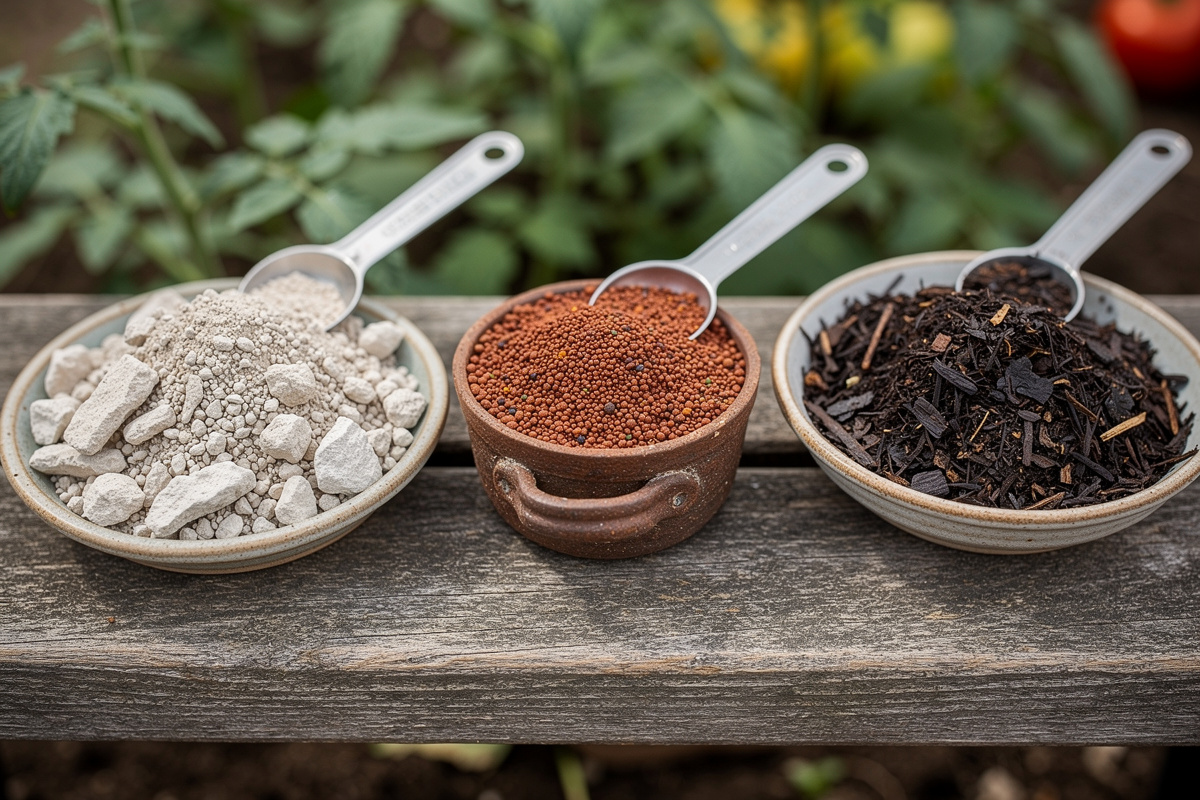
What goes in the planting hole sets the baseline for the whole season — skip it and you’re playing catch-up by week five. Per hole I add:
- 1–2 tablespoons bone meal (around 3-15-0). The slow-release phosphorus drives root growth through the first month.
- 1 tablespoon crushed eggshell or 1 teaspoon gypsum — slow-release calcium that heads off blossom end rot well before fruit set.
- 1–2 cups finished compost or worm castings — microbial life, slow nitrogen, organic matter. (My worm castings go straight into the tomato holes.)
- Optional Epsom salt only if your soil is genuinely magnesium-short — don’t use it as routine, it’s not a tonic.
Mix it into the hole bottom and the backfill rather than packing it against the root ball.
Stage 2: Vegetative Growth (Weeks 1–5)
For the first two weeks, do nothing — the plant is rebuilding roots and the hole amendments are enough. Feed now and you get a foliage rush at the expense of roots, which is backwards. From week three:
- Liquid feed every 10–14 days at half-label strength with a balanced organic — fish emulsion (about 5-1-1), compost tea, or a dissolved 5-5-5.
- Half strength is deliberate — tomatoes prefer frequent light feeding to occasional heavy doses.
- Water first, feed second — fertiliser on dry soil burns roots. Water, wait half an hour, then feed.
- Container plants feed ~50% more often — pots leach nutrients faster than ground. On my balcony the fabric grow bags are especially hungry because the constant wet-dry cycle flushes soluble nutrients out the sides as well as the bottom. I feed every 7 days during the vegetative stage in fabric bags while in-ground growers can stretch to 14. Pair the feeding rhythm with the right medium from my best potting soil for tomatoes guide.
Stage 3: Flowering Transition (Weeks 5–7)
When the first flower buds show, the ratio has to change. Keep pushing nitrogen here and you create the classic “all leaves, no tomatoes” plant everyone battles once. The switch:
- Stop the nitrogen-heavy feeds — drop the fish emulsion and balanced blends, move to a low-nitrogen bloom formula like 3-7-7 or 2-8-4.
- Liquid feed every 10–14 days at full strength now (flowering plants handle it).
- One top-dress of tomato-specific granular (typically 3-4-6 “tomato food”), about a cup per plant scratched into the top inch within the drip line. A staged tomato fertiliser takes the guesswork out of the ratios.
- A foliar calcium spray once only if your pH is questionable — skip it if you used bone meal/eggshell at transplant and your pH sits at 6.2–6.8.
The tell that you have overdone the nitrogen at this stage is easy to read once you have seen it: the plant throws thick, ropy stems and dark, slightly curled leaves, keeps stacking on leafy growth, and is stubbornly slow to set flowers — or drops the flowers it does open. I have done this to a Sungold in an over-rich compost mix and spent three weeks watching a gorgeous, fruitless jungle while the determinate cherry beside it, planted in leaner soil, was already ripening. If you see those signs, stop all nitrogen immediately, water normally to flush some of it through the pot, and wait — the plant will usually shift into flowering on its own within a couple of weeks once the nitrogen surge passes and the roots have burned through the excess.
Stage 4: Fruiting (Weeks 7 to Frost)
From first fruit set to the end of the season the priority is potassium, for sizing and ripening — and this is exactly where most people quietly stop feeding because the plant looks established.
- Liquid feed every 7–10 days with a high-potassium tomato formula (3-4-6 or similar). Indeterminate vines fruiting continuously need the steady input.
- Side-dress every 4 weeks with a cup of granular tomato fertiliser scratched into the topsoil around each plant.
- Container plants feed weekly at this stage — frequency matters more than dose.
- Mulch to hold nutrients — a few centimetres of straw cuts leaching from rain.
- Stop feeding about two weeks before your average first frost — there’s no point feeding fruit that won’t ripen. In my Nordic season I pull the last liquid feed around the last week of August; by mid-September the nights are too cold for the plant to move potassium into the fruit anyway, and any feed applied after that just sits in the soil until spring.
Reading Plant Symptoms: When to Adjust
The plant tells you when the feeding is off. The common signs:
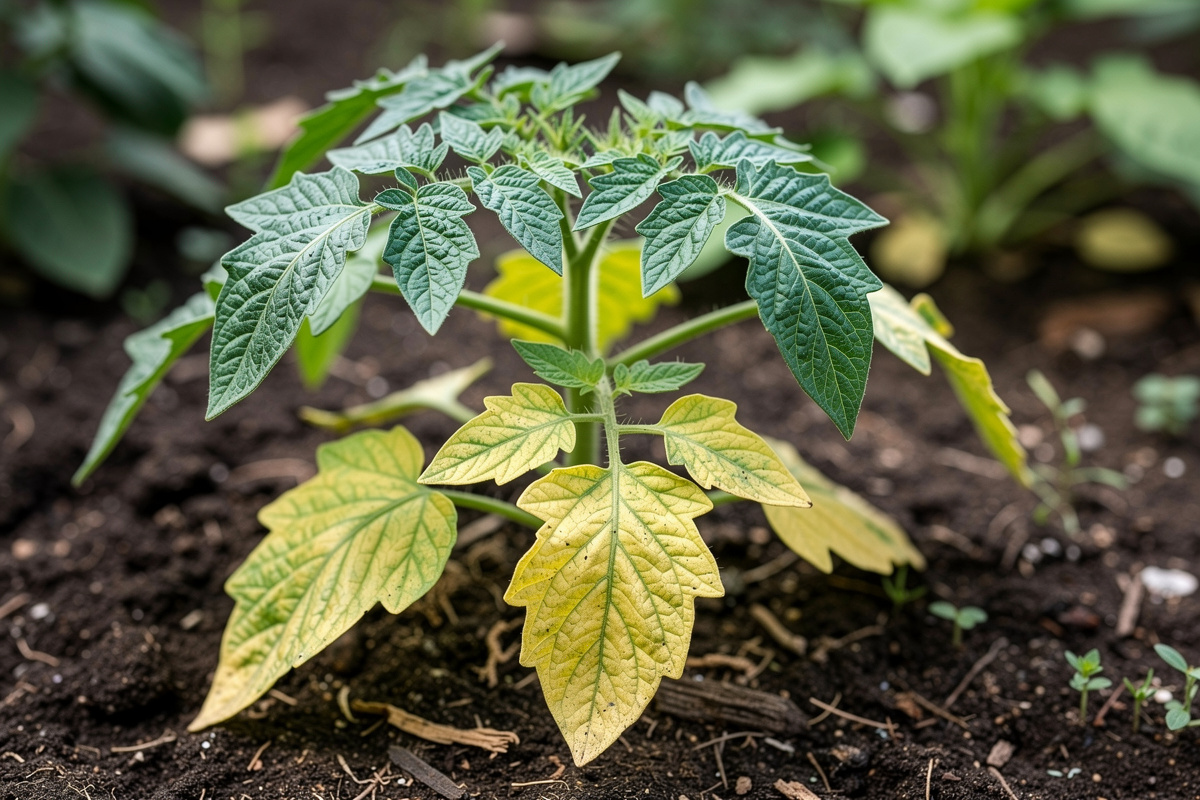
- Lower leaves yellow, upper leaves green: nitrogen shortage early in the season; late on it’s partly natural as the plant moves nitrogen into fruit — don’t chase it then.
- All leaves pale, including new growth: serious nitrogen or sulfur shortage — side-dress with compost or fish emulsion and water in deeply.
- Purple stems and leaf undersides: usually cold soil rather than real phosphorus deficiency — common early and it resolves as the soil warms. In a Nordic spring the soil in my fabric bags sometimes stays below 55°F for two weeks longer than the air temperature suggests, and the purple-stem phase on young determinate cherries is predictable every May. It clears up on its own once the bags catch enough sun.
- Brown, inward-curling leaf edges: potassium shortage — apply a high-K feed and check pH (uptake stalls below 6.0).
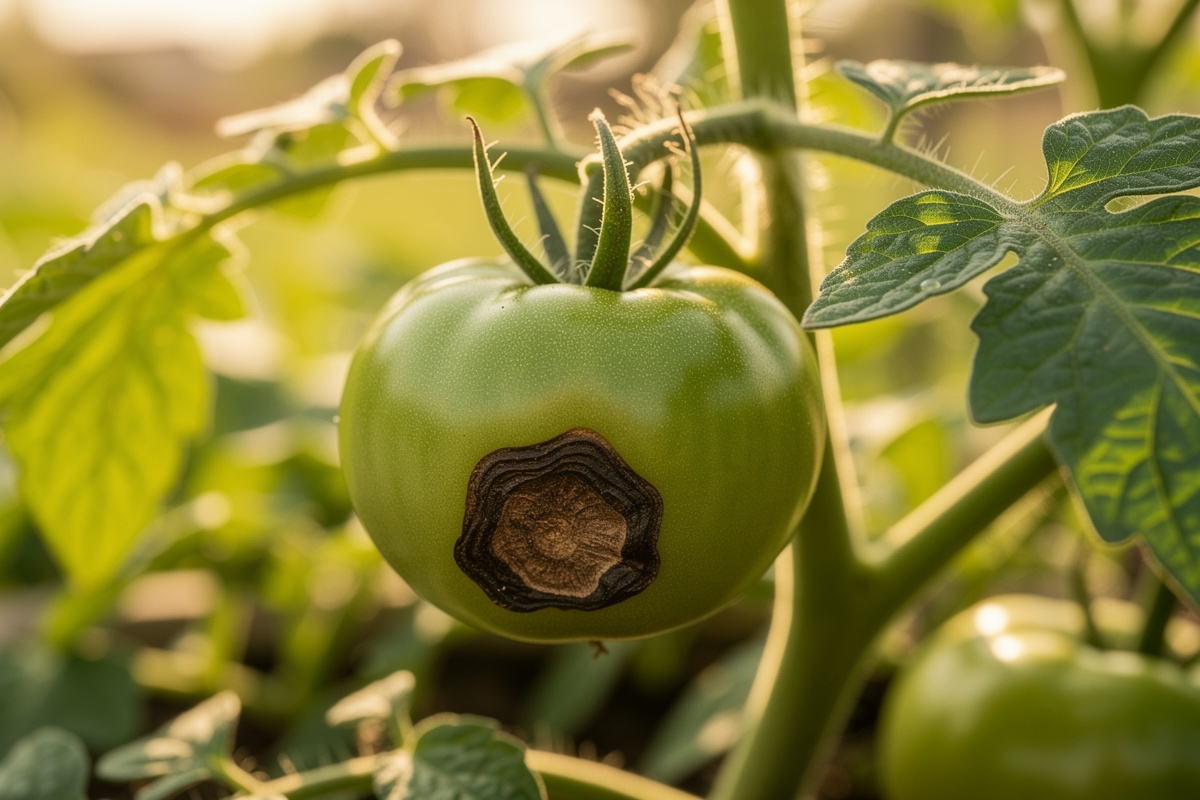
- Blossom end rot (dark sunken patch on the fruit base): a calcium-uptake failure that’s almost never an actual soil calcium shortage. The real cause is uneven watering or off pH — and in containers it’s nearly always the watering. Fix the watering rhythm; foliar sprays won’t reach the fruit in time.
- Huge plant, few flowers: nitrogen overdose — stop the nitrogen now, switch to a high-potassium bloom feed, and accept this season’s yield is largely set.
Organic vs Synthetic: What Actually Matters
The organic-versus-synthetic argument matters far less than getting the timing and ratio right — a well-timed synthetic beats a badly-timed organic, and vice versa. That said, I lean organic for tomatoes for real reasons: the slow release matches the plant’s steady, season-long demand better than soluble salts; organic matter feeds the soil microbes that help tomatoes fend off soil-borne disease; and there’s no salt build-up in container soil, which synthetics leave behind over a season. For the bigger soil picture, see my soil and compost guide, and for filling a bed in the first place, best soil for raised beds.
The Stage-by-Stage Schedule at a Glance
For the whole season’s care — watering, pruning, support — alongside feeding, see my complete tomato growing guide. Feeding also shifts by type (indeterminates are hungrier than determinates over a season), covered in tomato plant types and indeterminate tomatoes.
Fertilizing Container Tomatoes Through a Short Season
Container tomatoes in a Nordic climate need more frequent feeding than their in-ground counterparts because every watering leaches nutrients out of the fabric pot. I feed every 10 days with a balanced liquid tomato fertilizer at half the recommended strength from late June through mid-August, then stop feeding after the first week of August so the plants use up what is left in the pot — the fruit ripens better without a late-season nitrogen push that encourages foliage at the expense of flavor. The half-strength approach also prevents salt buildup in the limited soil volume of a 5-gallon pot, and the every-10-day rhythm means the plants never run a nutrient deficit during the brief flowering window in July.
Blossom-end rot is the most common nutrient-related failure in container tomatoes, and it is almost always a calcium transport problem rather than a calcium deficiency. Calcium moves through the plant in the water stream pulled up by transpiration, so inconsistent watering starves the developing fruit of calcium even when the soil has plenty of it — the fix is regular watering, not more fertilizer (University of Maryland Extension). I bottom-water my fabric pots every morning through July and August as the first thing I do with my coffee on the balcony, and since switching to fabric pots and that daily rhythm three seasons ago I have not lost a single tomato to blossom-end rot.
There is a fertilizing angle to blossom-end rot worth knowing, and it is the opposite of the instinct to add a calcium supplement. Potassium, magnesium, and ammonium-form nitrogen all compete with calcium for uptake into the plant, so overdoing a high-nitrogen or high-potassium feed can actually make the problem worse rather than better. This is one more reason I keep the feeds to half strength in containers and lean on steady watering: the plant already has enough calcium in the mix, and my job is just to keep the water moving so it reaches the fruit.
Frequently Asked Questions
How often should I fertilize tomato plants?
Skip the first 2 weeks after transplant. Then liquid feed every 10 to 14 days through vegetative and flowering stages, every 7 to 10 days during fruiting. Container growers should fertilize weekly during fruiting because container soil leaches nutrients faster.
What is the best NPK ratio for tomatoes?
It changes by stage. Transplant: high-phosphorus (3-15-0 bone meal in the hole). Vegetative: balanced (5-5-5). Flowering: low-N, balanced P, higher K (3-7-7). Fruiting: low-N, moderate-P, high-K (3-4-6). The biggest mistake is using one ratio all season.
Can I use lawn fertilizer on tomatoes?
No. Lawn fertilizers are very high nitrogen (often 30-0-0 or similar) and will produce a massive leafy plant with few tomatoes. Use a tomato-specific or balanced vegetable fertilizer instead.
Why is my tomato plant yellow?
Lower-leaf yellowing while upper leaves stay green is nitrogen deficiency early in the season, or natural senescence late in the season. All-over pale yellow including new growth is severe nitrogen or sulfur deficiency and needs immediate side-dressing with compost or fish emulsion.
Does Epsom salt help tomatoes?
Only if your soil is genuinely magnesium-deficient, which is uncommon. Routine Epsom salt application without testing is unnecessary and can throw off other nutrient ratios. Skip it unless a soil test or visible deficiency justifies it.
Can I over-fertilize tomatoes?
Yes, easily. Over-fertilization with nitrogen produces lush foliage at the cost of fruit; over-fertilization in containers causes salt buildup that damages roots. The classic over-fertilized plant is 6 feet tall, deep green, and has 4 tomatoes on it.