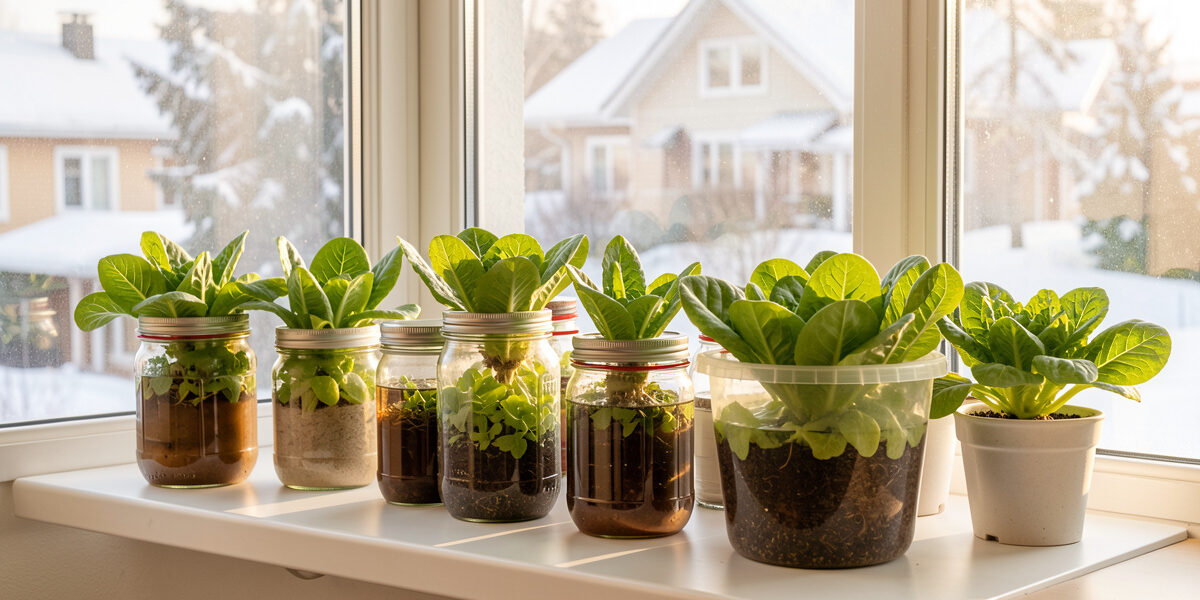
The Kratky method is the simplest way to grow leafy greens indoors: you suspend a seedling in a net cup over a sealed container of nutrient water, and you never touch a pump. As the plant drinks the level down, the roots follow it, and an air gap forms above the falling water line. That gap is the whole trick. For a Swedish apartment with four usable daylight hours in January, it is the least fussy food-growing system I run.
I came to passive hydroponics sideways. I had been growing microgreens under an LED bar for years, and the idea of leafy heads of lettuce on the same shelf — with no daily watering, no timer, no reservoir hum — sounded too good to be a real method. It is a real method. Bernard Kratky, a researcher at the University of Hawaii, published it as a set of “non-circulating” hydroponic techniques, and it has quietly become the entry drug for apartment hydroponics because the failure modes are gentle and the parts cost almost nothing.
This guide is the map for the whole cluster. I will show you exactly how the method works, what to buy, where beginners drown their first jar, and which crops actually pay you back through a dark Nordic winter. Every subtopic here has its own deep-dive article, linked in place, so you can start with a mason jar tonight and graduate to a shelf of tubs by next month.
What Is the Kratky Method, Exactly?
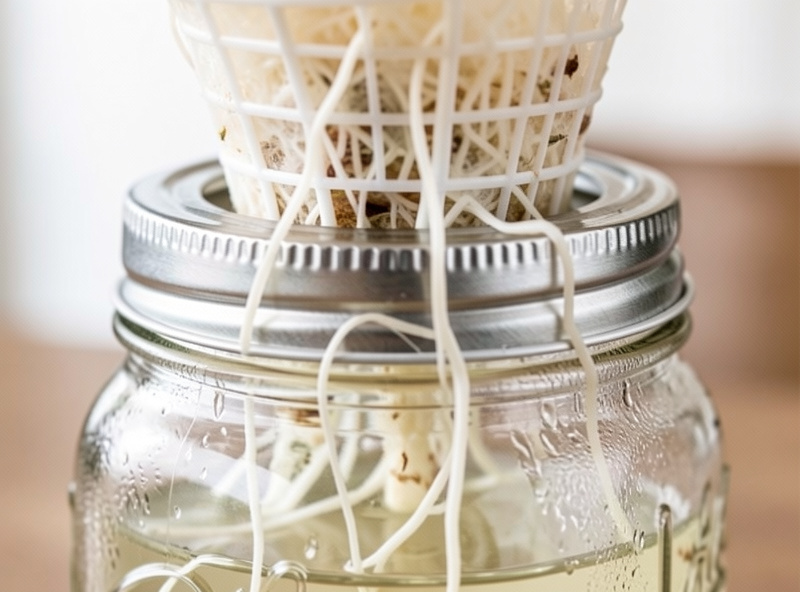
The Kratky method is passive, non-circulating hydroponics: a plant sits in a net cup in the lid of a sealed reservoir, and it grows by drinking a static pool of nutrient solution while its upper roots breathe in the air gap that opens as the water drops. No pump, no wick, no electricity in the water. You fill it once and harvest weeks later.
The mechanics matter because they explain every rule that follows. At planting, the solution touches the bottom of the net cup so the seedling’s roots and the growing medium stay wet. The plant drinks and transpires, the level falls a centimetre or two a day, and the roots split into two jobs: the lower “water roots” stay submerged and feed, while the upper “air roots” — which grow fatter and hairier in the humid gap — pull oxygen straight from the air. Get that air gap and you get healthy roots. Keep the whole root ball drowned with no gap, and you get the mushy brown rot that ends most beginners’ first attempt.
Kratky’s original work at the University of Hawaii’s College of Tropical Agriculture and Human Resources framed this as a low-labour method for growing lettuce and greens without the pumps and timers that circulating systems demand. That research pedigree is worth knowing: this is not a hack somebody invented on YouTube, it is a documented technique with real agronomy behind it.
How Is Passive Hydroponics Different From Regular Hydroponics?
Passive hydroponics has no moving parts — the plant does all the work of moving water and air, so there is nothing to plug in and nothing to fail. Active systems (deep water culture with an air stone, nutrient film technique, ebb and flow) use pumps to circulate or aerate the solution, which lets them run fruiting crops for months but adds noise, cost, and a whole new list of things that break at 2 a.m.
The practical difference for an apartment grower is failure behaviour. When my building lost power for most of a February day, the LED bar went dark but the Kratky tubs did not care — there was nothing running in them to stop. An air-stone system with fish-tank levels of aeration would have started sliding toward oxygen starvation within hours. Passive systems trade yield ceiling for robustness, and for someone growing salad on a windowsill, robustness wins nearly every time.
The catch is scale and crop range. Because you never refresh the solution mid-grow (in the purest single-charge version), the reservoir has to hold enough water and nutrient to carry the plant to harvest. That is easy for a head of lettuce and hard for a tomato. If you want the full comparison of what to grow where, the nutrient side is covered in hydroponic nutrients explained for first-timers, and the crop timing is in the Kratky lettuce winter-crop guide.
What Do You Need to Start a Kratky Setup?
You need five things: an opaque container, a net cup, a growing medium, hydroponic nutrients, and a seed. That is the entire bill of materials, and you can improvise most of it from a kitchen you already own. A widemouth mason jar, a yoghurt tub wrapped in tape, or a food-storage box all work as the reservoir — the only hard requirement is that light cannot reach the water.
Here is the honest starter list, in the order that matters:
- An opaque reservoir — a 1-litre jar grows one lettuce; a 10–20 litre tub grows six. Light in the water means algae, which I cover below.
- A net cup or basket — usually 2 inch or 3 inch, holding the seedling in the lid. Sizing and shape make a real difference; see the best net cups and baskets for small-space hydroponics.
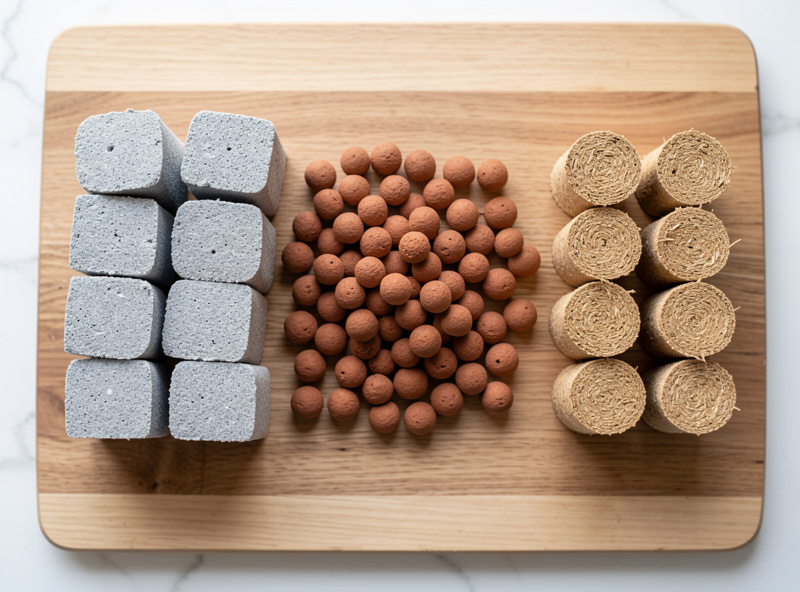
- A starter plug — rockwool, a clay-pebble-filled cup, or a coir plug to root the seed. Each behaves differently in a passive system, compared head-to-head in rockwool vs clay pebbles vs coir plugs.
- Hydroponic nutrients — a two- or three-part salt mix, not garden fertiliser. This is the one thing you cannot fake with kitchen scraps.
- A pH meter and adjuster — cheap, and the difference between thriving and stalled plants. Details in hydroponic pH for vegetables.
My very first passive grow was a wine-carton lettuce in a jar I had wrapped in duct tape because I did not own a net cup yet. It worked. It looked ridiculous on the windowsill next to the good jars, but it grew a perfectly edible butterhead, and that ugly proof-of-concept is exactly the DIY mason jar hydroponics build I still recommend to anyone on the fence.
Which Crops Work Best in a Passive System?
Fast, leafy, shallow-rooted crops are the Kratky sweet spot: loose-leaf and butterhead lettuce, pak choi, kale, spinach, chard, basil, and most soft herbs all finish before the reservoir runs dry. These plants have low nutrient demand and no fruiting phase, so a single charge of solution carries them from transplant to harvest without a top-up.
Fruiting crops are where beginners get burned. A cherry tomato or a chilli can be grown Kratky-style, but it needs a large reservoir, mid-grow refills, and honestly more babysitting than a passive system is supposed to need — at which point you have talked yourself back into an active setup. Through a Nordic winter I do not bother. The maths on light alone kills fruiting crops indoors up here; you need the kind of intensity discussed in how many hours of grow light per day before a tomato will set fruit, and by then the electricity is costing more than the fruit.
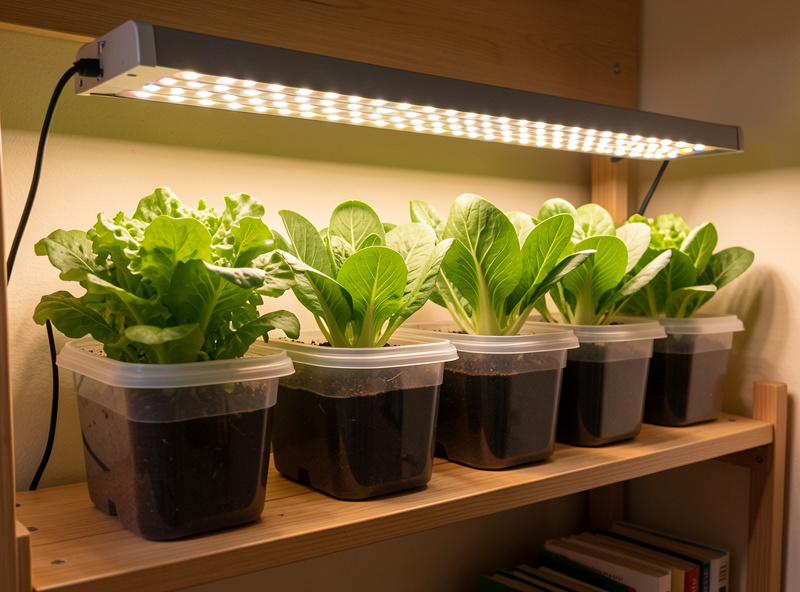
My reliable winter rotation is leaf lettuce, pak choi, and a tub of basil, all under the same LED bar that runs my microgreens. The greens are cut-and-come-again where the variety allows, so one planting feeds the kitchen for weeks. Here is how the common apartment crops stack up in a passive setup:
| Crop | Passive difficulty | Reservoir size | Weeks to harvest | Nordic-winter verdict |
|---|---|---|---|---|
| Loose-leaf lettuce | Easy | 1–4 litres | 4–6 | Best beginner crop |
| Butterhead lettuce | Easy | 2–4 litres | 6–8 | Excellent |
| Pak choi | Easy | 2–4 litres | 5–7 | Fast and forgiving |
| Basil | Easy–moderate | 2–5 litres | 6–8 | Great under a bar |
| Kale / chard | Moderate | 4–8 litres | 7–10 | Slower but steady |
| Cherry tomato | Hard | 15–20 litres | 10+ | Skip until spring |
Those week-to-harvest ranges assume decent supplemental light; in the dead of a Swedish December, add a week or two to everything. The reservoir sizes are the minimums I would trust for a single-charge grow without a top-up.
How Long Does a Kratky Reservoir Last Before It Runs Dry?
A properly sized Kratky reservoir should reach the end of the crop with a little solution to spare — that is the design target. A single lettuce in a 3–4 litre tub will typically drink itself down to a shallow puddle right around harvest, which is exactly what you want: enough water to finish, not so much that the roots never form an air gap.
The variable that catches people is transpiration rate, and it swings with light and warmth. Under a bright bar in a warm room, a mature lettuce moves a surprising amount of water — you can watch the level drop day to day. In a cool, dim window the same plant sips slowly and the level barely moves, which sounds fine until the roots sit in stagnant, un-oxygenated water for weeks and rot. This is the counter-intuitive part of passive growing: more light and healthy transpiration are what keep the roots safe, not just what feed the leaves. If your level is not dropping, your plant is not thriving, and you should look at your lighting before you blame the nutrients.
Where Do Beginners Go Wrong With Passive Hydroponics?
The three killers are drowning the roots, skipping pH, and letting light hit the water. Every failed Kratky jar I have autopsied — mine and other people’s — traces back to one of those three, and all three are avoidable in the first ten minutes of setup.
Drowning is the classic beginner mistake: filling the reservoir so full that the net cup is submerged and the roots never get their air gap. At planting the solution should just kiss the bottom of the net cup — enough to wick up to the seed, no more. My own first proper failure was the opposite error, a jar I topped up “to be safe” every few days like a houseplant, which kept the whole root ball drowned; it went slimy and I lost the plant. The lesson stuck: after the initial fill, you leave it alone and let the gap form.
Skipping pH is the silent one. Hydroponic plants can only absorb nutrients within a fairly narrow pH band, and outside it they starve in a full tank — leaves yellowing while the reservoir is still rich with food. I ran my first two grows without a meter and could not understand the pale, stalled plants. A cheap pH pen and a bottle of pH Down fixed it overnight. The full explanation is in reading and adjusting hydroponic pH.
Light on the water grows algae, and algae competes with your plant for oxygen and nutrients while turning the solution into pea soup. A clear glass jar on a bright sill is the worst offender. Wrap it, tape it, paint it, or grow in an opaque tub — the fix is trivial once you know to do it, and the whole problem is broken down in algae in a hydroponic reservoir.
Does the Kratky Method Work Through a Dark Nordic Winter?
Yes — but only with supplemental light, and that is the honest caveat most tutorials skip. In January a Stockholm windowsill gives you a few hours of weak, low-angle light, nowhere near enough to grow a dense head of lettuce. Passive hydroponics solves the watering problem, not the light problem; the two are separate, and up here the light problem is the hard one.
Under my full-spectrum LED bar the tubs perform through the darkest months exactly as they do in spring, because the plant sees the same photons either way. The bar is the same system I obsess over for spectrum and running cost elsewhere on the site — the plant does not care whether the light is free from the sun or paid for from the wall, it only cares about intensity and duration. Pair a passive reservoir with a proper grow light and you get fresh salad in February, which is the entire reason I grow indoors in the first place. Without the light, you get pale, leggy, disappointing plants no matter how perfect your nutrient solution is.
The energy question is real, and I will not pretend otherwise — running a bar for 12–16 hours a day adds up. I treat the light as the actual cost of winter greens and the reservoir as nearly free. If you already run lights for microgreens or seedlings, adding a Kratky tub to the same shelf is close to zero marginal cost, which is exactly how I justify it on my own winter-lit shelf.
Kratky vs Other Beginner Hydroponic Methods
For a first-time apartment grower, Kratky beats the alternatives on cost and simplicity, but it is not the only passive-ish route. Deep water culture (DWC) is its close cousin with an air pump added; wicking systems pull water up a rope; nutrient film technique (NFT) circulates a thin stream. Knowing where Kratky sits helps you decide when — if ever — to graduate.
DWC is worth the upgrade only when you start growing fruiting crops or want faster growth from heavy aeration, and it brings noise and a pump to maintain. Wicking is genuinely useful for a self-watering container of herbs and overlaps with the self-watering inserts I print for soil pots, but it is fiddlier than Kratky for pure hydroponic greens. NFT is a lovely system that I would not recommend to a beginner because a pump failure can dry out and kill an entire channel of plants in an afternoon. Start passive. Add complexity only when a specific crop demands it, not because a bigger system looks more impressive.
What Does a Passive Hydroponic Setup Actually Cost?
You can start for the price of a takeaway coffee if you improvise, or spend the cost of a nice dinner for a tidy shelf of six tubs. The mason-jar route needs only nutrients, a net cup, and a plug — everything else is repurposed. The one expense I never cut is the nutrients and the pH meter, because those are the two things a kitchen cannot substitute.
Here is roughly how I think about the spend. A jar of general hydroponic nutrient concentrate lasts many grows and is the best value in the whole hobby. Net cups come in bags of dozens for pocket change. The reservoir is free if you save a food tub. The variable cost per head of lettuce, once you own the kit, is genuinely a few cents of nutrient and whatever your light costs to run. If you want a shortlist of the nutrient and net-cup products I would actually buy, I keep those recommendations in the net cups guide and the nutrients guide. You can find a solid two-part beginner hydroponic nutrient set on Amazon for the price of a few coffees, and it will outlast a whole winter of salad.
As an Amazon Associate I earn from qualifying purchases.
My Starter Plan If I Were Doing This Tonight
If you have never grown a hydroponic anything, do not build a shelf — build one jar. Take a widemouth mason jar, wrap the glass in tape or foil so no light reaches the water, drop a 2 inch net cup in the lid opening, and root a lettuce seed in a rockwool cube or a pinch of clay pebbles. Mix your nutrient solution to the leafy-greens strength on the bottle, adjust the pH into the low 6s, and fill until the water just touches the bottom of the net cup. Then put it under a light and walk away.
Check it every couple of days — not to fiddle, just to watch the level drop and the air roots reach down. In four to six weeks you will cut your first head of lettuce that you grew in water, in winter, in a flat, with no pump. That first harvest is what hooks people, and from there the whole cluster is your playbook: better containers, better media, tighter pH, and the crop guides that turn one jar into a rotating winter salad bar. Start with the lettuce winter-crop guide and the mason jar build, and you are growing food by the weekend.
For the agronomy nerds who want the controlled-environment research behind all of this, Cornell’s Controlled Environment Agriculture program is a rabbit hole worth falling into — it is the university-level version of what we are doing on the windowsill, and it will make you a sharper grower.
How Do You Mix and Fill a Kratky Jar the First Time?
You mix nutrient concentrate into water to the leafy-greens strength on the label, adjust the pH into the high fives to low sixes, then fill the reservoir until the solution just touches the base of the net cup. That contact point is the single number that matters most on day one — too high and you drown the roots, too low and the seedling dries out before its roots reach down.
The order I do it in every time: fill the container with plain water first, stir in the nutrient parts one at a time (never combined in concentrated form, or the calcium and sulphate can react and cloud out of solution), then check and correct pH last, because adding nutrients shifts pH on its own. Then I lower the lid with its planted net cup and top up or pour off until the water line kisses the bottom of the cup. From that moment I do nothing but watch. The temptation to “help” by adding water is the exact impulse that killed my early jars, so I keep the watering can on the other side of the kitchen.
One detail that trips people up in a Nordic flat: cold tap water holds less dissolved oxygen and slows early root growth. I let filled jars come up to room temperature on the counter before I trust the level, and I mix a fresh batch rather than using water straight from a cold winter tap. It is a small thing that makes the first fortnight noticeably smoother.
Does Your Tap Water Matter for Passive Hydroponics?
Yes — hard water and heavily chlorinated water both change how your solution behaves, and Nordic municipal water varies a lot from town to town. Hard water carries dissolved calcium and magnesium that add to whatever your nutrients already provide, which can nudge the pH stubbornly high and make it fight your adjuster. It rarely ruins a grow, but it explains why two people following the identical recipe get different pH readings.
My rule of thumb: start with your tap water, measure the pH before and after adding nutrients, and only worry about it if the pH will not settle or your plants show the pale, stalled look of a nutrient lockout. Chlorine off-gasses if you let the water stand uncovered for a day, and chloramine (used by some utilities) does not, but neither is usually a dealbreaker at the concentrations in drinking water. If your water is genuinely very hard, a jug of filtered or rainwater to cut it is the cheap fix — the same rainwater I collect for the balcony pots, covered in my small-space rainwater guide, works perfectly for topping a reservoir. The full pH mechanics live in the hydroponic pH guide.
Can You Get a Second Harvest From One Reservoir?
With cut-and-come-again lettuce and loose-leaf varieties, yes — you can harvest outer leaves and let the plant keep growing, and a well-fed reservoir will support that for a while. But the pure single-charge Kratky method is really built around one full grow per fill, and pushing a plant far past its natural harvest window is where passive growing starts to disappoint.
What I actually do is treat the reservoir as spent once the primary harvest is off, rinse it, and start a fresh plug rather than nursing a tired plant in depleted, unbalanced solution. Old solution drifts in pH and nutrient ratio as the plant selectively strips out what it wants, so a “second crop” in the same unrefreshed water tends to grow slowly and lock out. If you want continuous salad, the trick is not squeezing two crops from one jar — it is succession sowing, staggering three or four jars a couple of weeks apart so something is always ready to cut. That rolling-shelf approach is the same logic I use for microgreens, and it is what turns a novelty jar into an actual food supply through the winter.
Further Reading From the Cluster
- Growing Lettuce With the Kratky Method: A No-Pump Winter Crop
- DIY Mason Jar Hydroponics: A Kratky Build From Stuff You Own
- Hydroponic Nutrients Explained for First-Timers
- Hydroponic pH for Vegetables: Reading and Adjusting It Simply
- Algae in a Hydroponic Reservoir and How to Block Light
Do you need an air pump for the Kratky method?
No. The Kratky method is passive and non-circulating, which means it uses no air pump and no water pump. As the plant drinks the reservoir down, an air gap forms above the falling water line and the upper roots pull oxygen directly from that gap. Adding a pump turns it into deep water culture, a different method.
How often do you change the water in a Kratky setup?
In the pure single-charge Kratky method you do not change the water at all. You fill the reservoir once at planting with enough nutrient solution to carry the crop to harvest, then leave it alone. Fast leafy crops like lettuce and pak choi finish before a correctly sized reservoir runs dry.
Can you grow tomatoes with the Kratky method?
You can, but it is difficult for beginners and a poor fit for a Nordic winter. Tomatoes are fruiting crops that need a large reservoir, mid-grow top-ups, and far more light than an apartment provides in winter. Passive hydroponics is best kept to leafy greens and herbs.
Why is my Kratky lettuce turning yellow?
The most common cause is pH drift. Hydroponic plants absorb nutrients only within a narrow pH band, so a reservoir that is full of food but out of range will still starve the plant and yellow the leaves. Check pH with a meter and adjust it into the high fives to low sixes for leafy greens.
Does the Kratky method work indoors in winter?
Yes, but only with supplemental grow light. Passive hydroponics solves the watering problem, not the light problem. In a dark Nordic winter a windowsill alone is not bright enough to grow dense greens, so a full-spectrum LED bar over the reservoir is what makes winter salad possible.