Seed starting in small spaces needs three things: a 1020 tray, a $25 LED light, and 12 inches of windowsill or counter. Apartment growers can produce 50+ seedlings on a single tray for under $40 — versus $150-200 in nursery transplants for the same plants. This guide walks through the exact setup, mix, timing, and lighting that turns any kitchen counter, hallway shelf, or sunny windowsill into a productive seed-starting station.
For a complete overview of all indoor growing methods and crops, see our complete indoor growing guide.
Seed Starting in Small Spaces: The Apartment Setup
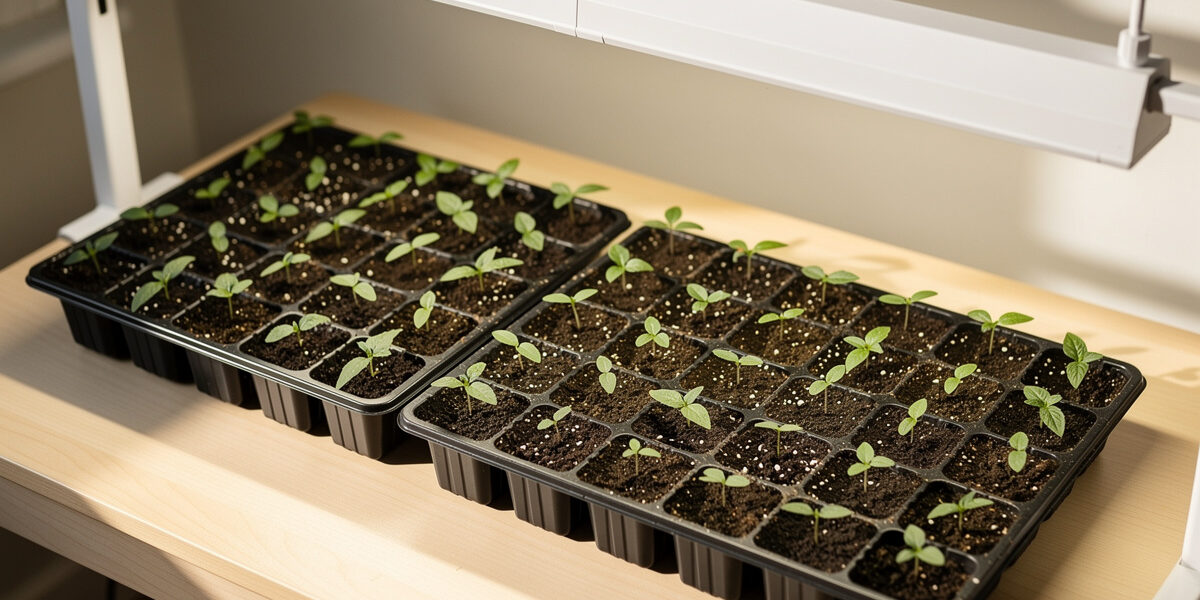
The minimum footprint for seed starting is one 1020 tray (10×20 inches) plus a 24-inch LED bar light overhead — total area: 1.4 square feet. That single tray fits 72 cells and produces enough seedlings to fill a 4×8 raised bed or fifteen 5-gallon containers. No spare room required.
Counter, Shelf, or Closet — All Work
Pick the spot first, then size the rest of the gear to fit. The three highest-success small-space setups for seed starting are:
- Kitchen counter (1.4 sq ft): One 1020 tray + clip-on LED. Best for apartments with no spare floor space. Move the tray off-counter for cooking; rest of the day it lives there.
- Wire shelving unit (3 sq ft per shelf): Two 1020 trays per shelf, LED bar zip-tied to the shelf above. A 4-shelf unit produces 600+ seedlings in a 2×1.5-ft footprint.
- Closet or pantry (1-2 sq ft): Door open during light hours, closed when off. Closet doors block the dim purple LED glow that some apartment dwellers find annoying at night.
The $40 Small-Space Starter Kit
Every component you need fits in one shopping basket and costs under $40:
- 1020 tray with humidity dome — $8
- 72-cell insert — $5
- One bag of seed-starting mix (16 quart) — $10
- 24-inch full-spectrum LED bar — $15
- Mechanical outlet timer — $7
That kit produces 72 seedlings at a per-plant cost of about $0.55 — versus $3-8 each at a nursery. The grow light alone returns its $15 cost the first time you start tomato or pepper seeds for a season's container garden.
Run Time and Spacing for Tight Setups
Run the LED 14-16 hours per day, 2-4 inches above the seedlings. The closer the better, as long as the light is not warm enough to burn leaves (most LED bars run cool to the touch). Set the timer once and never think about it again. In a closet or shelving setup, leave 6 inches of clearance above the dome for airflow — stagnant warm air invites damping-off fungus, the #1 killer of seedlings in compact setups.
Why Start Seeds Indoors Instead of Buying Transplants
See our sprouting seeds at home guide for an even simpler indoor option for kitchen counters.
A packet of seeds costs between $2 and $5 and contains anywhere from 20 to 200 seeds. A single nursery transplant runs $3 to $8. The math alone makes seed starting worthwhile, but the real advantage is variety selection. Seed catalogs list thousands of tomato, pepper, herb, and flower cultivars that commercial nurseries never stock because they focus on a handful of proven sellers.
Indoor seed starting also lets you control the timing. Instead of waiting for your local garden center to stock transplants in late spring, you can start seeds 6 to 12 weeks earlier and have sturdy, hardened-off seedlings ready the moment your last frost date passes.
Essential Supplies for Indoor Seed Starting
Learn about grow lights for vegetables to maximize indoor production.
You do not need expensive equipment to grow healthy seedlings. Here is what you actually need and what you can skip.
| Supply | Budget Option | Upgrade Option | Estimated Cost |
|---|---|---|---|
| Containers | Recycled yogurt cups with drainage holes | 72-cell seed starting trays | $0 – $12 |
| Growing medium | Basic seed starting mix | Peat-free coco coir blend | $5 – $15 |
| Light source | South-facing windowsill | Full-spectrum LED grow light | $0 – $40 |
| Heat mat | Top of refrigerator (warm spot) | Thermostat-controlled seedling heat mat | $0 – $25 |
| Humidity dome | Clear plastic wrap | Vented humidity dome | $0 – $8 |
| Labels | Popsicle sticks + permanent marker | Plastic plant tags | $0 – $5 |
| Spray bottle | Recycled cleaning spray bottle | Fine mist sprayer | $0 – $5 |
Total budget setup: under $10. Total upgraded setup: around $80 to $110. Both approaches produce healthy seedlings when you follow proper technique.
Choosing the Right Seed Starting Mix
Regular potting soil is too dense for starting seeds. It holds excessive moisture, compacts around tiny roots, and often contains chunks of bark or perlite that dwarf a germinating seed. Seed starting mix is finer, lighter, and designed to stay evenly moist without becoming waterlogged.
Look for mixes labeled “seed starting” or “germination” that contain some combination of peat moss (or coco coir), vermiculite, and perlite. Avoid anything with added fertilizer — seedlings get all the energy they need from the seed itself for the first two weeks. You can introduce diluted liquid fertilizer once the first true leaves appear.
If you prefer a budget-friendly approach, make your own mix: combine equal parts coco coir, vermiculite, and perlite. This drains well, holds just enough moisture, and costs roughly half the price of commercial mixes when bought in bulk.
Step-by-Step Seed Starting Process
For indoor seed planting techniques, check our indoor planting guide.
For indoor seed planting techniques, check our indoor planting guide.
Step 1: Pre-Moisten the Growing Medium
Dry seed starting mix repels water. Pour the mix into a large bowl or bucket, add warm water gradually, and stir until the mix feels like a wrung-out sponge — moist throughout but not dripping. This step prevents uneven moisture pockets that cause some seeds to rot and others to dry out.
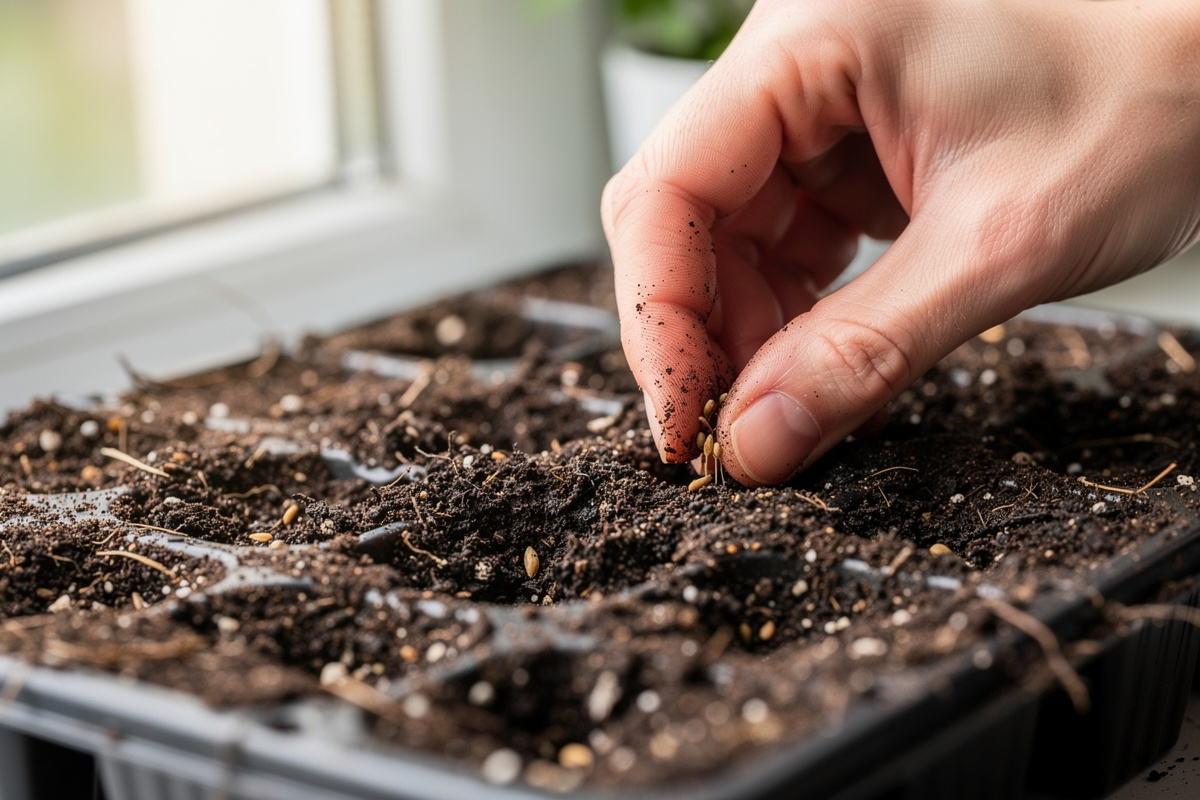
Step 2: Fill Containers and Create Planting Holes
Fill each cell or container to about 1 cm (half inch) below the rim. Gently press the surface level without compacting the mix. Use a pencil or chopstick to make planting holes at the correct depth for each seed type.
Step 3: Plant Seeds at the Correct Depth
The general rule is to plant seeds at a depth of 2 to 3 times their diameter. Tiny seeds like lettuce and basil sit on the surface with a light dusting of mix. Larger seeds like squash and beans go 2 to 3 cm deep. Check the seed packet — it always lists the recommended depth.
| Seed Type | Planting Depth | Days to Germinate | Weeks Before Last Frost |
|---|---|---|---|
| Tomatoes | 6 mm (1/4 inch) | 5–10 | 6–8 weeks |
| Peppers | 6 mm (1/4 inch) | 7–14 | 8–10 weeks |
| Lettuce | Surface / barely covered | 2–7 | 4–6 weeks |
| Basil | 3 mm (1/8 inch) | 5–10 | 4–6 weeks |
| Cucumbers | 12 mm (1/2 inch) | 3–7 | 3–4 weeks |
| Squash / Zucchini | 25 mm (1 inch) | 4–7 | 3–4 weeks |
| Herbs (parsley, cilantro) | 6 mm (1/4 inch) | 10–21 | 6–8 weeks |
| Flowers (marigold, zinnia) | 6 mm (1/4 inch) | 5–7 | 4–6 weeks |
Step 4: Cover and Provide Warmth
Cover the tray with a humidity dome or plastic wrap to trap moisture. Most vegetable seeds germinate best between 21°C and 27°C (70°F – 80°F). A seedling heat mat placed under the tray raises soil temperature by about 10 degrees, which dramatically speeds up germination for heat-loving crops like peppers and tomatoes.
Seeds do not need light to germinate (with a few exceptions like lettuce). Place covered trays in any warm spot until you see the first green shoots breaking the surface.
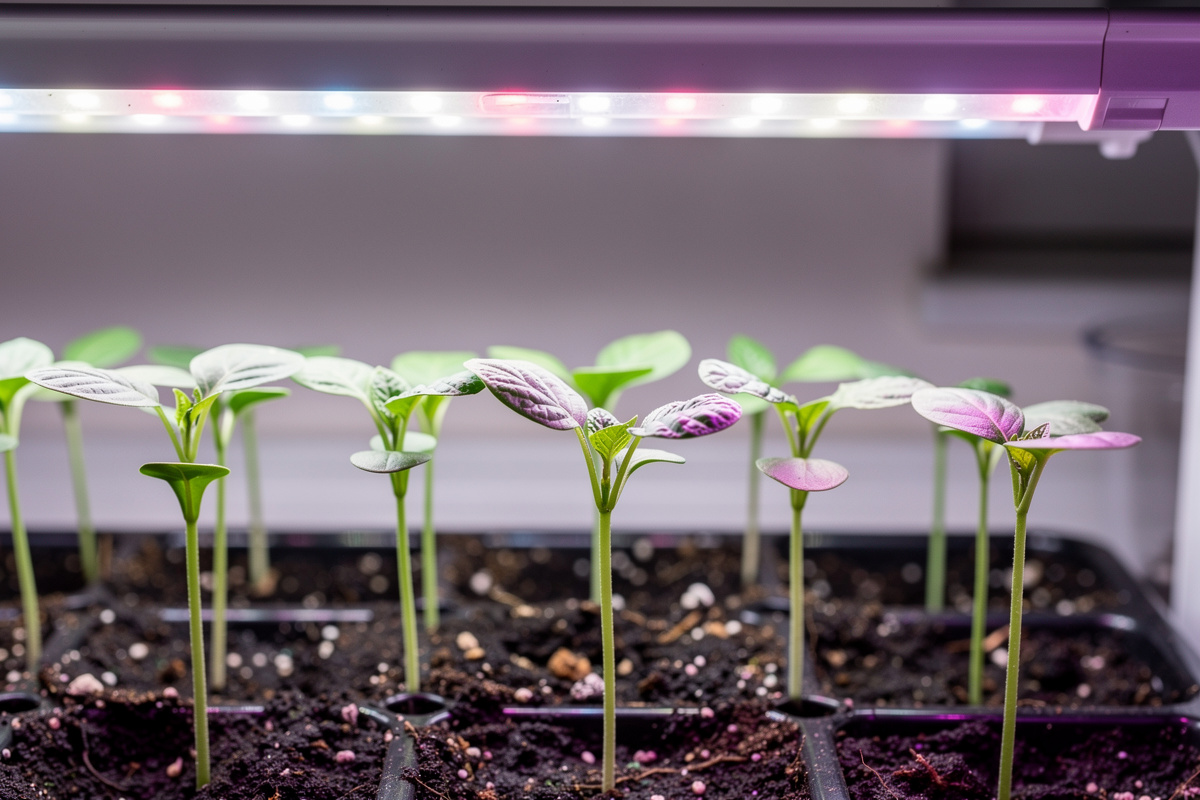
Step 5: Remove Covers and Provide Light
The moment seedlings emerge, remove the humidity dome and move trays under your light source. Seedlings need 14 to 16 hours of light per day. A south-facing window provides adequate light in spring, but a full-spectrum LED grow light positioned 5 to 10 cm (2 to 4 inches) above the seedlings produces stockier, healthier plants with less stretching.
Step 6: Water from the Bottom
Top watering with a heavy stream displaces seeds and damages delicate stems. Instead, pour water into the tray beneath the containers and let the growing medium wick moisture upward for 15 to 20 minutes. Then pour out any standing water. This method encourages roots to grow downward and reduces the risk of damping-off disease.
Common Seed Starting Problems and Solutions
Avoid common gardening mistakes when growing from seed.
| Problem | Cause | Solution |
|---|---|---|
| Leggy, stretched seedlings | Insufficient light or light too far away | Move grow light to 5–10 cm above seedlings, ensure 14–16 hours daily |
| Damping off (seedlings collapse at soil line) | Overwatering, poor air circulation, contaminated soil | Use sterile seed starting mix, bottom water, improve airflow with small fan |
| Seeds not germinating | Too cold, too old, planted too deep | Use heat mat, check seed packet date, follow depth guidelines |
| Mold on soil surface | Excessive moisture, no air circulation | Remove humidity dome, increase airflow, reduce watering frequency |
| Yellow leaves on seedlings | Nutrient deficiency (outgrew seed energy) | Begin feeding with quarter-strength liquid fertilizer at first true leaves |
| Seedlings falling over | Weak stems from no air movement | Run oscillating fan on low near seedlings to strengthen stems |
| Fungus gnats | Consistently wet soil surface | Allow top layer to dry between waterings, use yellow sticky traps or BTI |
When to Start Seeds: Timing Calendar
Timing depends on your last frost date. Count backward from that date to determine when each crop should be started indoors. Starting too early creates overgrown, root-bound seedlings that struggle after transplanting. Starting too late negates the whole advantage of indoor seed starting.
For most urban gardeners in temperate climates, the main indoor seed starting window is February through April. Warm-season crops like tomatoes and peppers start earliest (8 to 10 weeks before last frost), while fast-growing crops like cucumbers and squash only need 3 to 4 weeks indoors.
Lighting Options for Indoor Seedlings
Light is the single most important factor after germination. Insufficient light produces tall, weak, pale seedlings that rarely recover fully. Here is how the main options compare.
A south-facing windowsill works for the earliest weeks of spring, but as seedlings grow they need more consistent intensity. Even a bright window delivers only 4 to 6 hours of usable light on cloudy days, and the light comes from one direction, causing seedlings to lean.
Full-spectrum LED grow lights solve both problems. Modern LED panels draw 20 to 40 watts, cost pennies per day to run, and deliver uniform light from directly above. Position them on an adjustable stand or hang from a shelf so you can raise them as seedlings grow. A basic timer set to 14 to 16 hours eliminates the daily chore of switching lights on and off.
If you are already growing food indoors, you likely have a light setup that doubles for seed starting. The same lights used for growing lettuce or herbs work perfectly for seedlings.
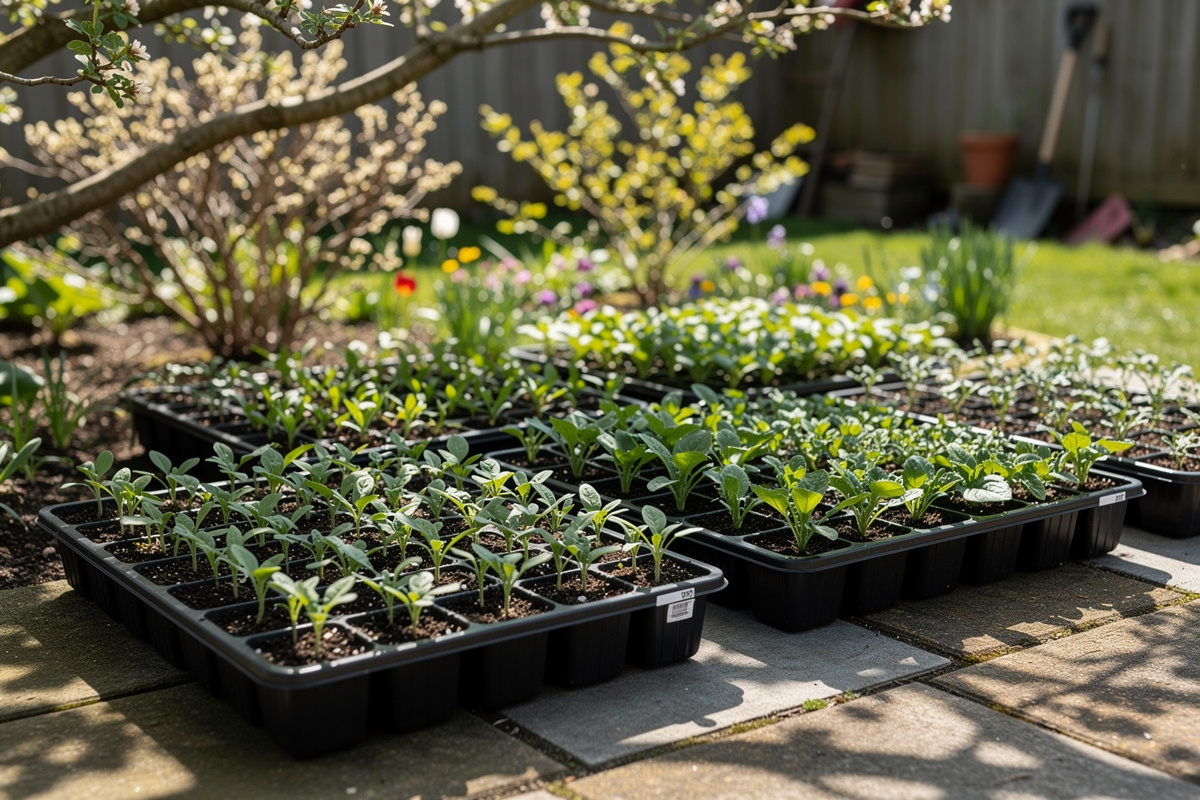
Hardening Off: The Critical Transition Step
Moving seedlings directly from a controlled indoor environment to full outdoor conditions shocks them. Wind, direct sun, temperature swings, and lower humidity can damage or kill seedlings that were thriving indoors. Hardening off is the gradual process of acclimatizing seedlings to outdoor conditions over 7 to 10 days.
Hardening Off Schedule
Days 1–2: Place seedlings outdoors in a shaded, sheltered spot for 2 hours. Bring them back inside.
Days 3–4: Increase outdoor time to 4 hours with some morning sun exposure.
Days 5–6: Move to 6 hours with more direct sun. Leave out during light rain if temperatures are mild.
Days 7–8: Full day outdoors in their eventual growing position. Bring inside only if frost is forecast.
Days 9–10: Leave outdoors overnight if nighttime temperatures stay above 10°C (50°F). Transplant into final containers or garden beds.
Skip this step and you risk losing weeks of work. Hardening off is tedious but non-negotiable for healthy transplants.
Best Seeds for Indoor Starting Beginners
Some seeds are nearly foolproof for first-time growers. Others require specific conditions that make them frustrating without experience. Start with the easy wins to build confidence before tackling the difficult ones.
Easy and fast: Lettuce, basil, marigolds, zinnias, cucumbers, squash. These germinate quickly, tolerate minor mistakes, and give visible results within days.
Moderate: Tomatoes, peppers, eggplant, broccoli, cabbage. These need more time (6 to 10 weeks) and consistent warmth but reward patience with strong transplants.
Advanced: Celery, artichokes, lavender, rosemary. Slow and inconsistent germination, very specific temperature requirements, and long growing periods make these poor choices for beginners.
If you are new to urban gardening, start one tray of lettuce and one tray of tomatoes. Both teach core seed starting skills while being forgiving enough that minor mistakes do not result in total failure.
Feeding Seedlings: When and How to Fertilize
Seeds contain all the nutrients a seedling needs for its first week or two. The initial leaves you see (cotyledons) are not true leaves — they are food storage organs that fuel early growth. Once the first set of true leaves appears (the second pair of leaves, which look different from the cotyledons), the seedling has exhausted its built-in food supply.
Begin feeding with a liquid fertilizer diluted to one-quarter strength. A balanced formula (such as 10-10-10 or fish emulsion) works for most seedlings. Apply once per week during bottom watering. Increase to half-strength after two more weeks if seedlings look healthy. Never use full-strength fertilizer on seedlings — it burns roots and causes salt buildup in the small volume of growing medium.
Scaling Up: From Windowsill to Seed Starting Station
Once you are comfortable with one or two trays, you will likely want to start more varieties. A dedicated seed starting station does not require much space. A wire shelving unit with two to three tiers, one LED light per shelf, and a basic timer turns any corner of an apartment into a seedling nursery.
The vertical approach works especially well in small living spaces. A standard 4-tier wire shelf unit occupies less than 0.5 square meters of floor space but supports 4 full-size seed trays — enough to start 200+ seedlings for a full season of container gardening and balcony growing.
2026 Update: Seed-Starting Heat Mats With Thermostats
In 2026, seed-starting heat mats with built-in digital thermostats dropped below $25, making precise germination temperature control accessible to every home grower. Pepper and tomato seeds germinate fastest at 80-85°F, lettuce at 65-70°F, and most herbs at 70-75°F. A thermostat-controlled mat maintains the exact temperature band without overheating — a common problem with older on/off mats that could spike to 95°F+ and cook seeds. For the $25 investment, expect germination rates to improve 20-30% and emergence to happen 2-5 days faster across most vegetable seeds.
How long do seeds take to germinate indoors?
Most vegetable seeds germinate in 3 to 14 days when soil temperature is between 21°C and 27°C (70°F – 80°F). Fast germinators like lettuce and radish sprout in 2 to 5 days. Slower crops like peppers and parsley can take 10 to 21 days. Using a heat mat speeds up germination by 30 to 50 percent.
Can I use regular potting soil for starting seeds?
Regular potting soil is not recommended for seed starting. It is too heavy, retains too much moisture, and often contains large particles that block tiny seedling roots. Use a dedicated seed starting mix made from fine-textured peat moss or coco coir blended with vermiculite and perlite.
Do seeds need light to germinate?
Most seeds germinate in darkness and only need light after they emerge from the soil. A few exceptions include lettuce, celery, and some flower seeds that require light exposure to trigger germination. Once any seedling emerges, it needs 14 to 16 hours of light per day immediately.
What temperature is best for starting seeds indoors?
The ideal soil temperature for most vegetable seeds is 21°C to 27°C (70°F – 80°F). Cool-season crops like lettuce and broccoli germinate well at 15°C to 21°C (60°F – 70°F). Heat-loving crops like peppers and eggplant prefer 27°C to 32°C (80°F – 90°F).
How often should I water seedlings started indoors?
Water seedlings when the top layer of the growing medium feels dry to the touch — typically every 1 to 3 days. Always bottom water by pouring water into the tray and letting the mix absorb it from below for 15 to 20 minutes. This prevents damping-off disease and encourages deeper root growth.
Related Articles
- Grow Lights for Tomatoes: Indoor Growing Guide — Choosing the right lighting for your seedlings and beyond
- How to Grow Tomatoes Indoors — Take your tomato seedlings from seed to harvest
- Growing Peppers Indoors: Complete Container Guide — Pepper seedlings need specific care for best results
- How to Grow Lettuce Inside — The easiest seed to start for complete beginners
- How to Start Urban Gardening — The complete starting point for new growers